In one of my previous posts, I put together a new ECU with a Nistune Daughterboard and Nistune Flex Board in preperation to support E85. The next step here was to get the fuel system to handle it physically.
E85 requires approximately 20-25% more fuel than gasoline. This is because it has slightly lower energy content than gasoline, so more of it is required. The nice side-effect is that the additional fuel has a significant cooling affect on combustion temps, and the fuel behaves like ~110 octane race fuel. But because it requires a greater volume of fuel, I wanted to make sure the fuel system could handle it.
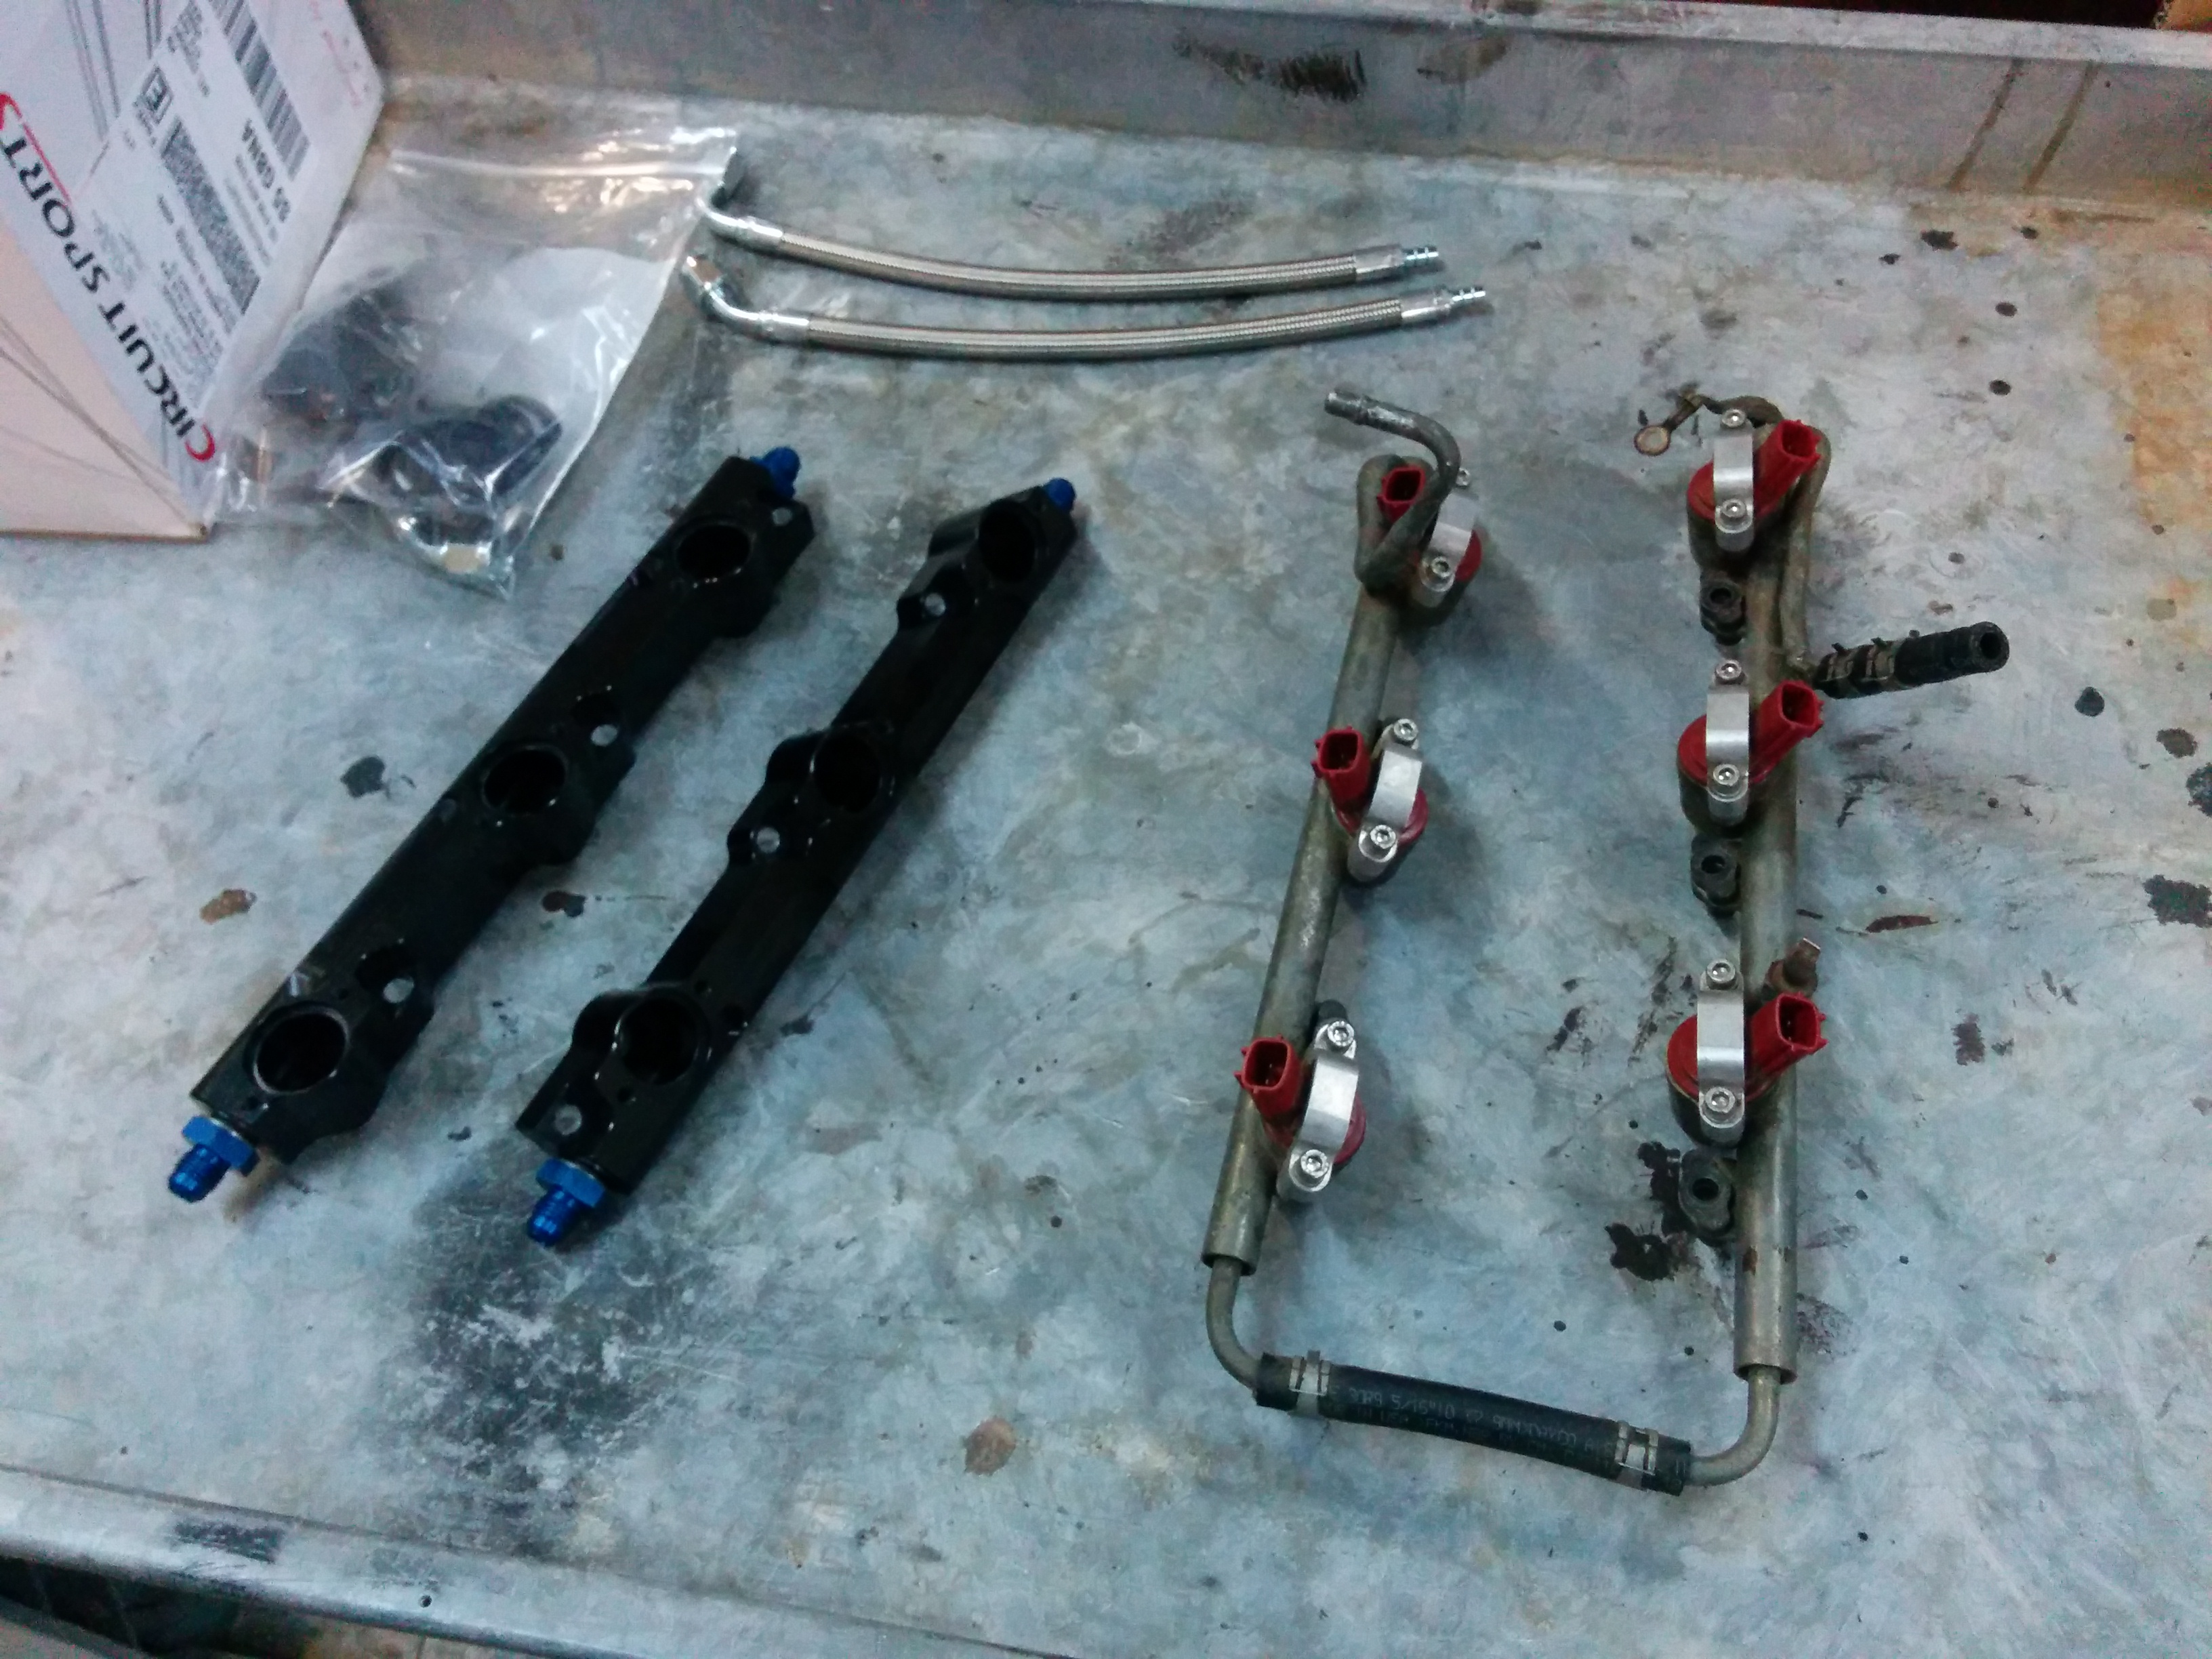
I decided on a set of second generation CZP Fuel Rails. Partially for their cost and availability, but also because they implement some changes not found on other rails that I liked. Particularly, the addition of an O-ring at the fitting ports to create a seal. Practically every aftermarket fuel rail out there (for other cars, at least) utilizes this O-ring to create a reliable seal, so it was meaningful for me to have it there. Plus, there were some unique design touches that I just plain liked (the notched top-portions, and black anodization, for instance).
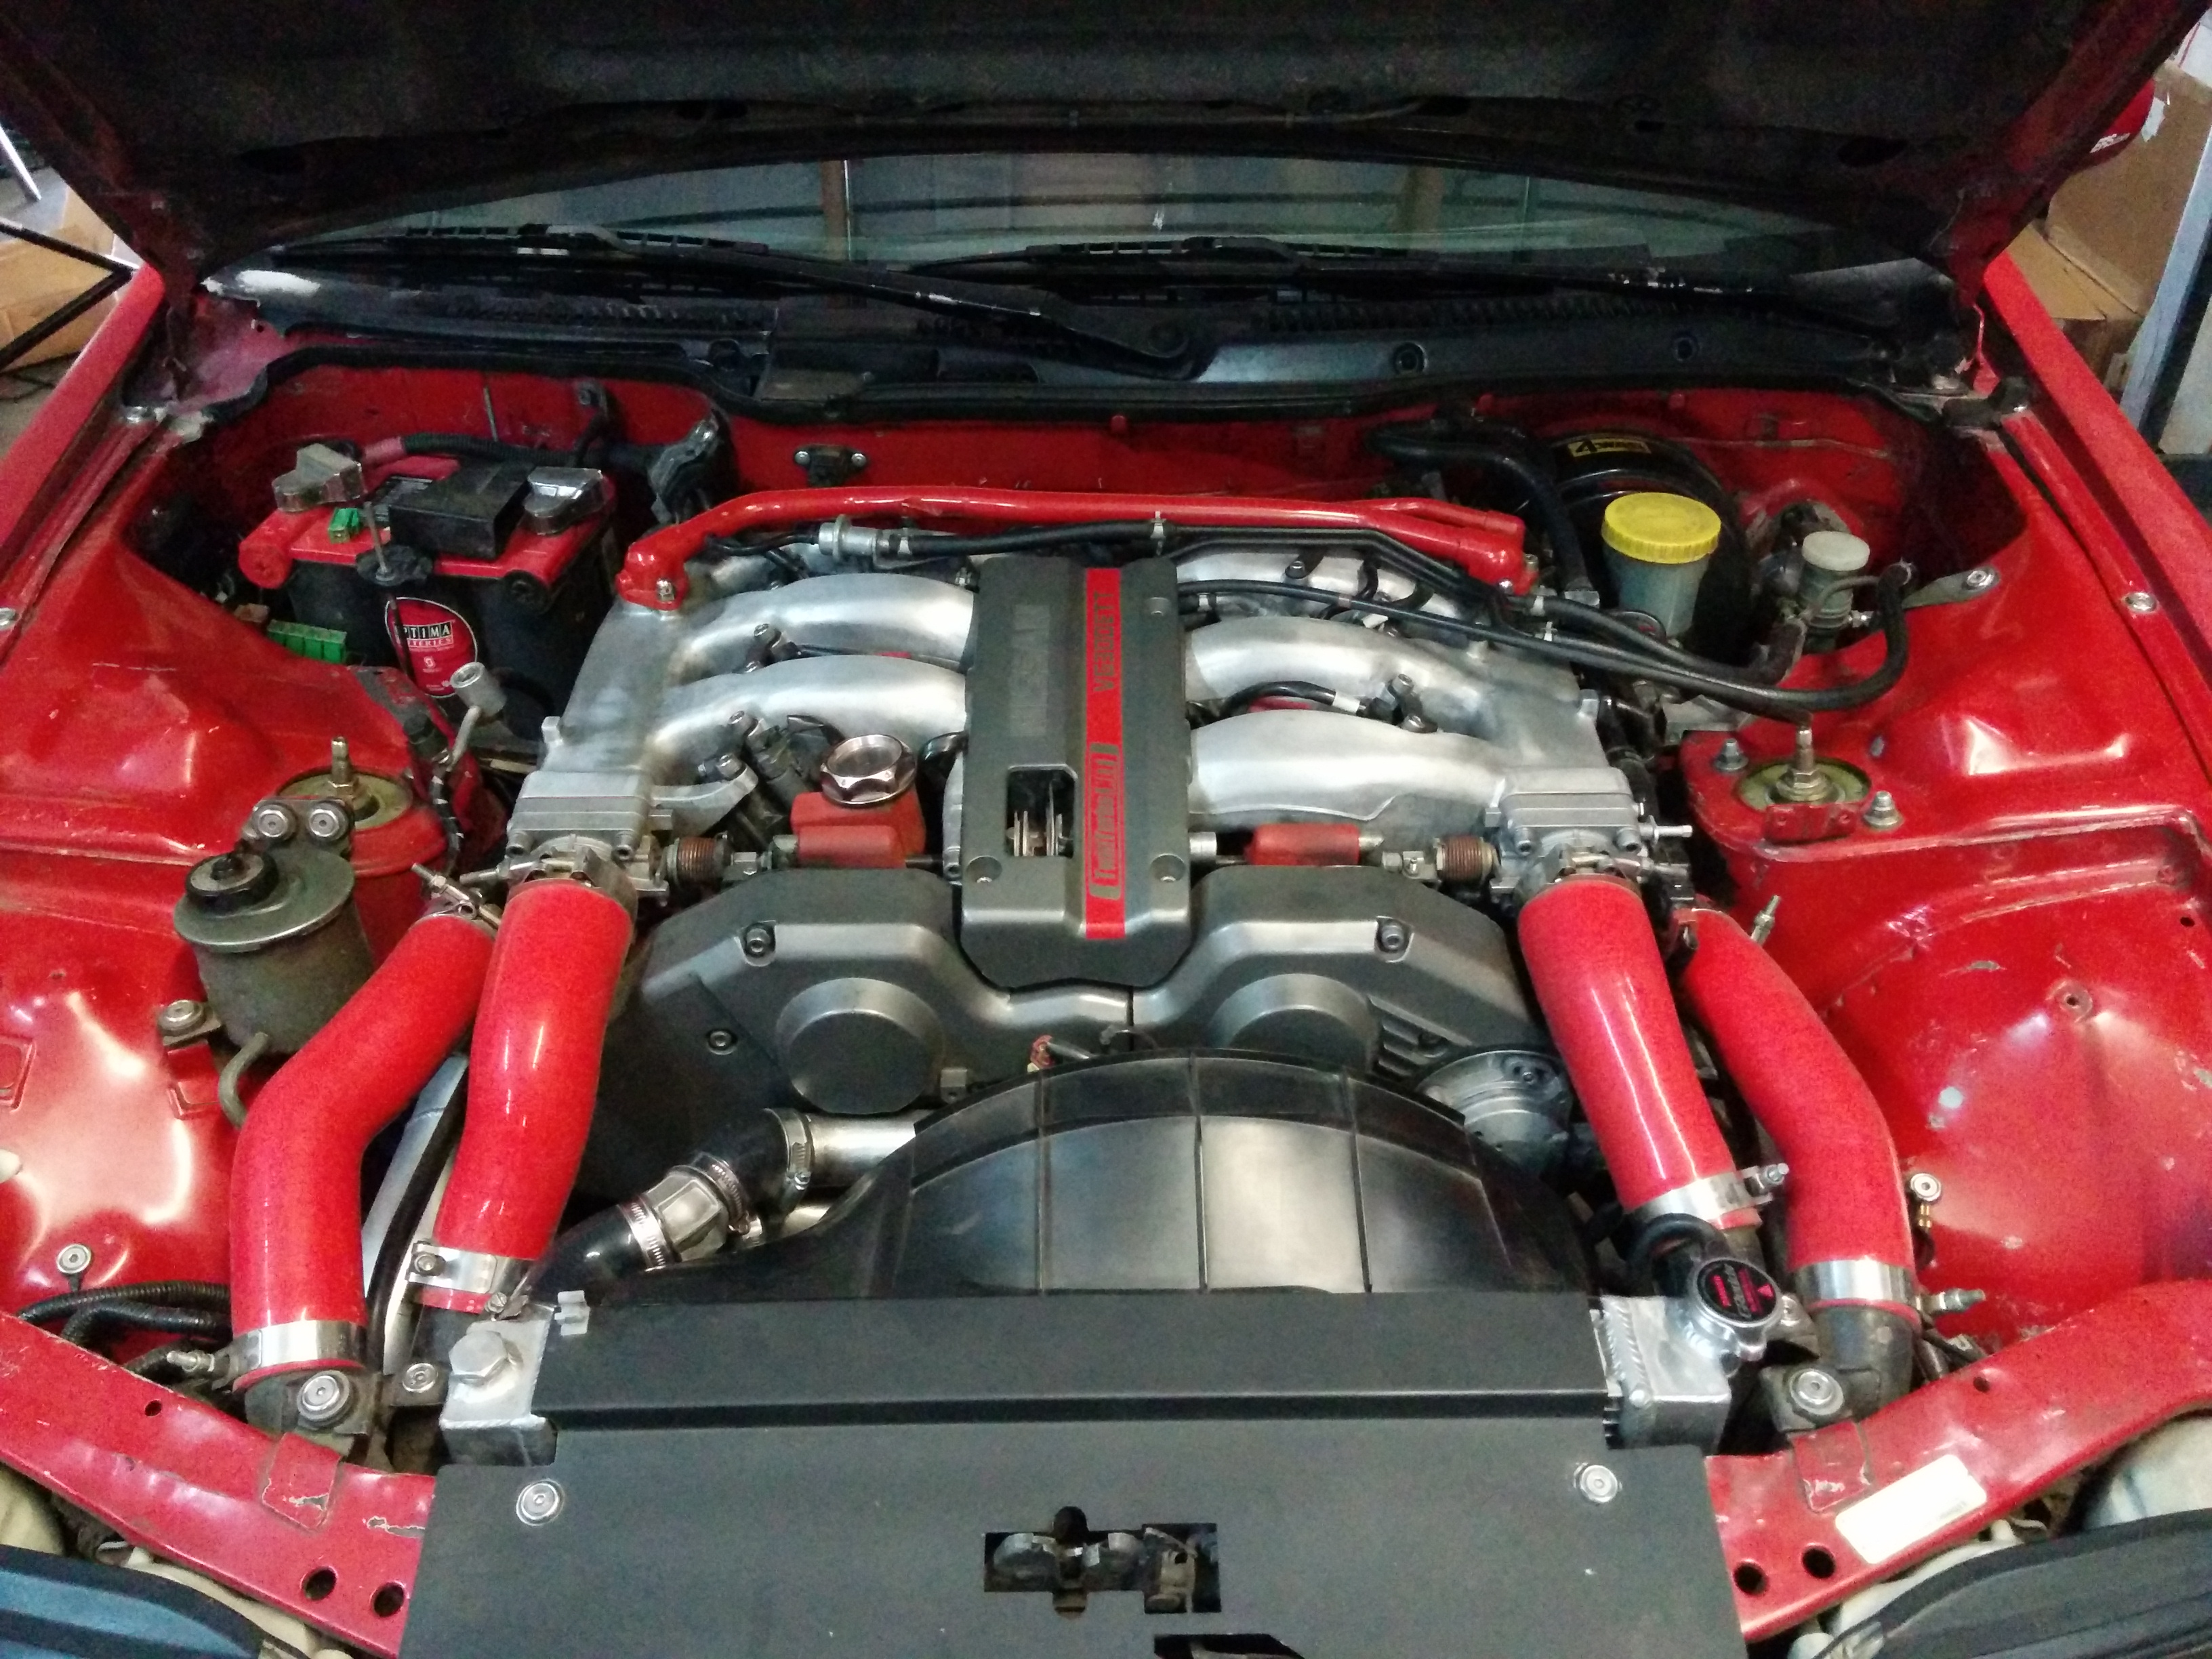
Here is the engine bay before starting any work. This bay has already been mildly tucked (you’ll notice the fuel filter isn’t visible), but the fuel system is largely untouched here.
After pulling the plenum, the next step is just to switch the injectors over to the new rails. I was previously running Nismo 740cc injectors in a stock fuel rail with an adapter kit. As always, it’s of the utmost importance to use new O-rings and make sure they are well lubricated while installing to prevent pinching. If an o-ring is pinched, it will either leak out the top or leak out the bottom, the latter of which can be potentially catastrophic for your engine as it is likely to hydrolock.
I snugged down the AN fittings at the ends, lubricating the O-rings a bit before tightening them down. The AN fittings come to a well-defined stopping point, so you don’t have to wrench down on them too much.
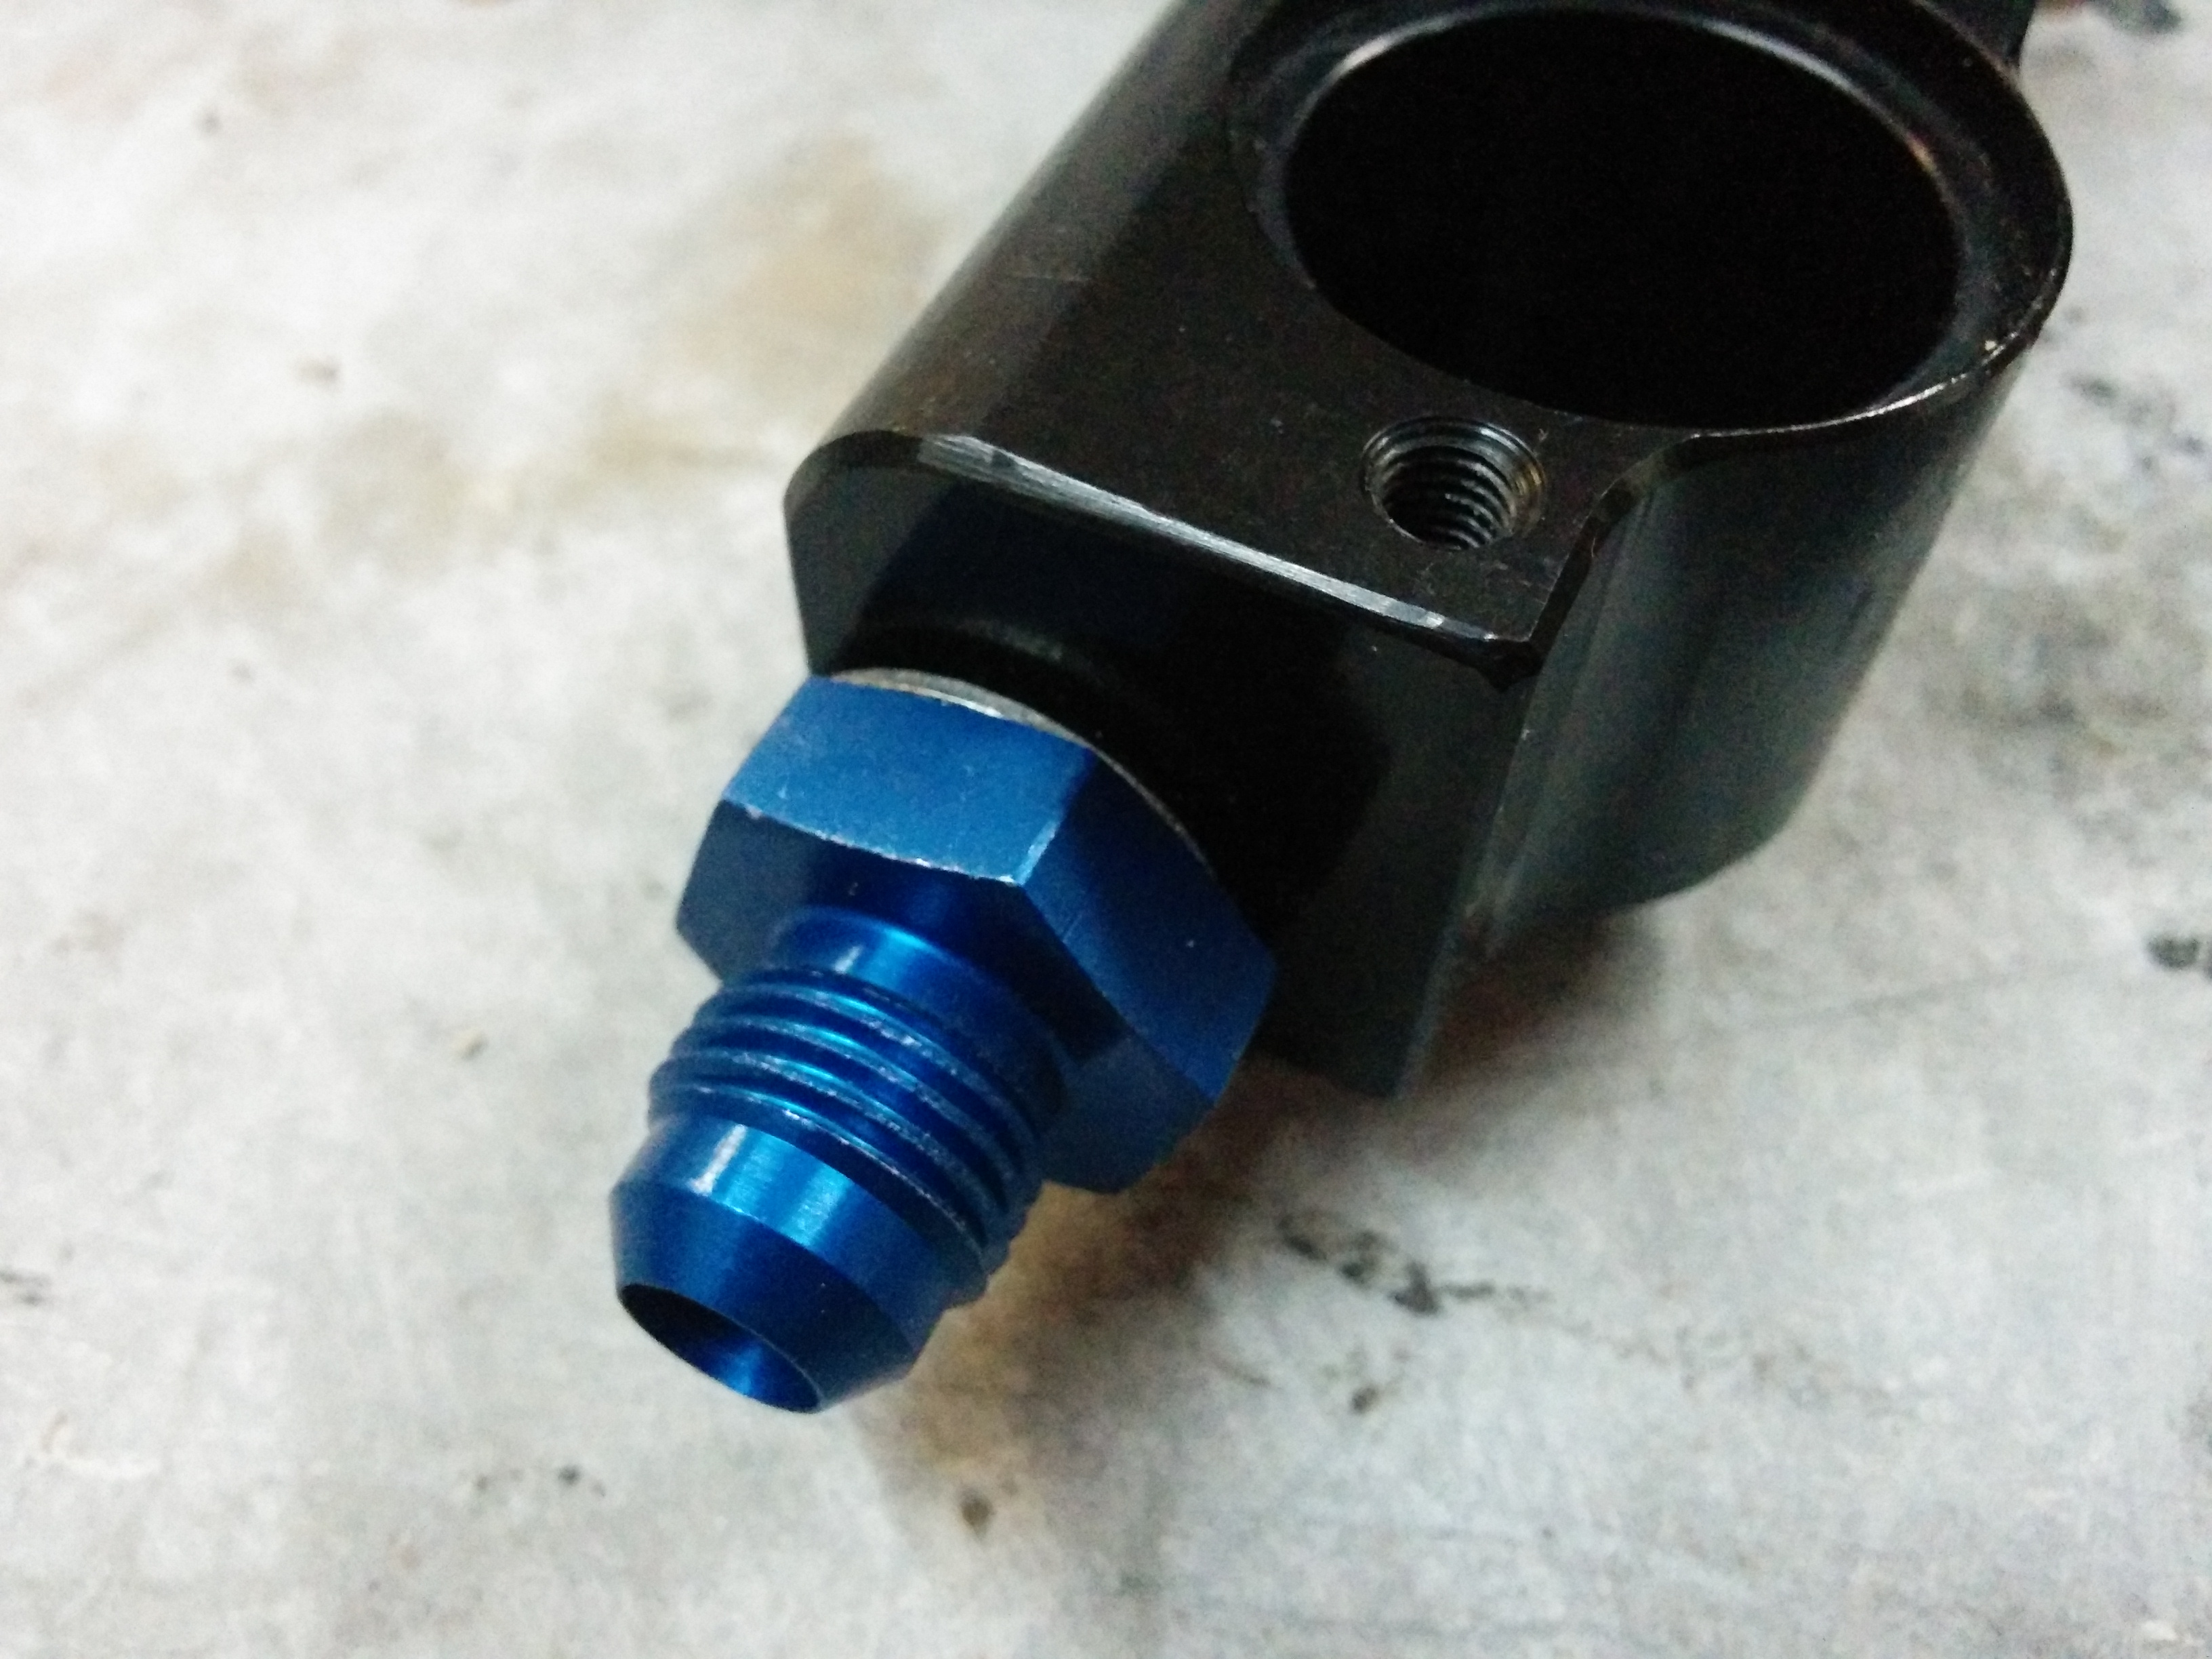
Once fully tightened, the O-ring is completely obscured by the AN fitting (or washer, if used).
Nismo 740CC injectors installed in the rails, along with the fuel temp sensor.
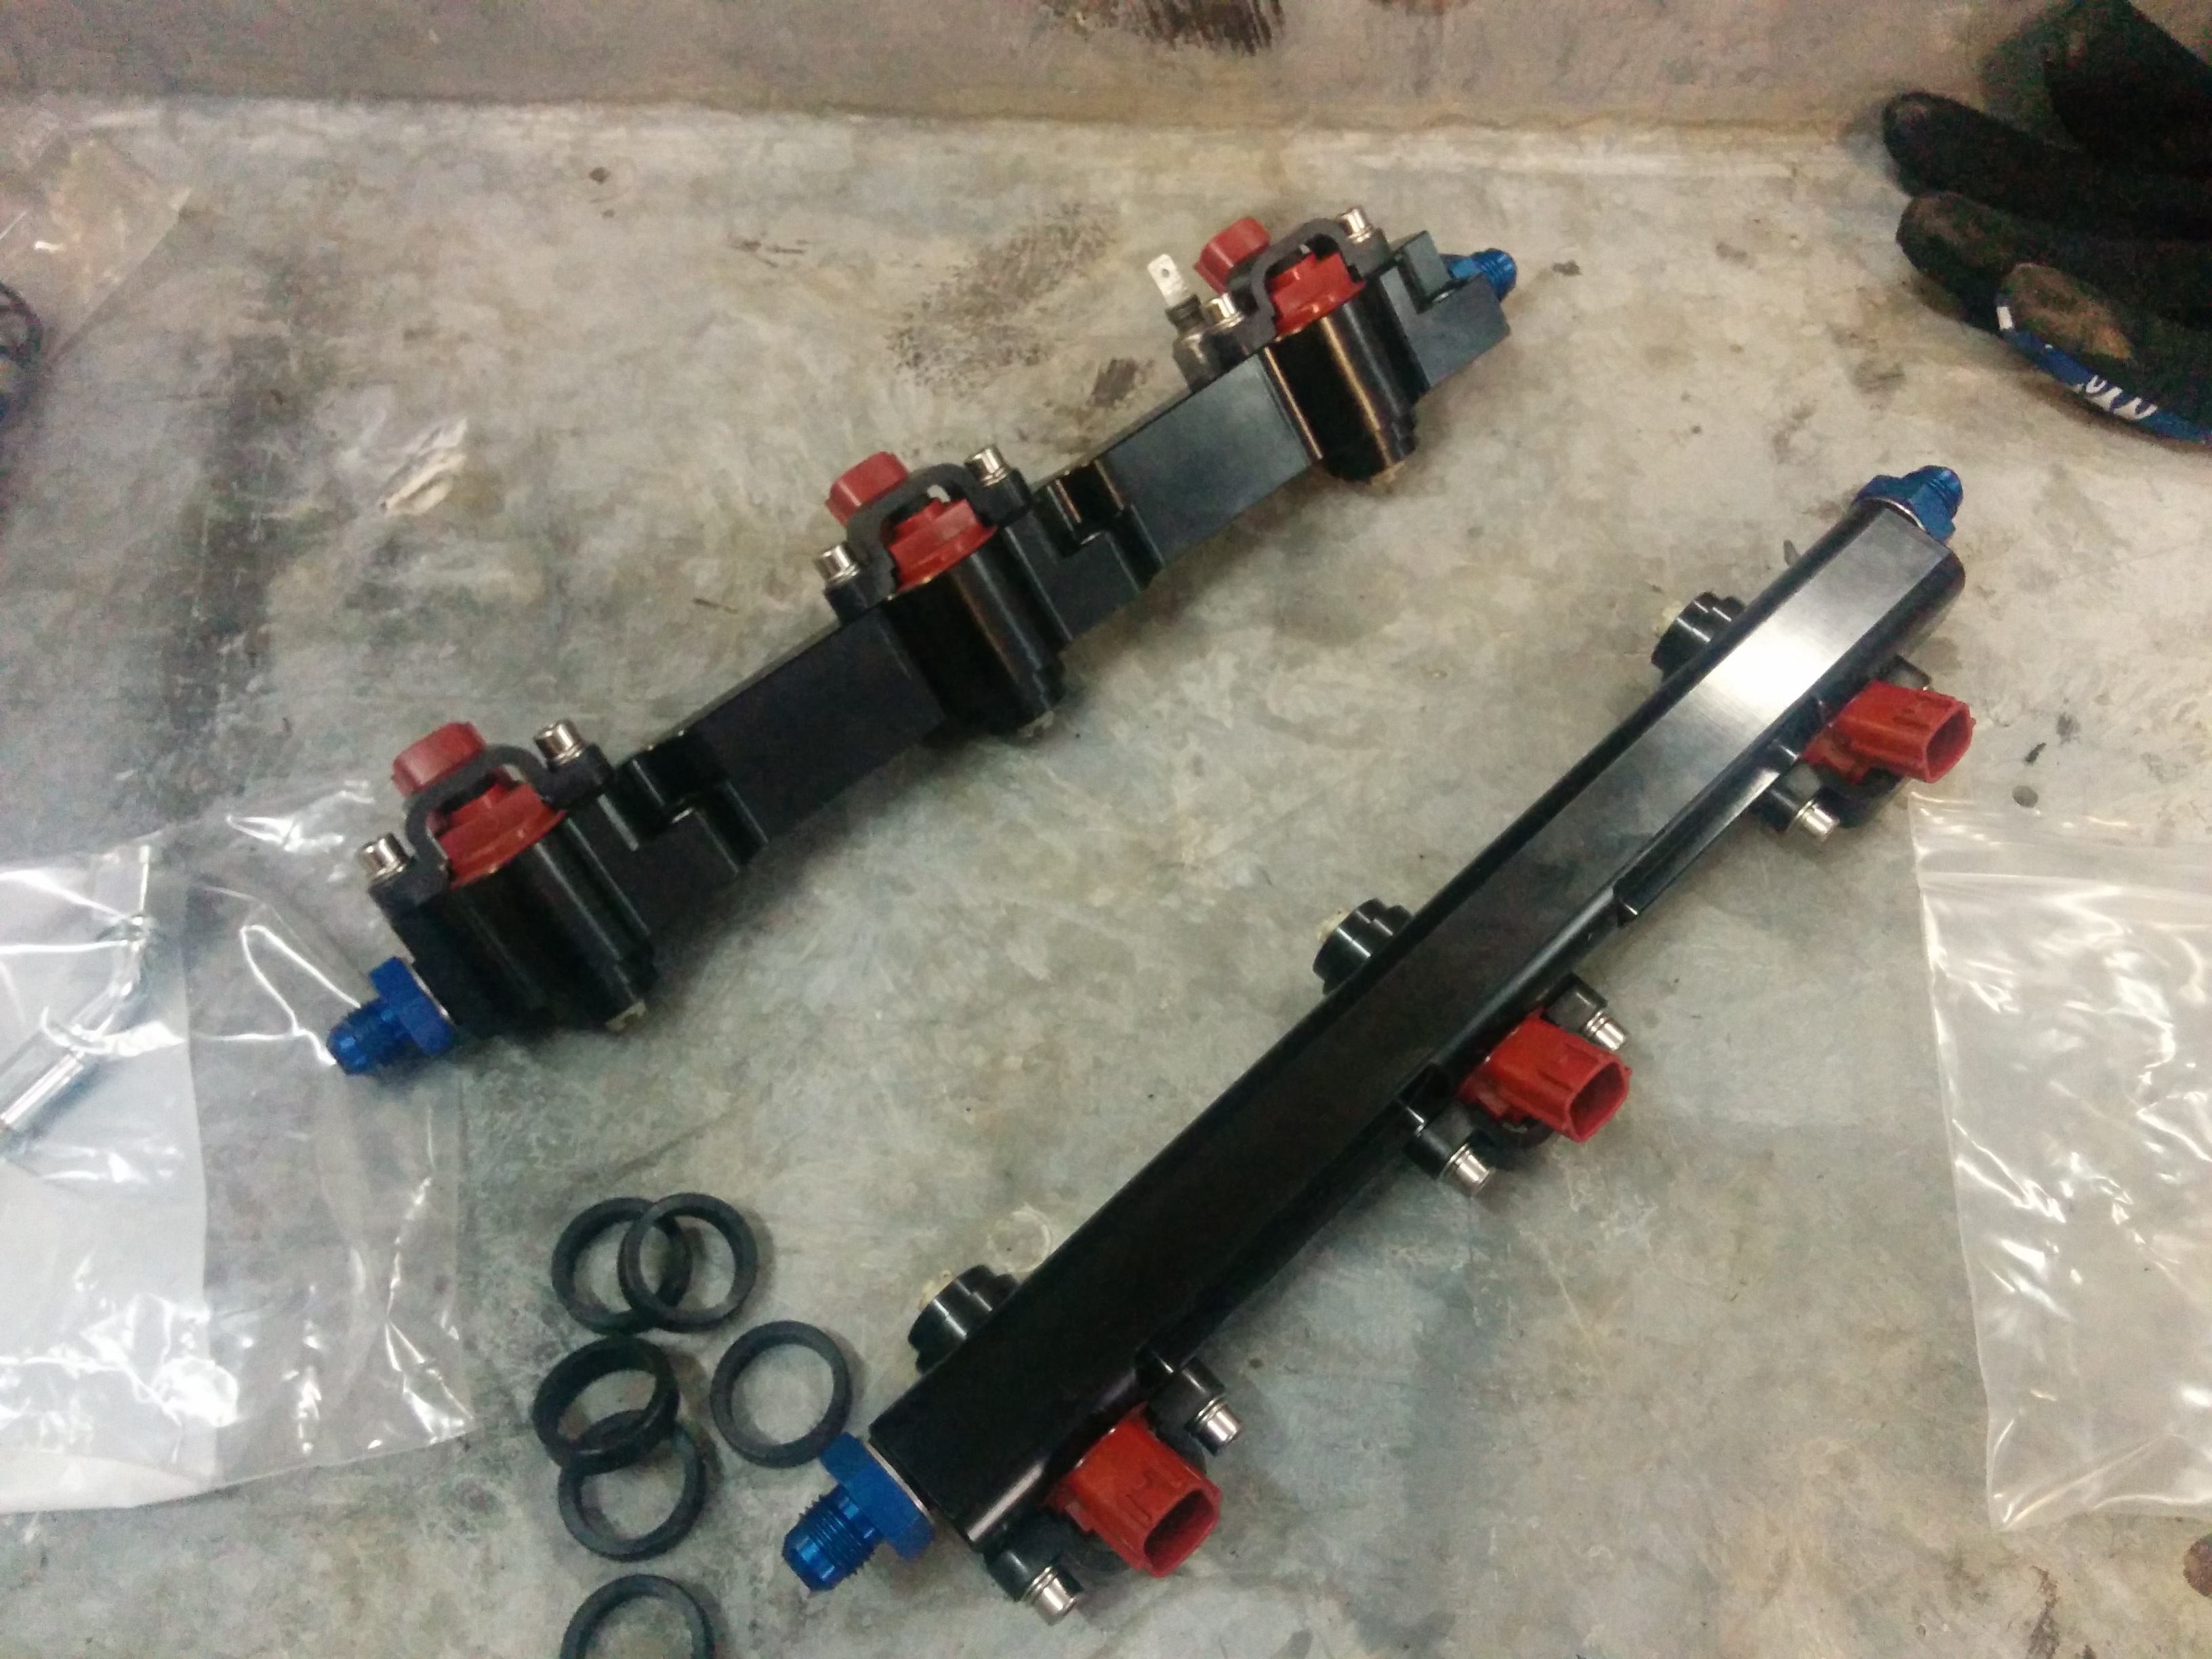
I mocked everything up on the engine to see how I wanted the rear lines to fit. I wasn’t routing them in a standard way, in which the stainless lines would run up to the fuel pressure regulator and fuel damper. I wanted to relocate those components for a cleaner look. After mocking up, I mounted everything to a spare lower plenum I had, so I could tighten down the AN fittings with plenty of working room, then transferred everything over to the engine.
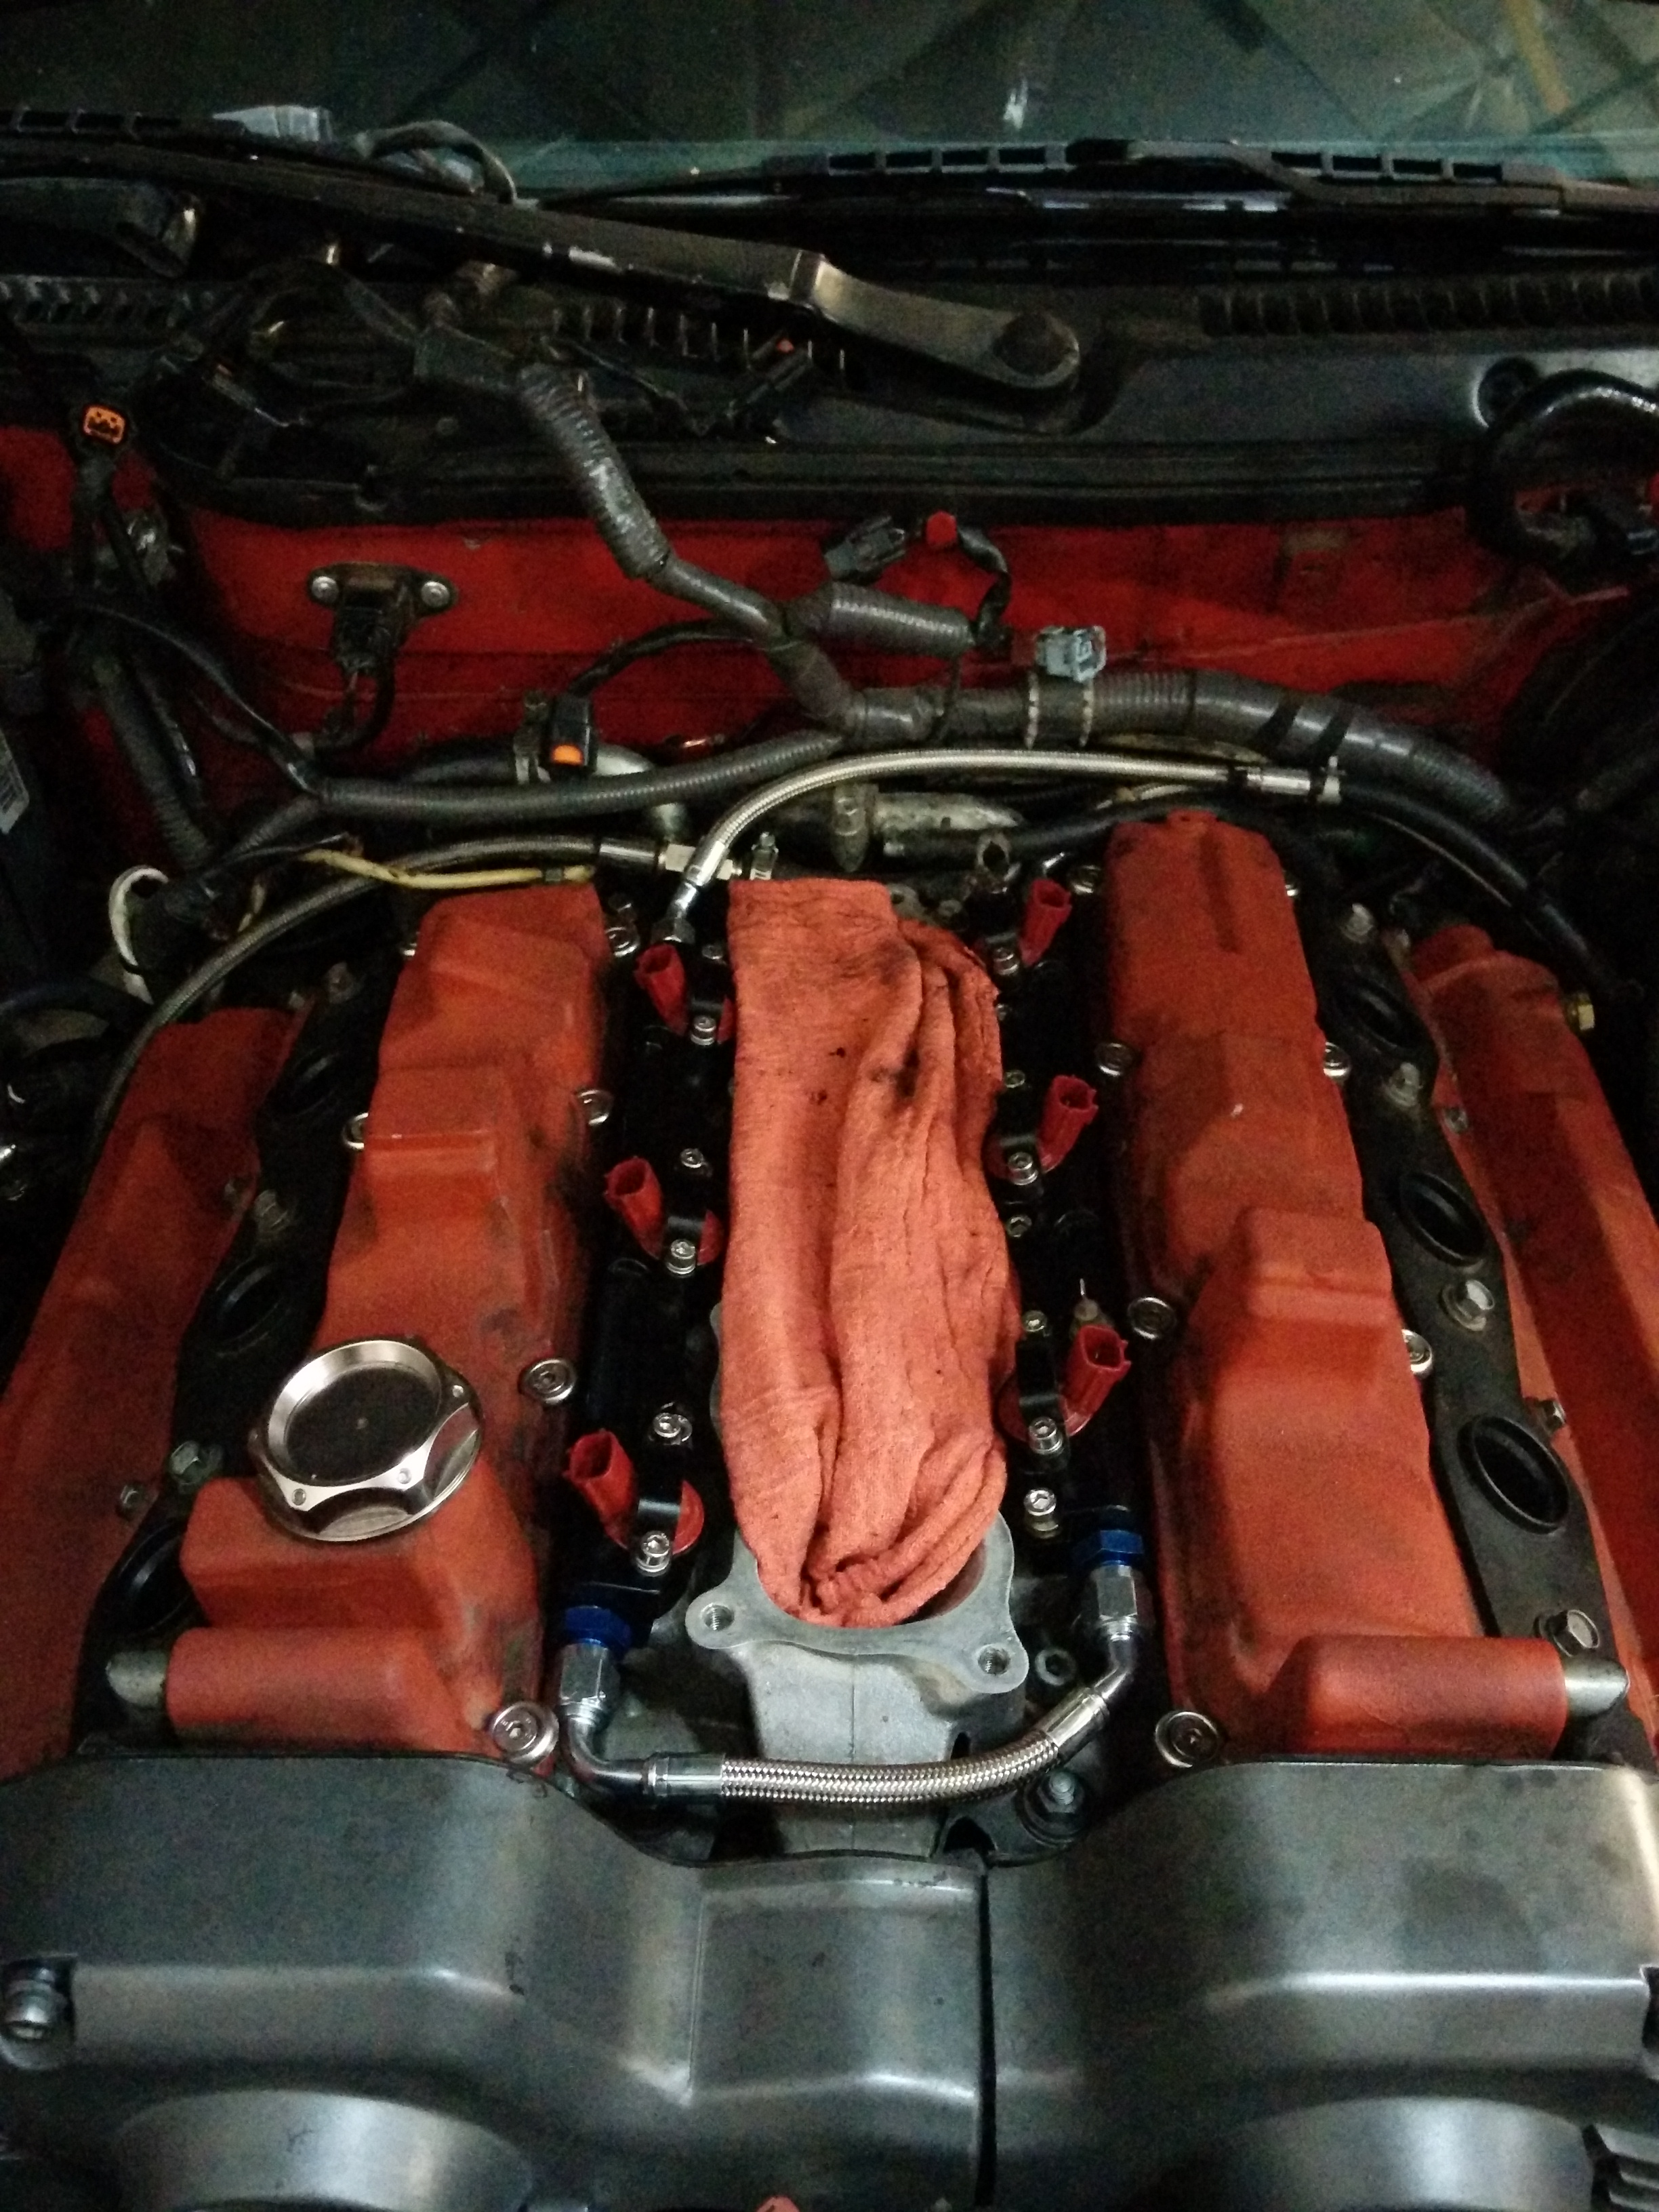
Never wrinkle coat your valve covers. They are impossible to keep clean.
I was very pleased with how everything fit together. I then started working on the labyrinth of fuel and vacuum lines which would live under my clutch master cylinder.
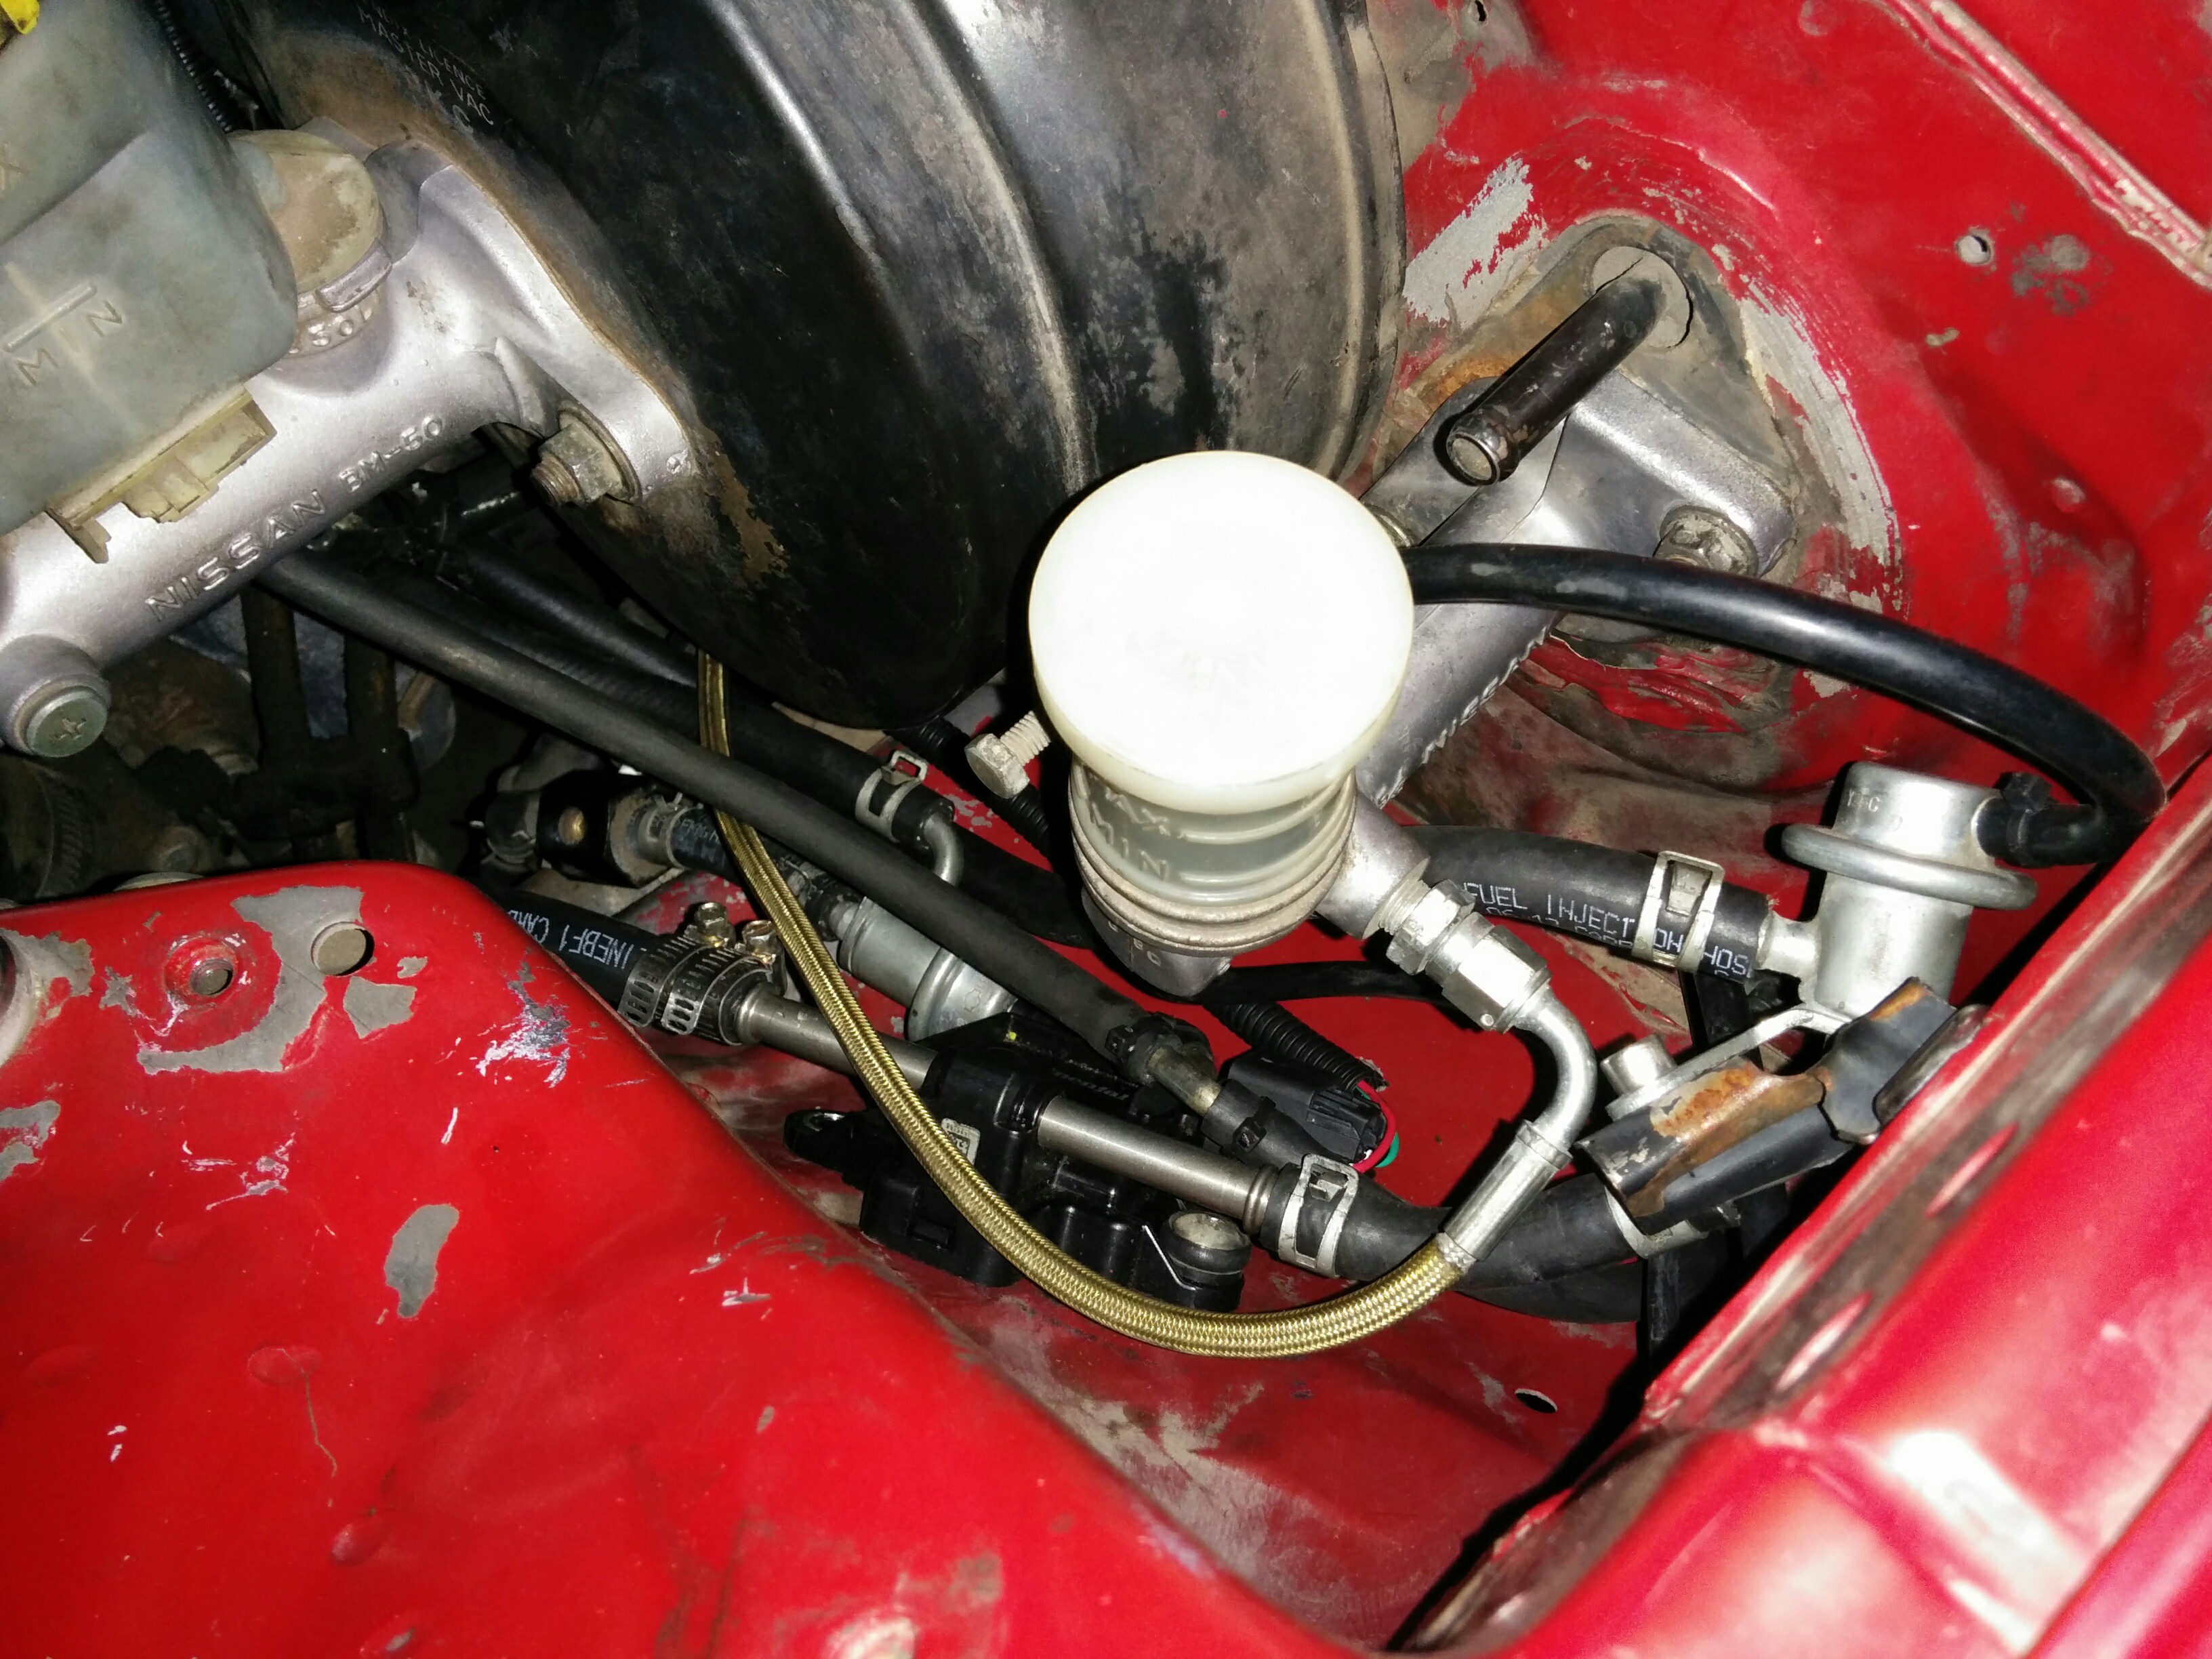
This is not exactly the prettiest corner of the engine bay, but there is a lot of function crammed in here. Here is how the fuel system is plumbed in:
Fuel Tank → Fuel Filter (Not shown) → GReddy Fuel Pressure Sensor → Fuel Damper → RH Fuel Rail → LH Fuel Rail → Fuel Pressure Regulator → Ethanol Content Sensor → Fuel Tank
I also have a vacuum “gallery” down here, which supplies vacuum signal to the FPR, FD, and OEM boost pressure sensor (relocated to the fender well). Also, the ethanol content sensor uses a slightly larger size than stock lines, so it is a bit of a stretch to get some of the larger fuel hose (like Gates Barricade) and a clamp over the line. The line returning to the fuel tank is actually a Barricade hose, so I wasn’t looking to replace it, but because it was so large I went ahead and used a pair of worm gear clamps on the hose. Not my first choice, but it works, and this side of the fuel system is under low pressure– I would not recommend using worm gear clamps on the high pressure side.
For the rest of the hose, I used Dayco 5/16″ 150 PSI Fuel Injection Hose. It is cheap, easy to work with, reliable, and ethanol compatible.
All put back together, this relocation allowed me to remove the upper fuel gallery, which not only cleans up the engine bay a bit, but also simplifies the upper plenum area even further, making it easier to pull the plenum in the future.
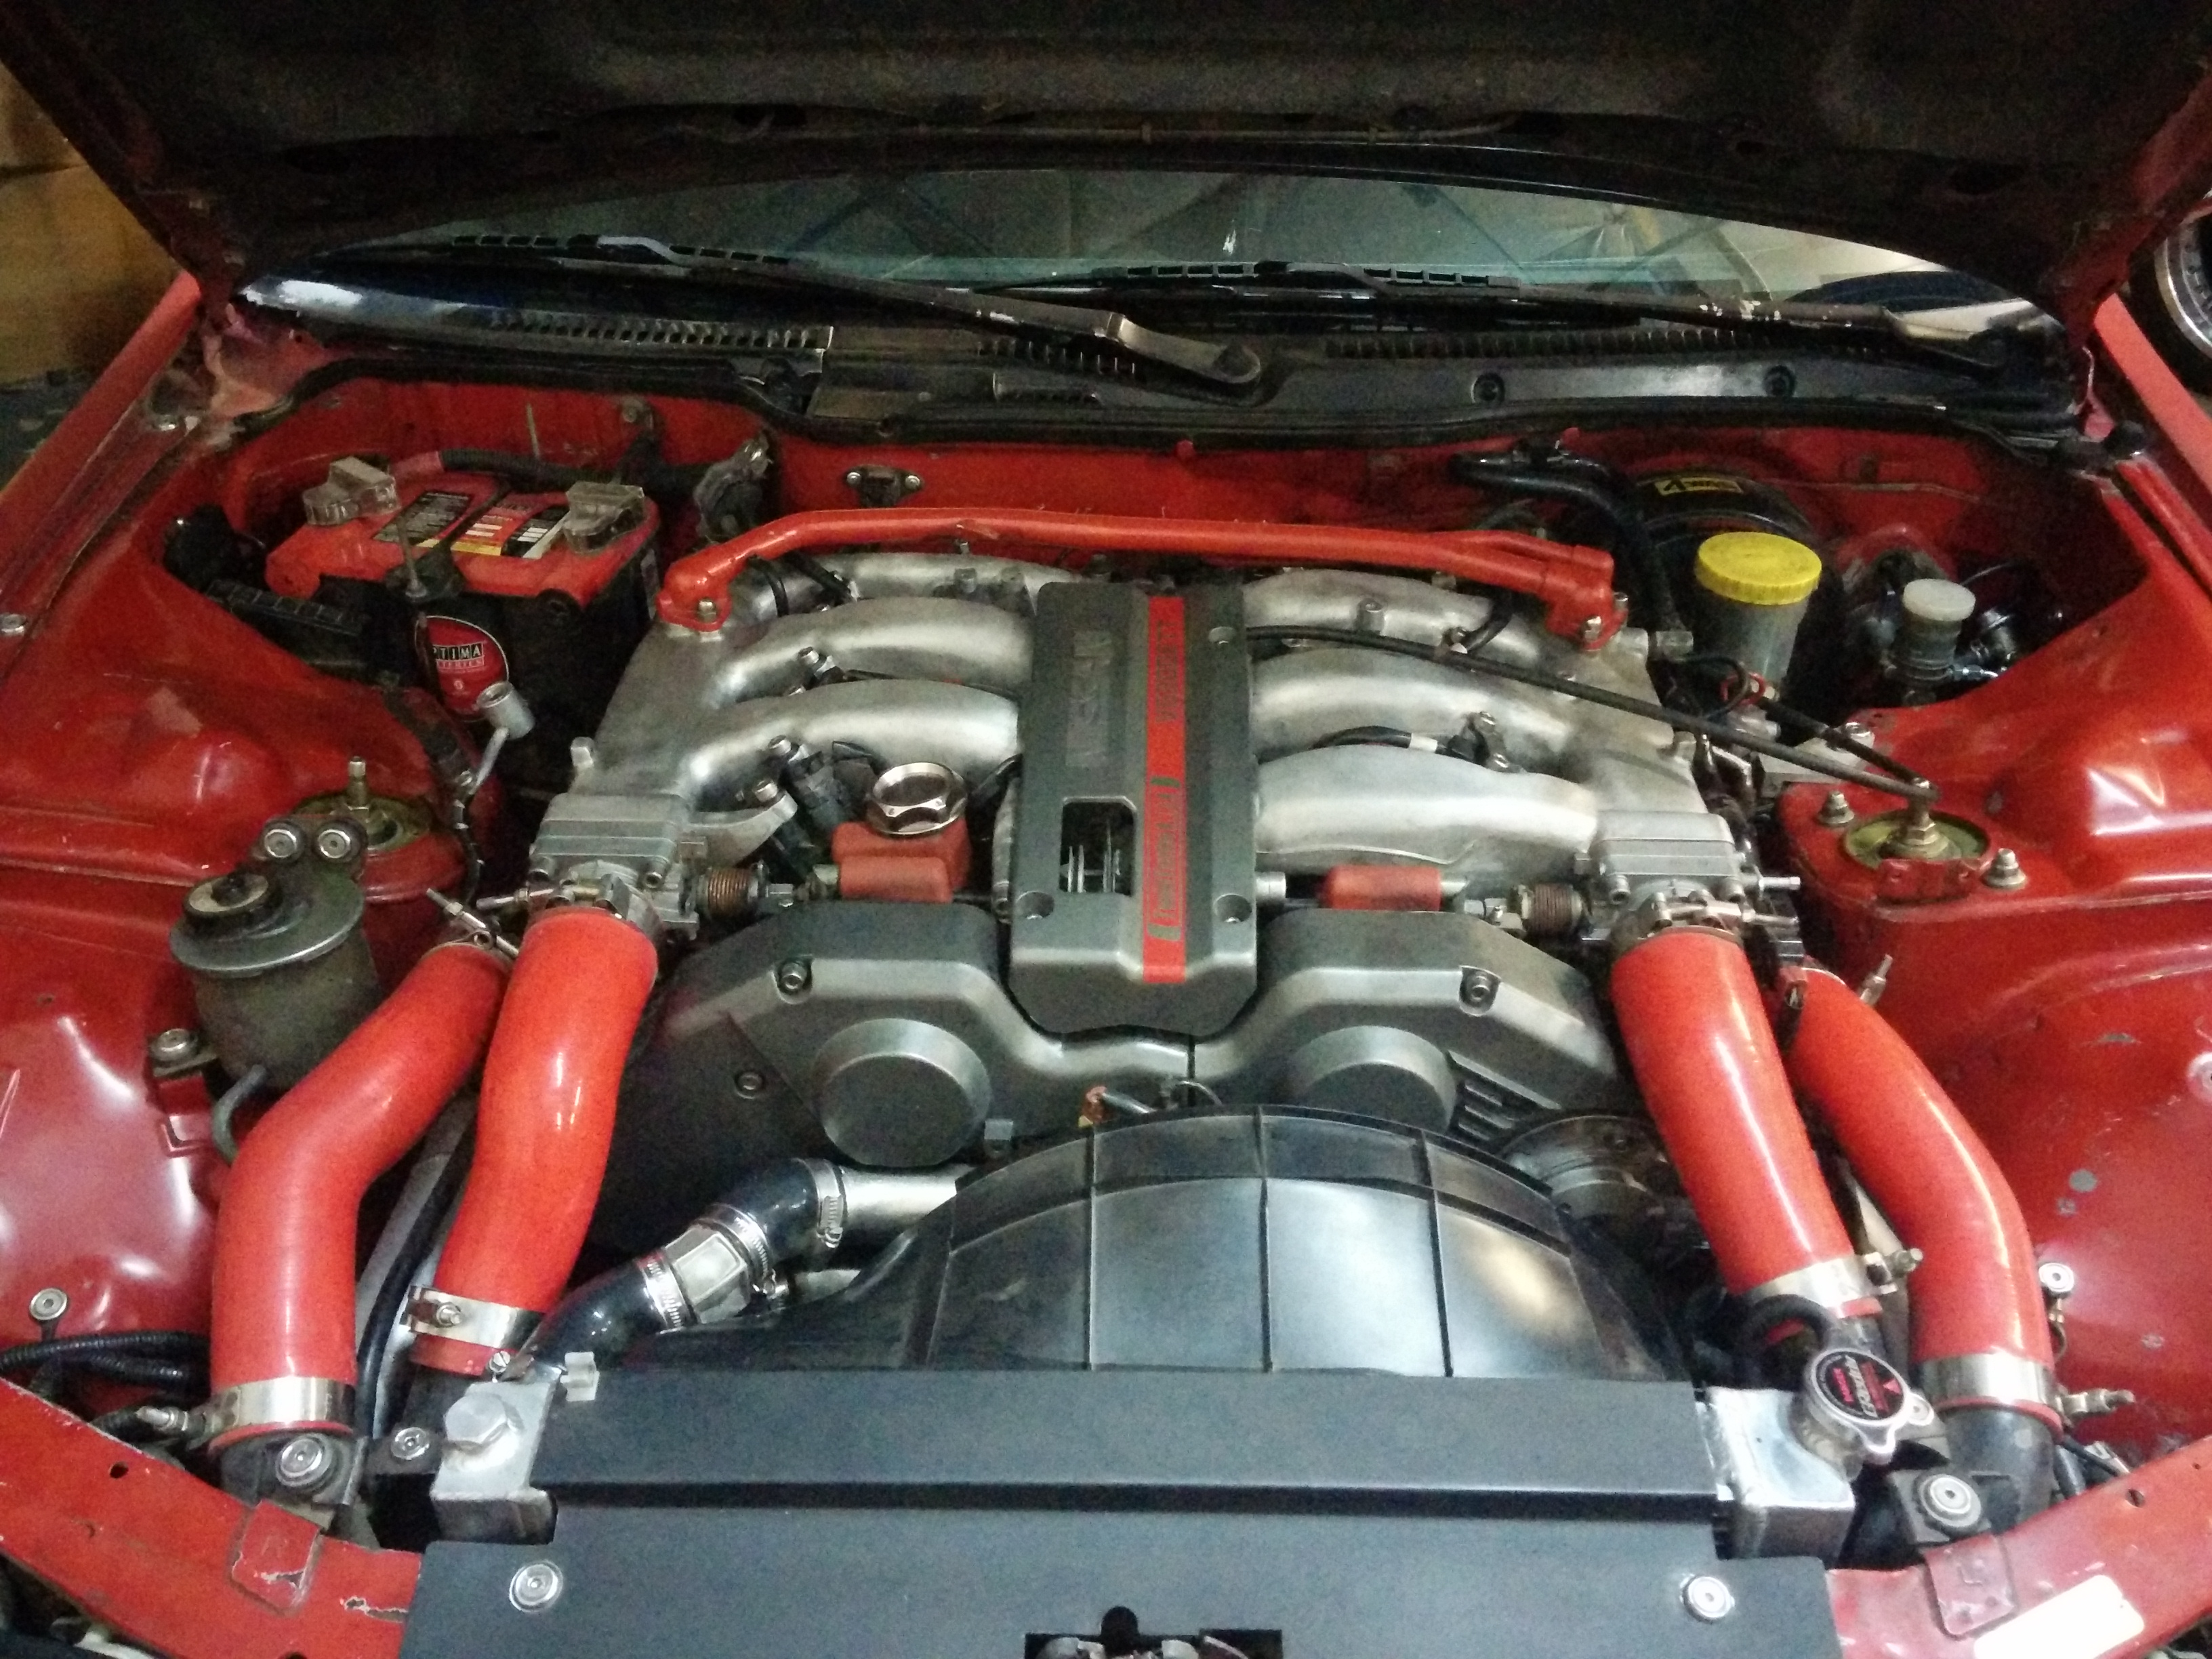
Engine Bay After. I should hide that throttle cable!
Finally, I wanted to switch fuel pumps. The stock twin turbo fuel pump is an extremely strong unit, capable of supporting upwards of 700whp on race fuel. I wanted a little higher window of safety, and I wanted to make sure my fuel pump was ethanol compatible, so I opted for a Walbro 485 with install kit. It is extremely inexpensive, quiet, reliable, and flows tons of fuel.
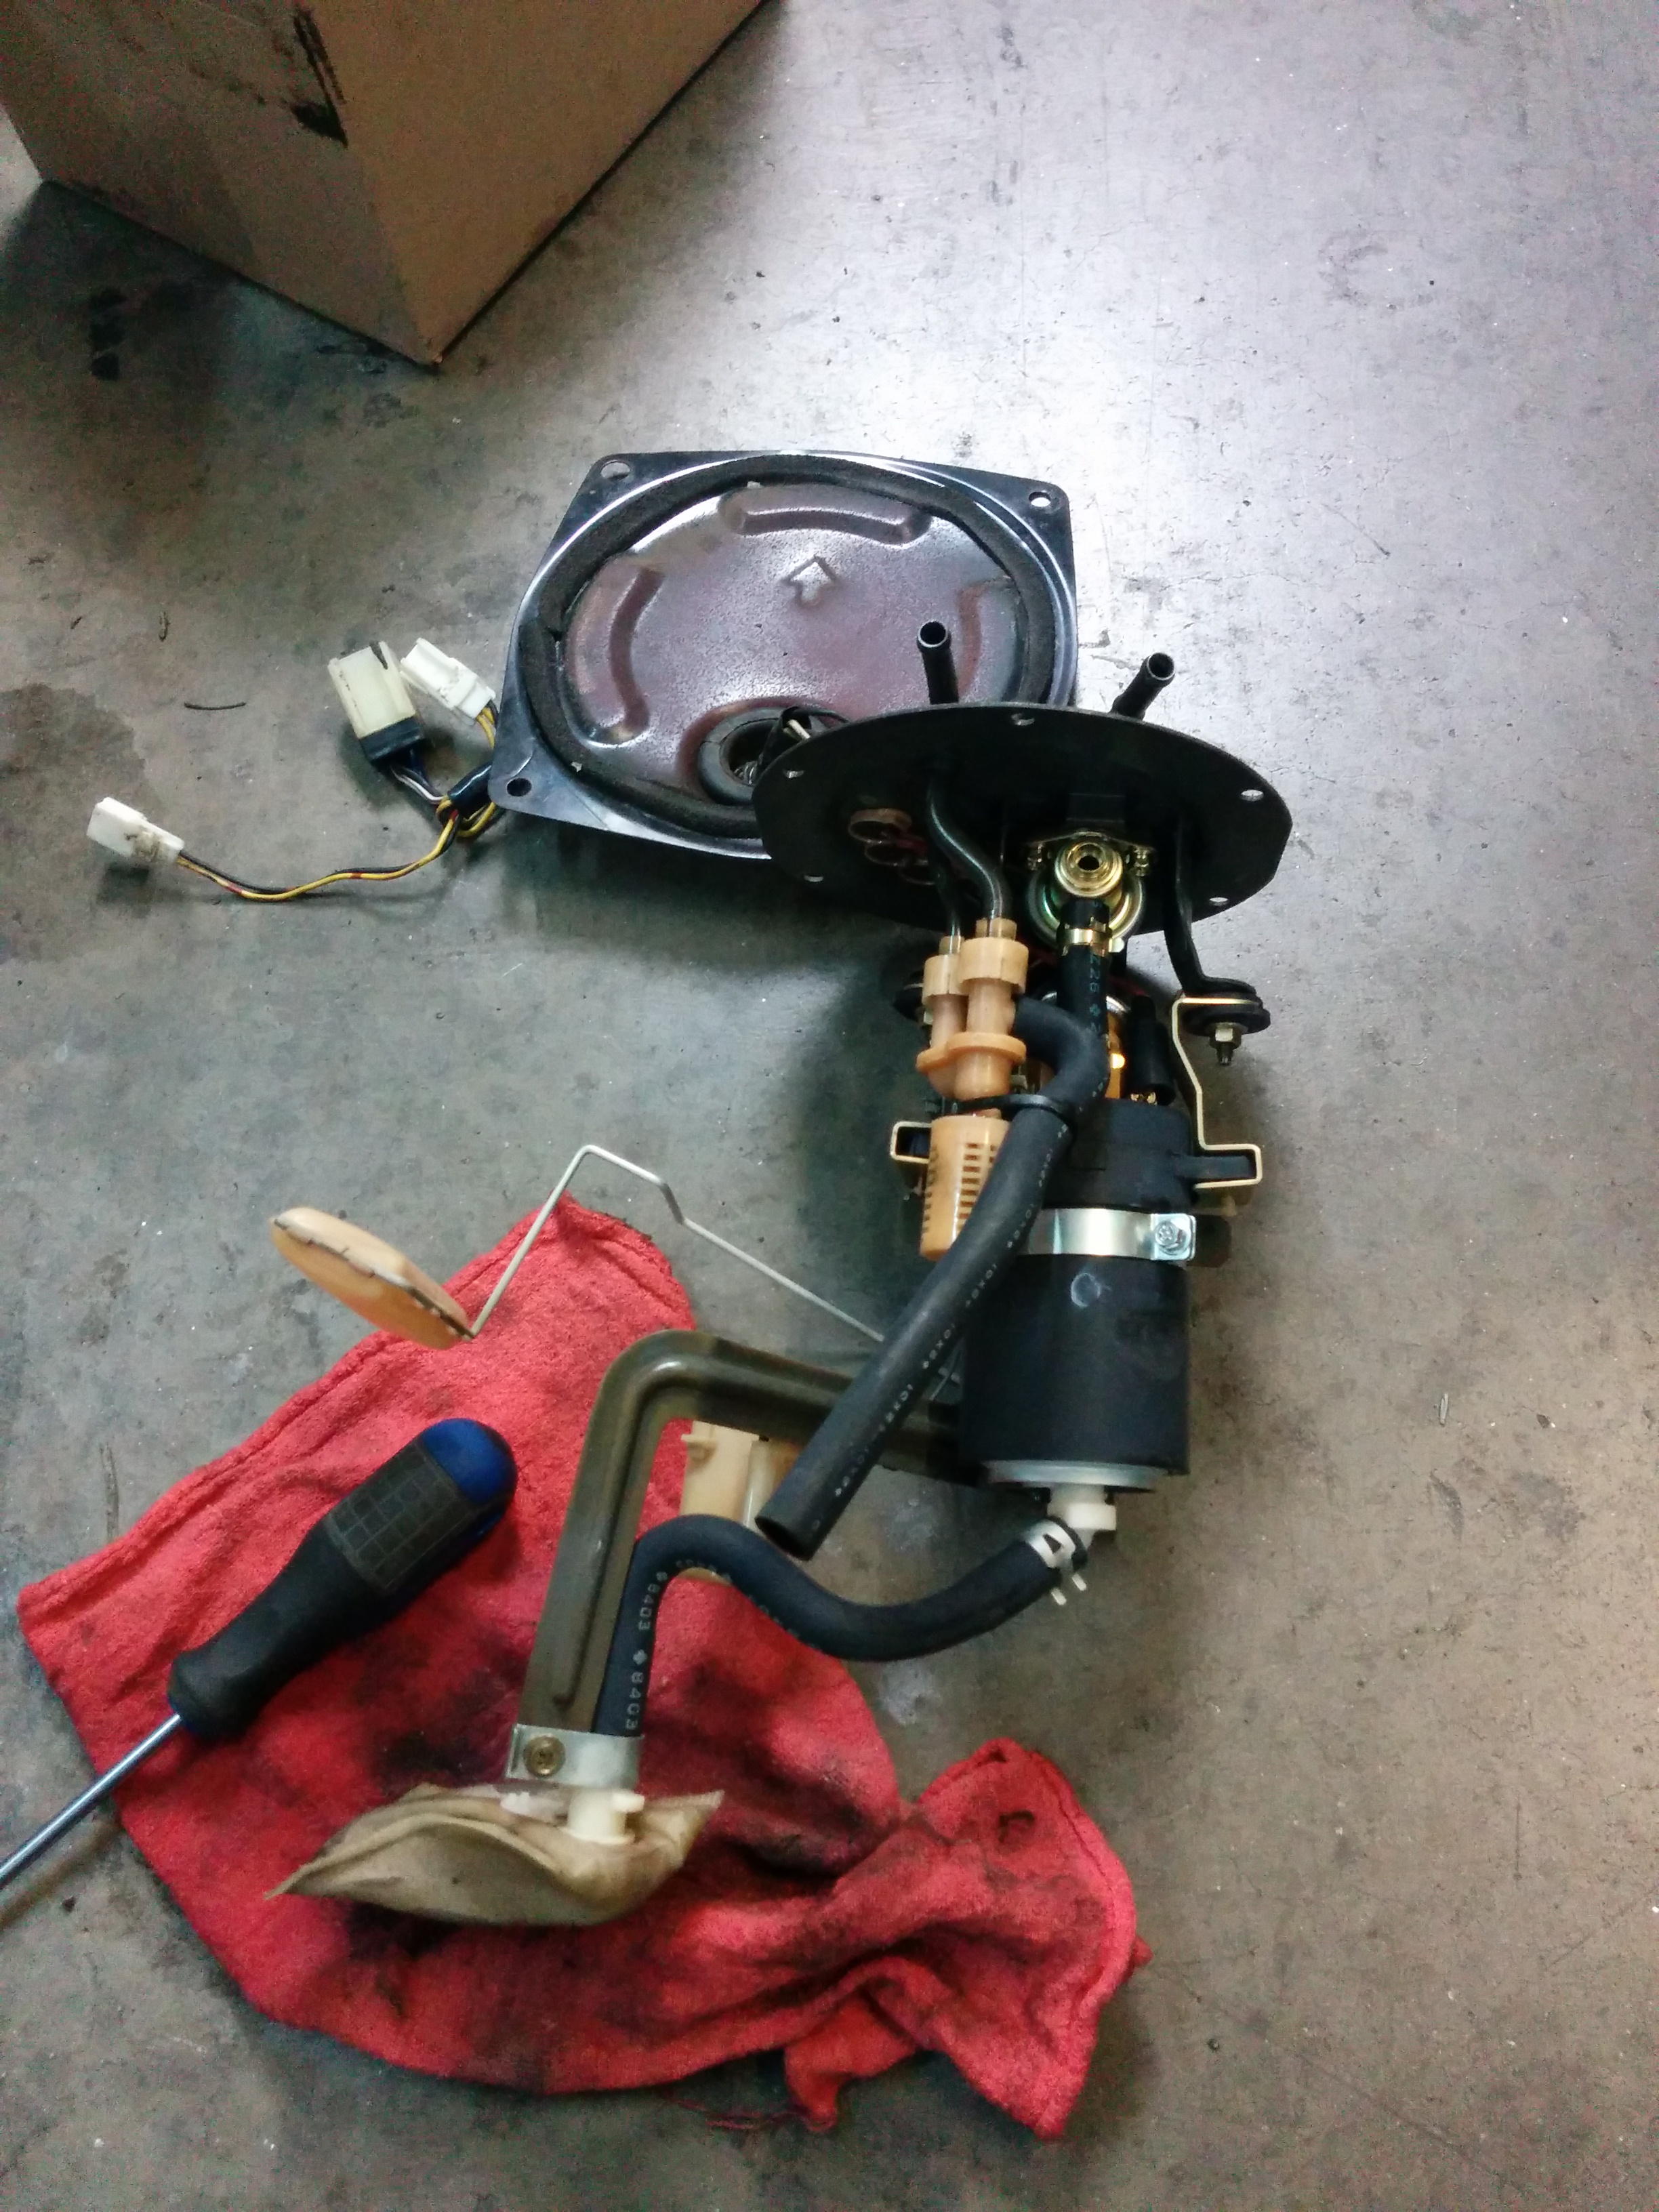
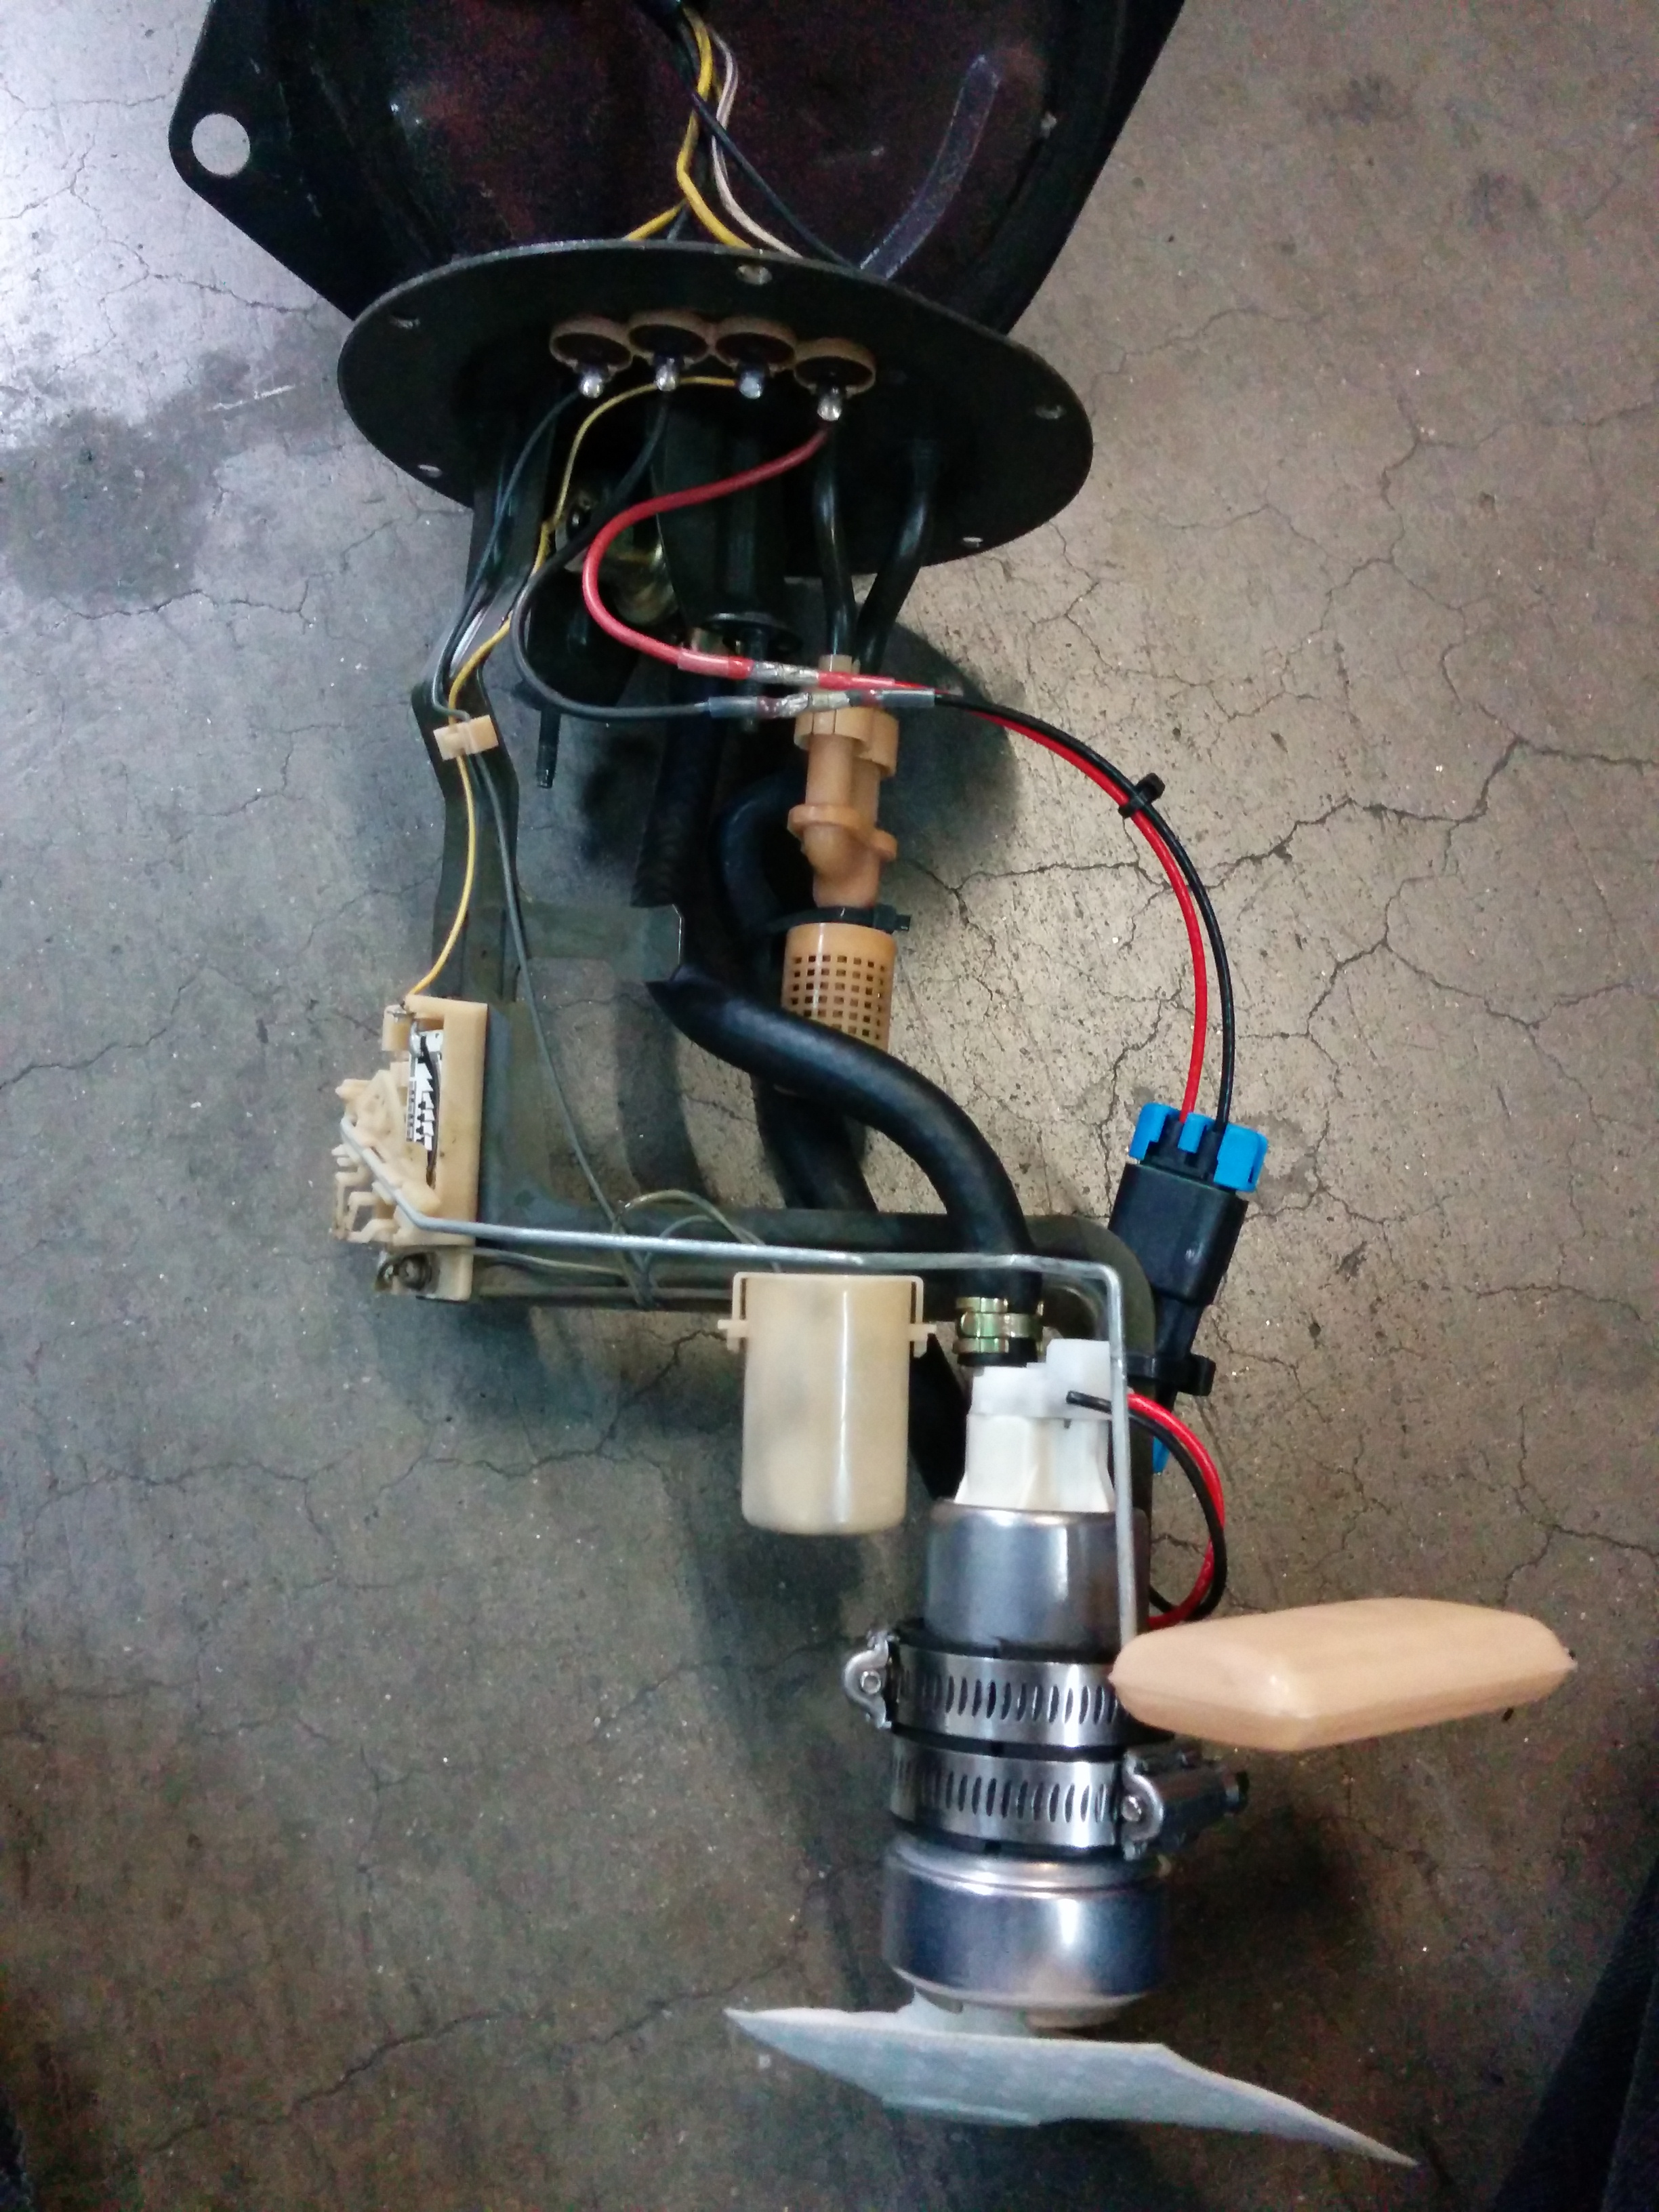
OEM Fuel Pump Bulkhead
Installation of the Walbro is pretty simple, despite being a totally aftermarket unit. After removing the OEM fuel pump from the bulkhead, you just need to rig up a way to mount the new fuel pump. Attach the fuel sock directly to the pump (make sure to remove the clear plug!) and position the pump so the sock sits in approximately the same position as the original sock. Then wrap the pump in some kind of rubber sleeve (I used some old timing belt!) and band clamp it to the original bracket. You’ll also need to cut the screw-on spade connectors the OEM pump uses from the harness, and splice in the pigtail that comes with the Walbro 485 installation kit. Additionally, it is necessary to run a new line from the pump bulkhead to the pump itself. Please remember that this needs to be submersible fuel line, which Nissan sells a bit cheaper than many aftermarket submersible hoses.
Walbro 485 Installed
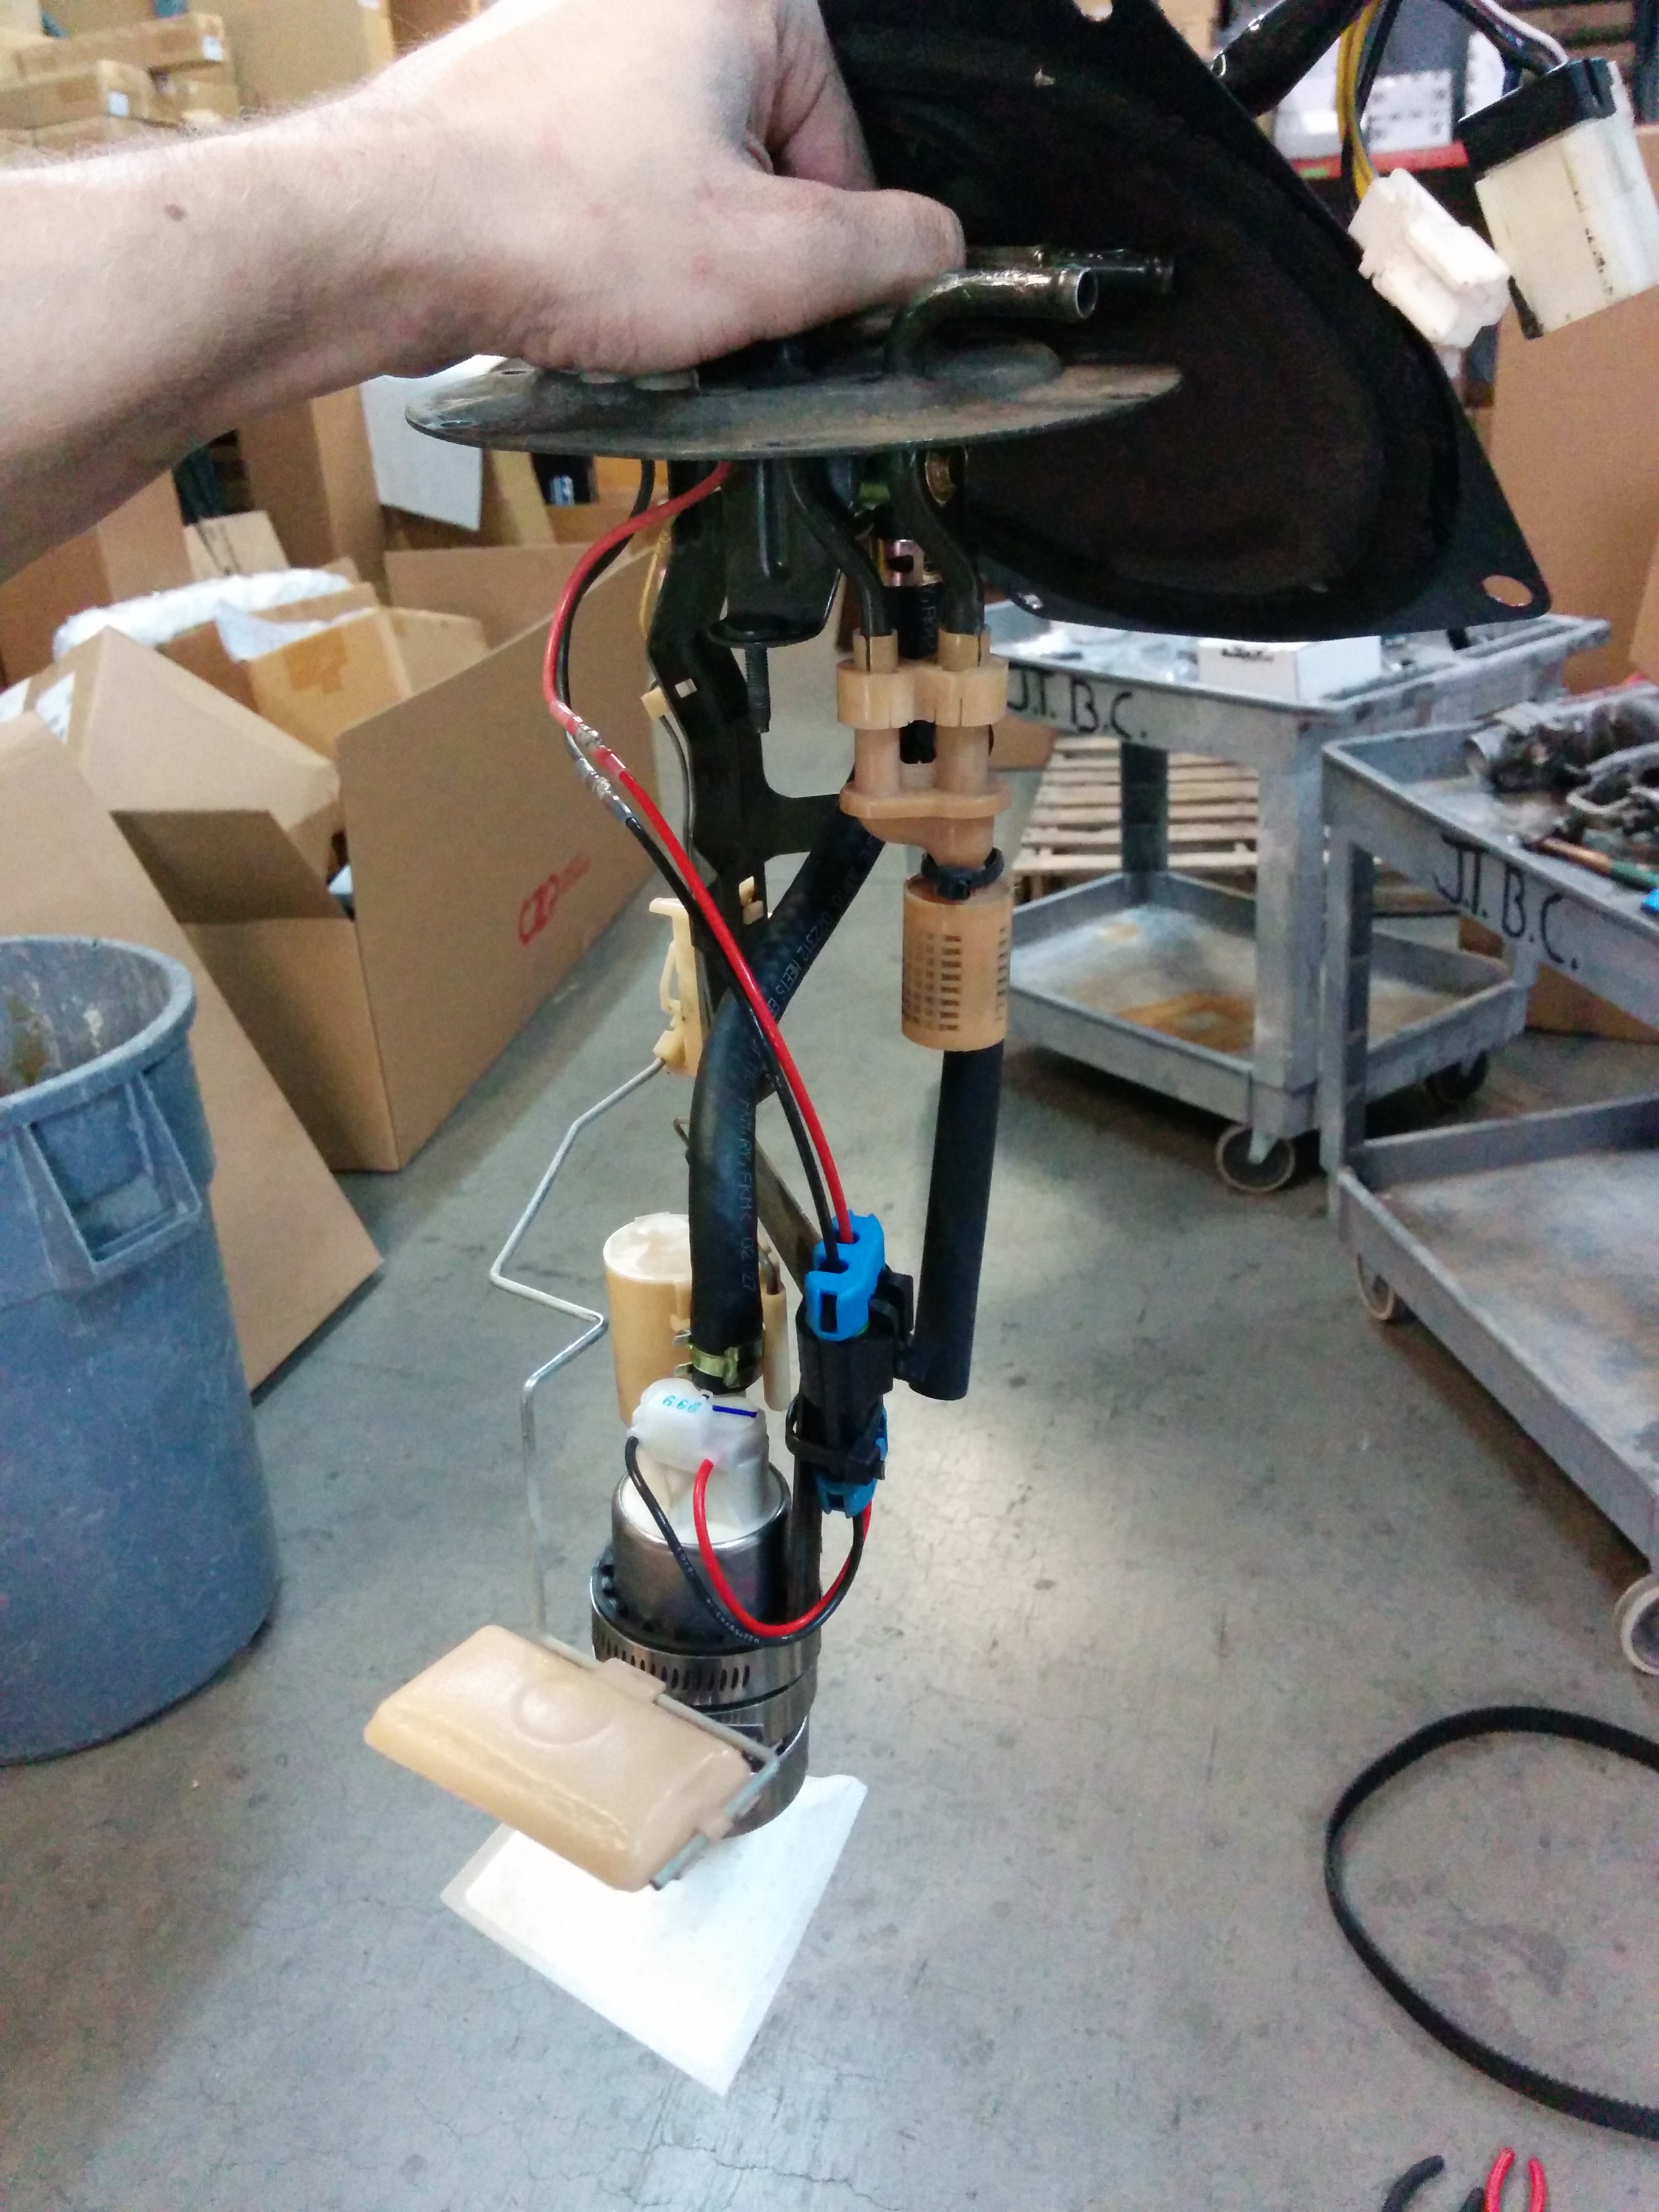
Walbro 485 Installed
And that about wraps it up. To recap, here is what has been done to the car in preperation for the complete Nistune suite:
- ECU Upgraded with Nistune Type 2 Daughterboard
- Nistune Flex Board installed in ECU
- Dual Widebands w/ serial output installed
- Launch Control button installed and wired in
- Ethanol Content Sensor installed
- Walbro 485 Fuel Pump installed
- Nismo 740cc Injectors Installed
- CZP Fuel Rails installed
The next step will be to start running E85 and start tuning the car on it!
Good read man ! I have the exact same setup. Also I did the fpcm bypass and thru a relay so we get 12 volts to the r85 pump at all times . Did you tune it and if so how much hp you making ?