I’ve received a few questions and seen some confusion regarding how injector adapter kits are installed. It’s actually pretty straightforward, but there are a few things that are worth mentioning.
First, getting the old injectors out can be kind of a pain if you’ve never done it before. My favorite method is to flip the fuel rail over, and use an 11mm deep-well socket (preferably 12-point) to tap out the injector. It’s the perfect size to touch the metal body of the injector without coming into contact with the plastic pintle cap, or the fuel rail itself. A quick tap of a rubber mallet pops them right out.
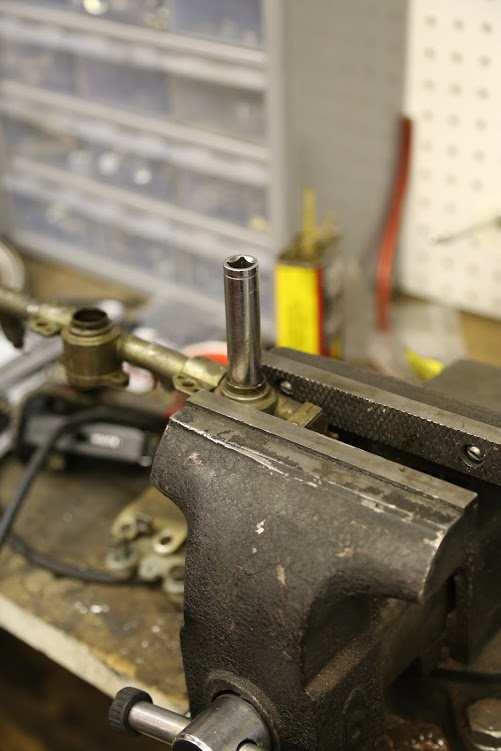
A deep-well 11mm socket is perfect for tapping injectors out from the bottom of the rail.
Basically, the upper O-rings are the same size for both the new and old style fuel injectors for the 300ZX. The difference is in the lower O-ring. The old style uses thin O-rings that are about 3/4 the size of the uppers. The new-style uses tiny O-rings only about 1cm in diameter. When you use an adapter kit, you’ll basically use all three. The upper O-ring, a new-style lower O-ring (on the injector itself), and an old-style lower O-ring (on the adapter collar). Most injectors will come with new O-rings, as do the adapter kits, so make sure you always use new O-rings when replacing injectors. Even if they look okay, they need to be replaced when they’re removed.
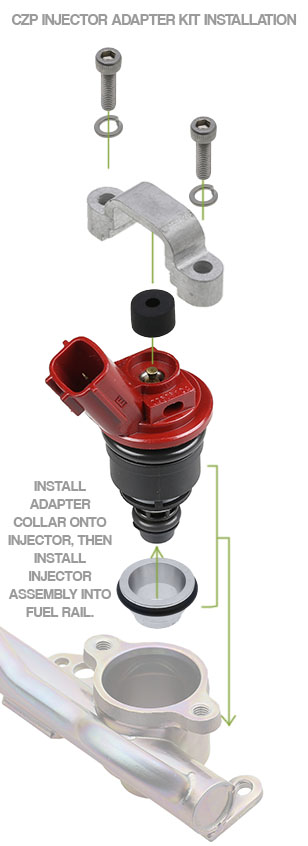
Injector adapter installation.
I personally like to install the adapter collar onto the injector first, and then install the entire unit into the fuel rail. You can also install the adapter into the rail first and then install the injector into that, as long as it’s all lined up properly. As always, make sure to lubricate each and every O-ring, and I like to put a very very light smear around the inside of the fuel rail just to be safe. As you’re pushing parts together, be sure to twist the injector to make sure they seat properly, and you should get a satisfying (if silent) “pop” as it all seats into place.
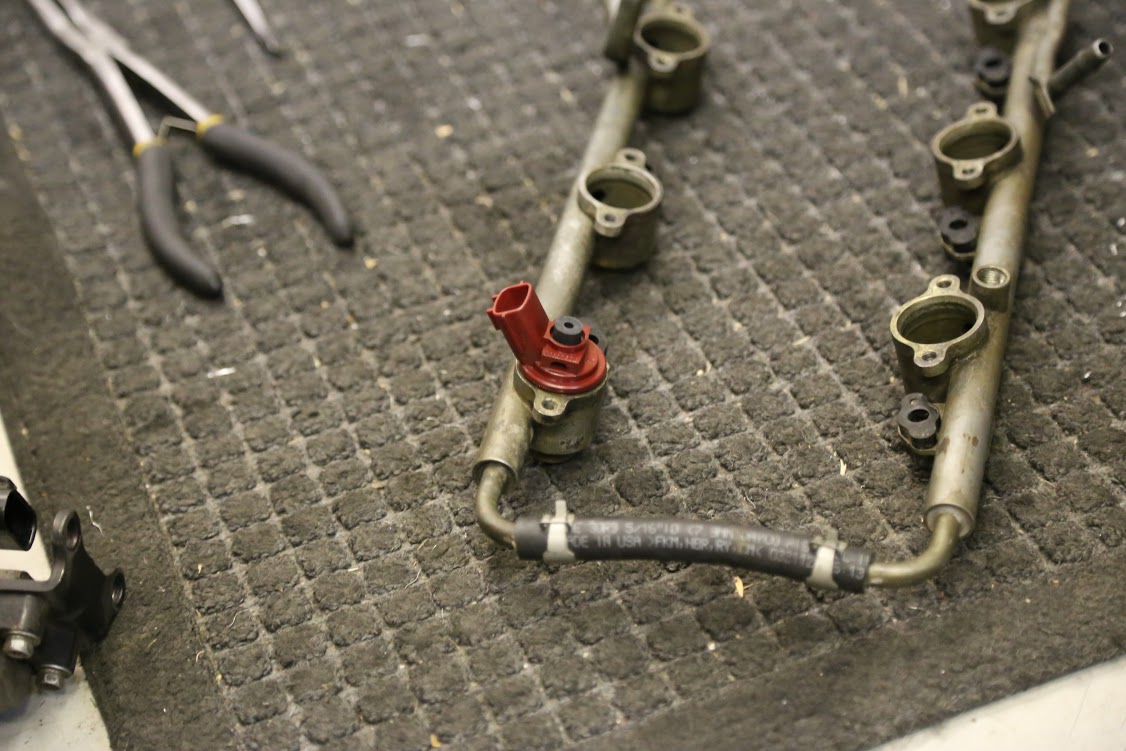
Injector fully seated into the rail.
When the injector and adapter assembly is installed into the rail, it’s important that it’s seated fully in the rail without requiring additional force. If you have to draw the injector in with the cap, that means it’s not seated correctly and an O-ring is likely pinching. Give the injector a spin once it’s in the rail and listen for the sound of rubber clicking/settling. It should be pretty much silent, but any sort of “clicking” is also a sign of pinched O-ring. Once you’re happy with the fitment, you can go ahead and install the caps. Some adapter kits will include the upper rubber insulator (shown above) but it’s not necessary if yours didn’t. The metal part at the top is only used in manufacturing and doesn’t move, so even if yours did happen to break off, it won’t affect the operation of the injector.
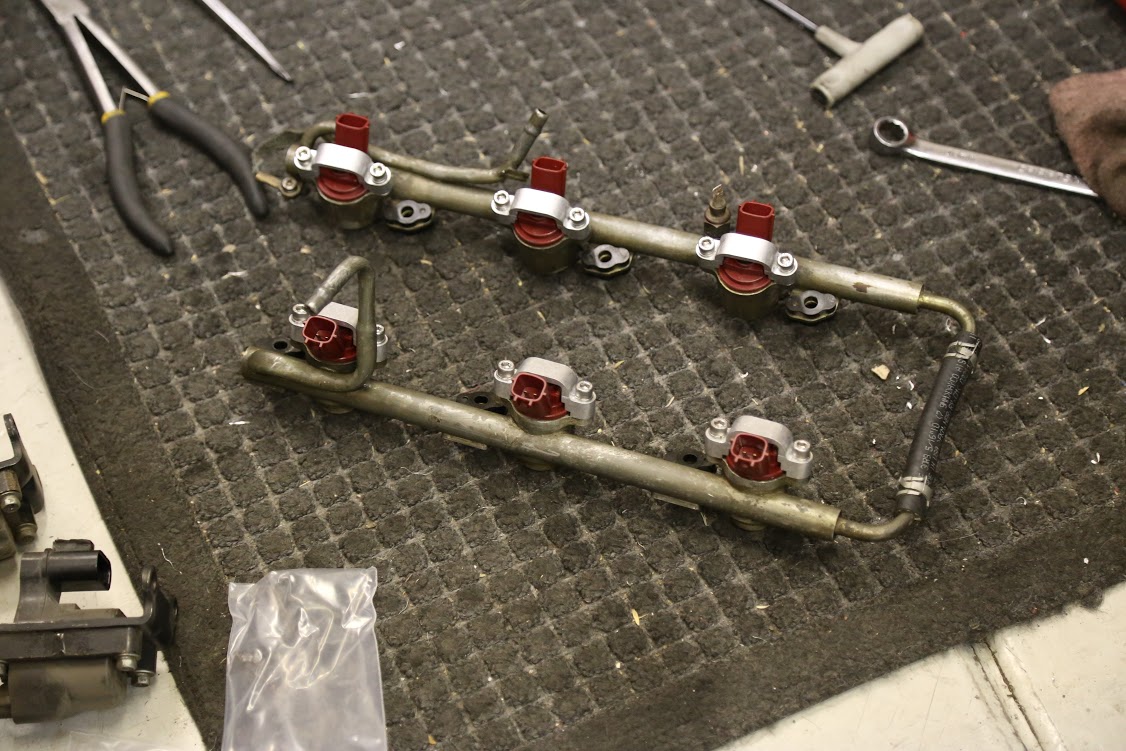
Injectors and adapters fully installed in the rail.
Finally, when you switch to new-style injectors, you’ll need to grind away a bit of the plenum near cylinder number 1 (front most, on the RH [US Passenger] side) intake runner. The “bridge” here runs too close to the connector and makes it impossible to connect it. The later-style plenums had area removed here, so you just need to do the same thing. Just test fit your plenum a few times until you have clearance, it’s immediately obvious what has to happen!

The plenum bridge machined to make room for the connector.
The only other thing to note is where the lower injector O-ring mounts on the injector, which is between the plastic protector cap at the end and the plastic collar on the injector body, like this:
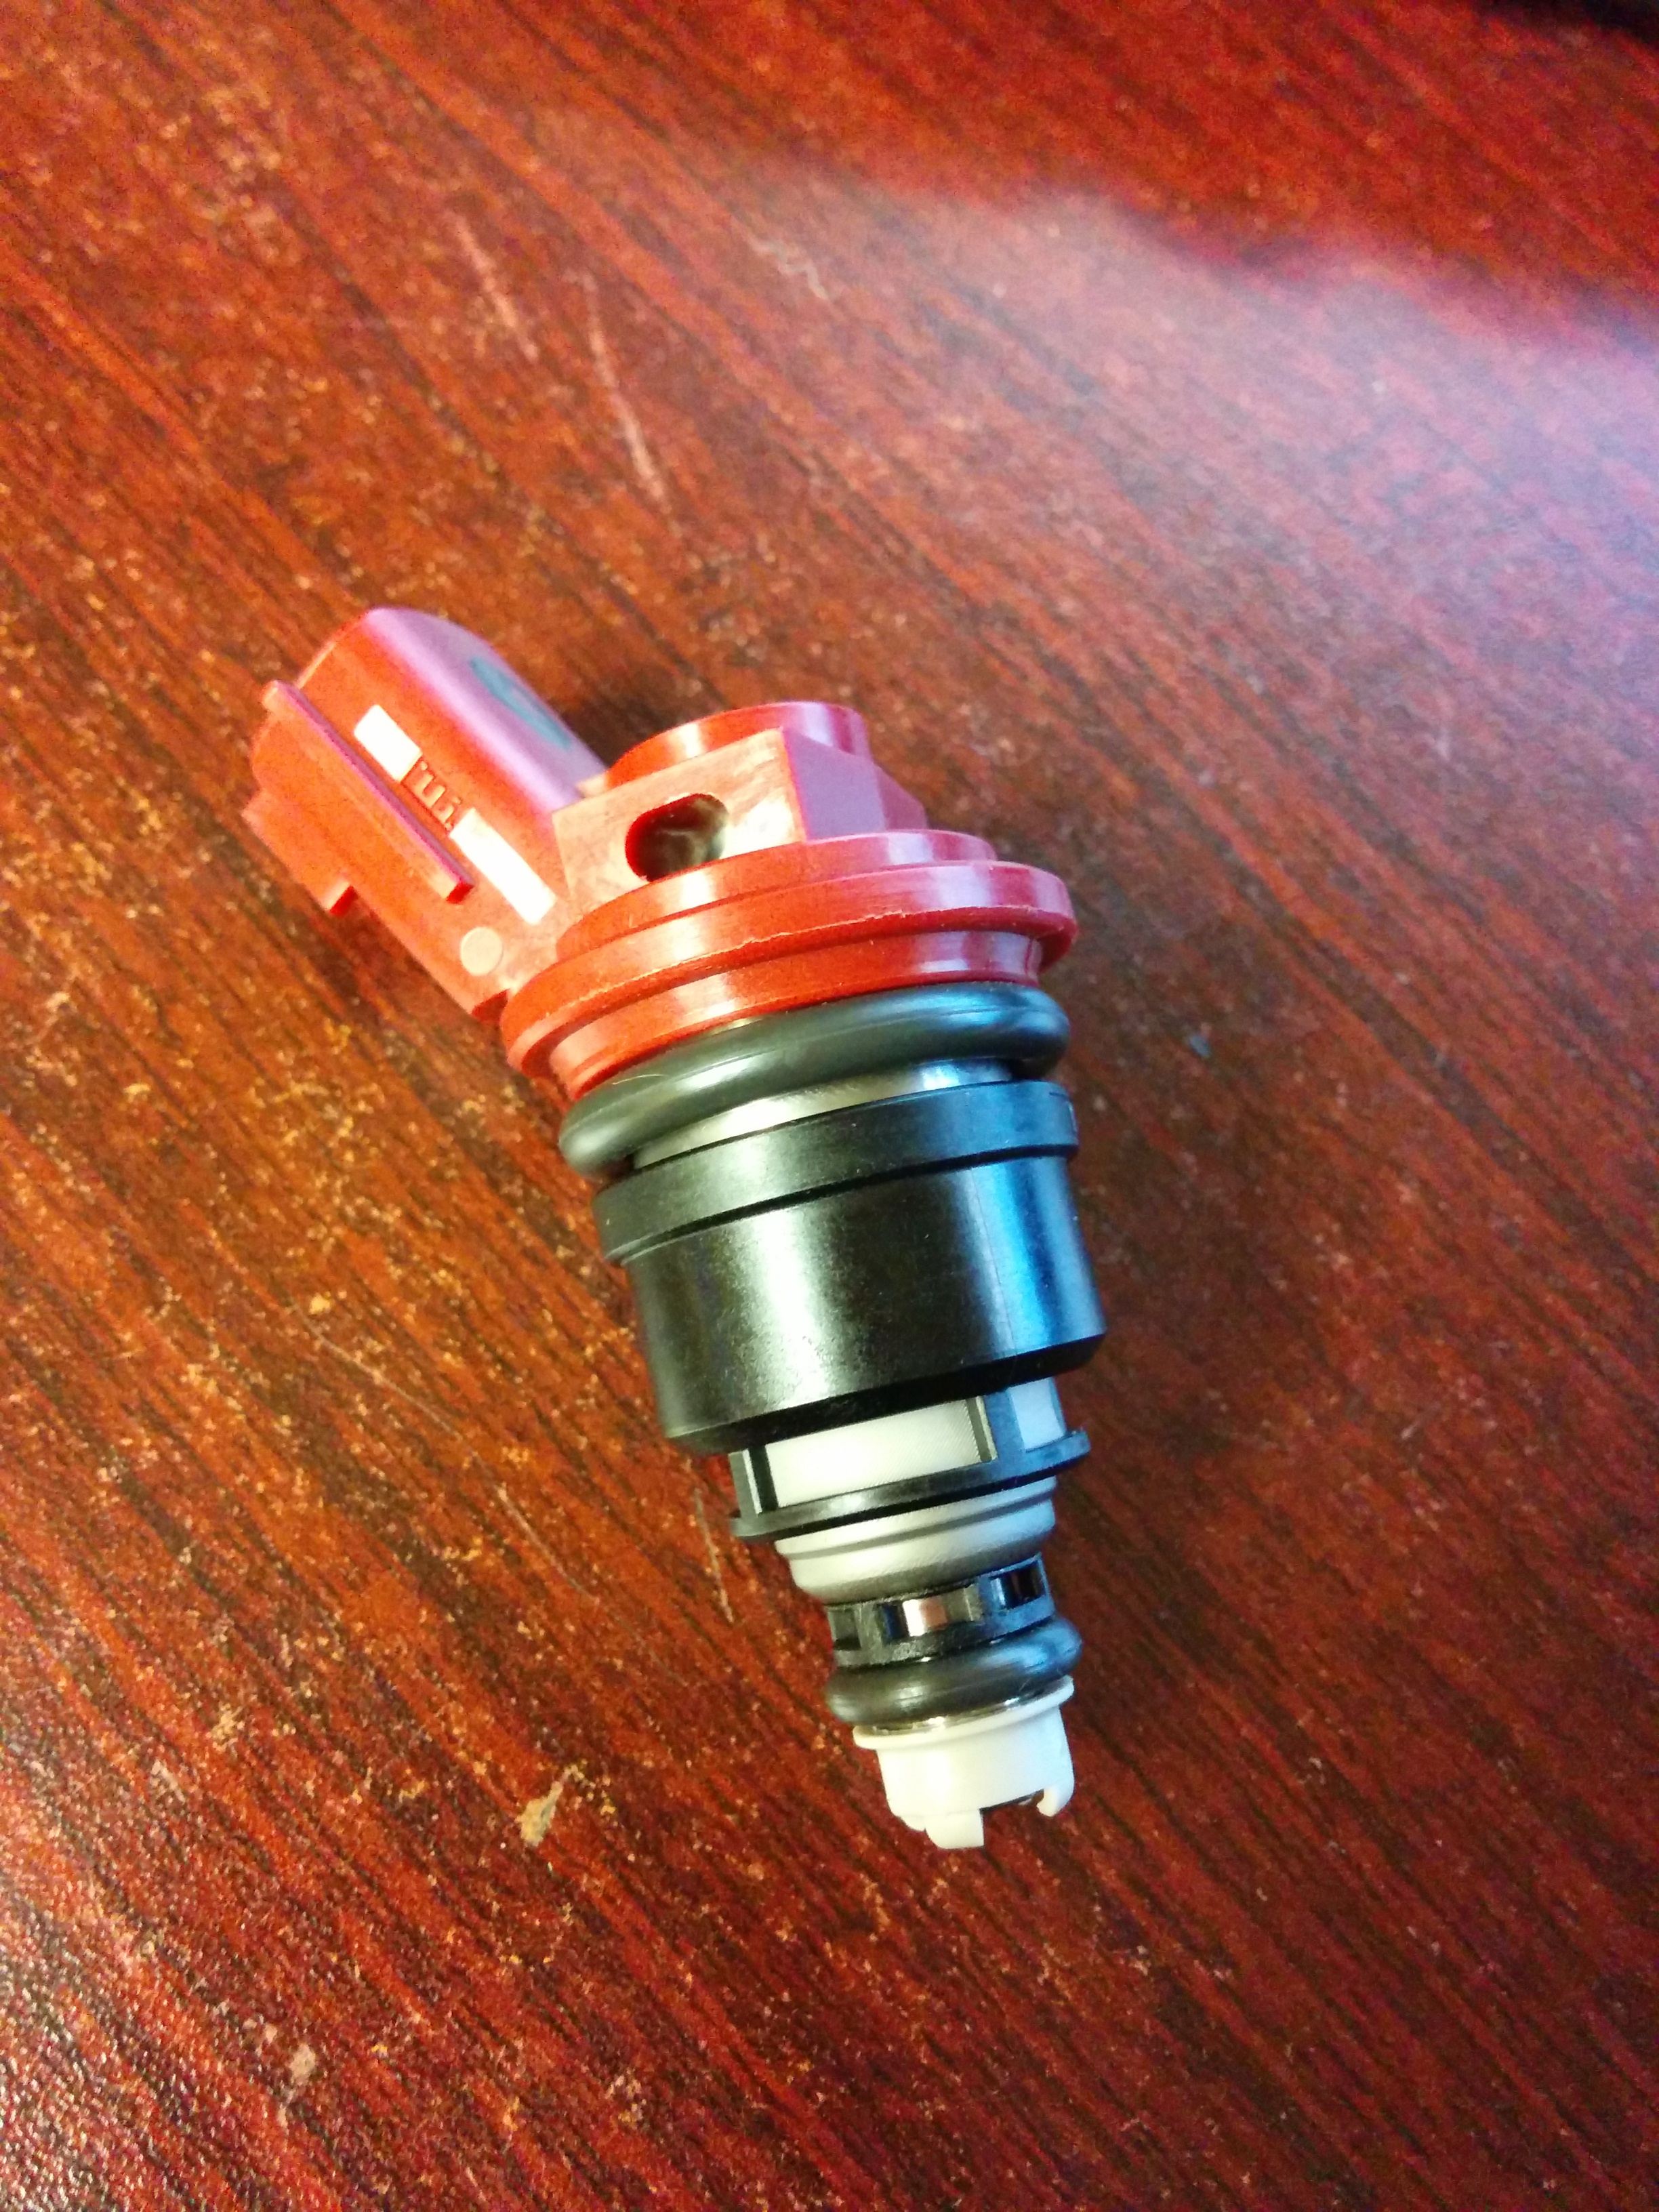
Note the location of the lower O-ring.
Keep in mind, on old-style injectors, the pintle cap is not hugely necessary. It’s mostly to prevent the exposed pintle tip from becoming damaged during handling or installation. New style injectors are a little different. While the pintle itself is completely contained (from the bottom of the injector, the metering plate obscures it), but this lower plastic cap must be present on new-style injectors. If it’s broken or missing, the O-ring will slip off the end of the injector once met with fuel pressure, and it will dump fuel into the engine, potentially hydrolocking it. We had one person very angrily tell us that the genuine NISMO 740CC injectors we sold him we “garbage” as the car ran poorly with them, despite receiving two ECUs to confirm his tune was correct for them. He sent them back to us like this:
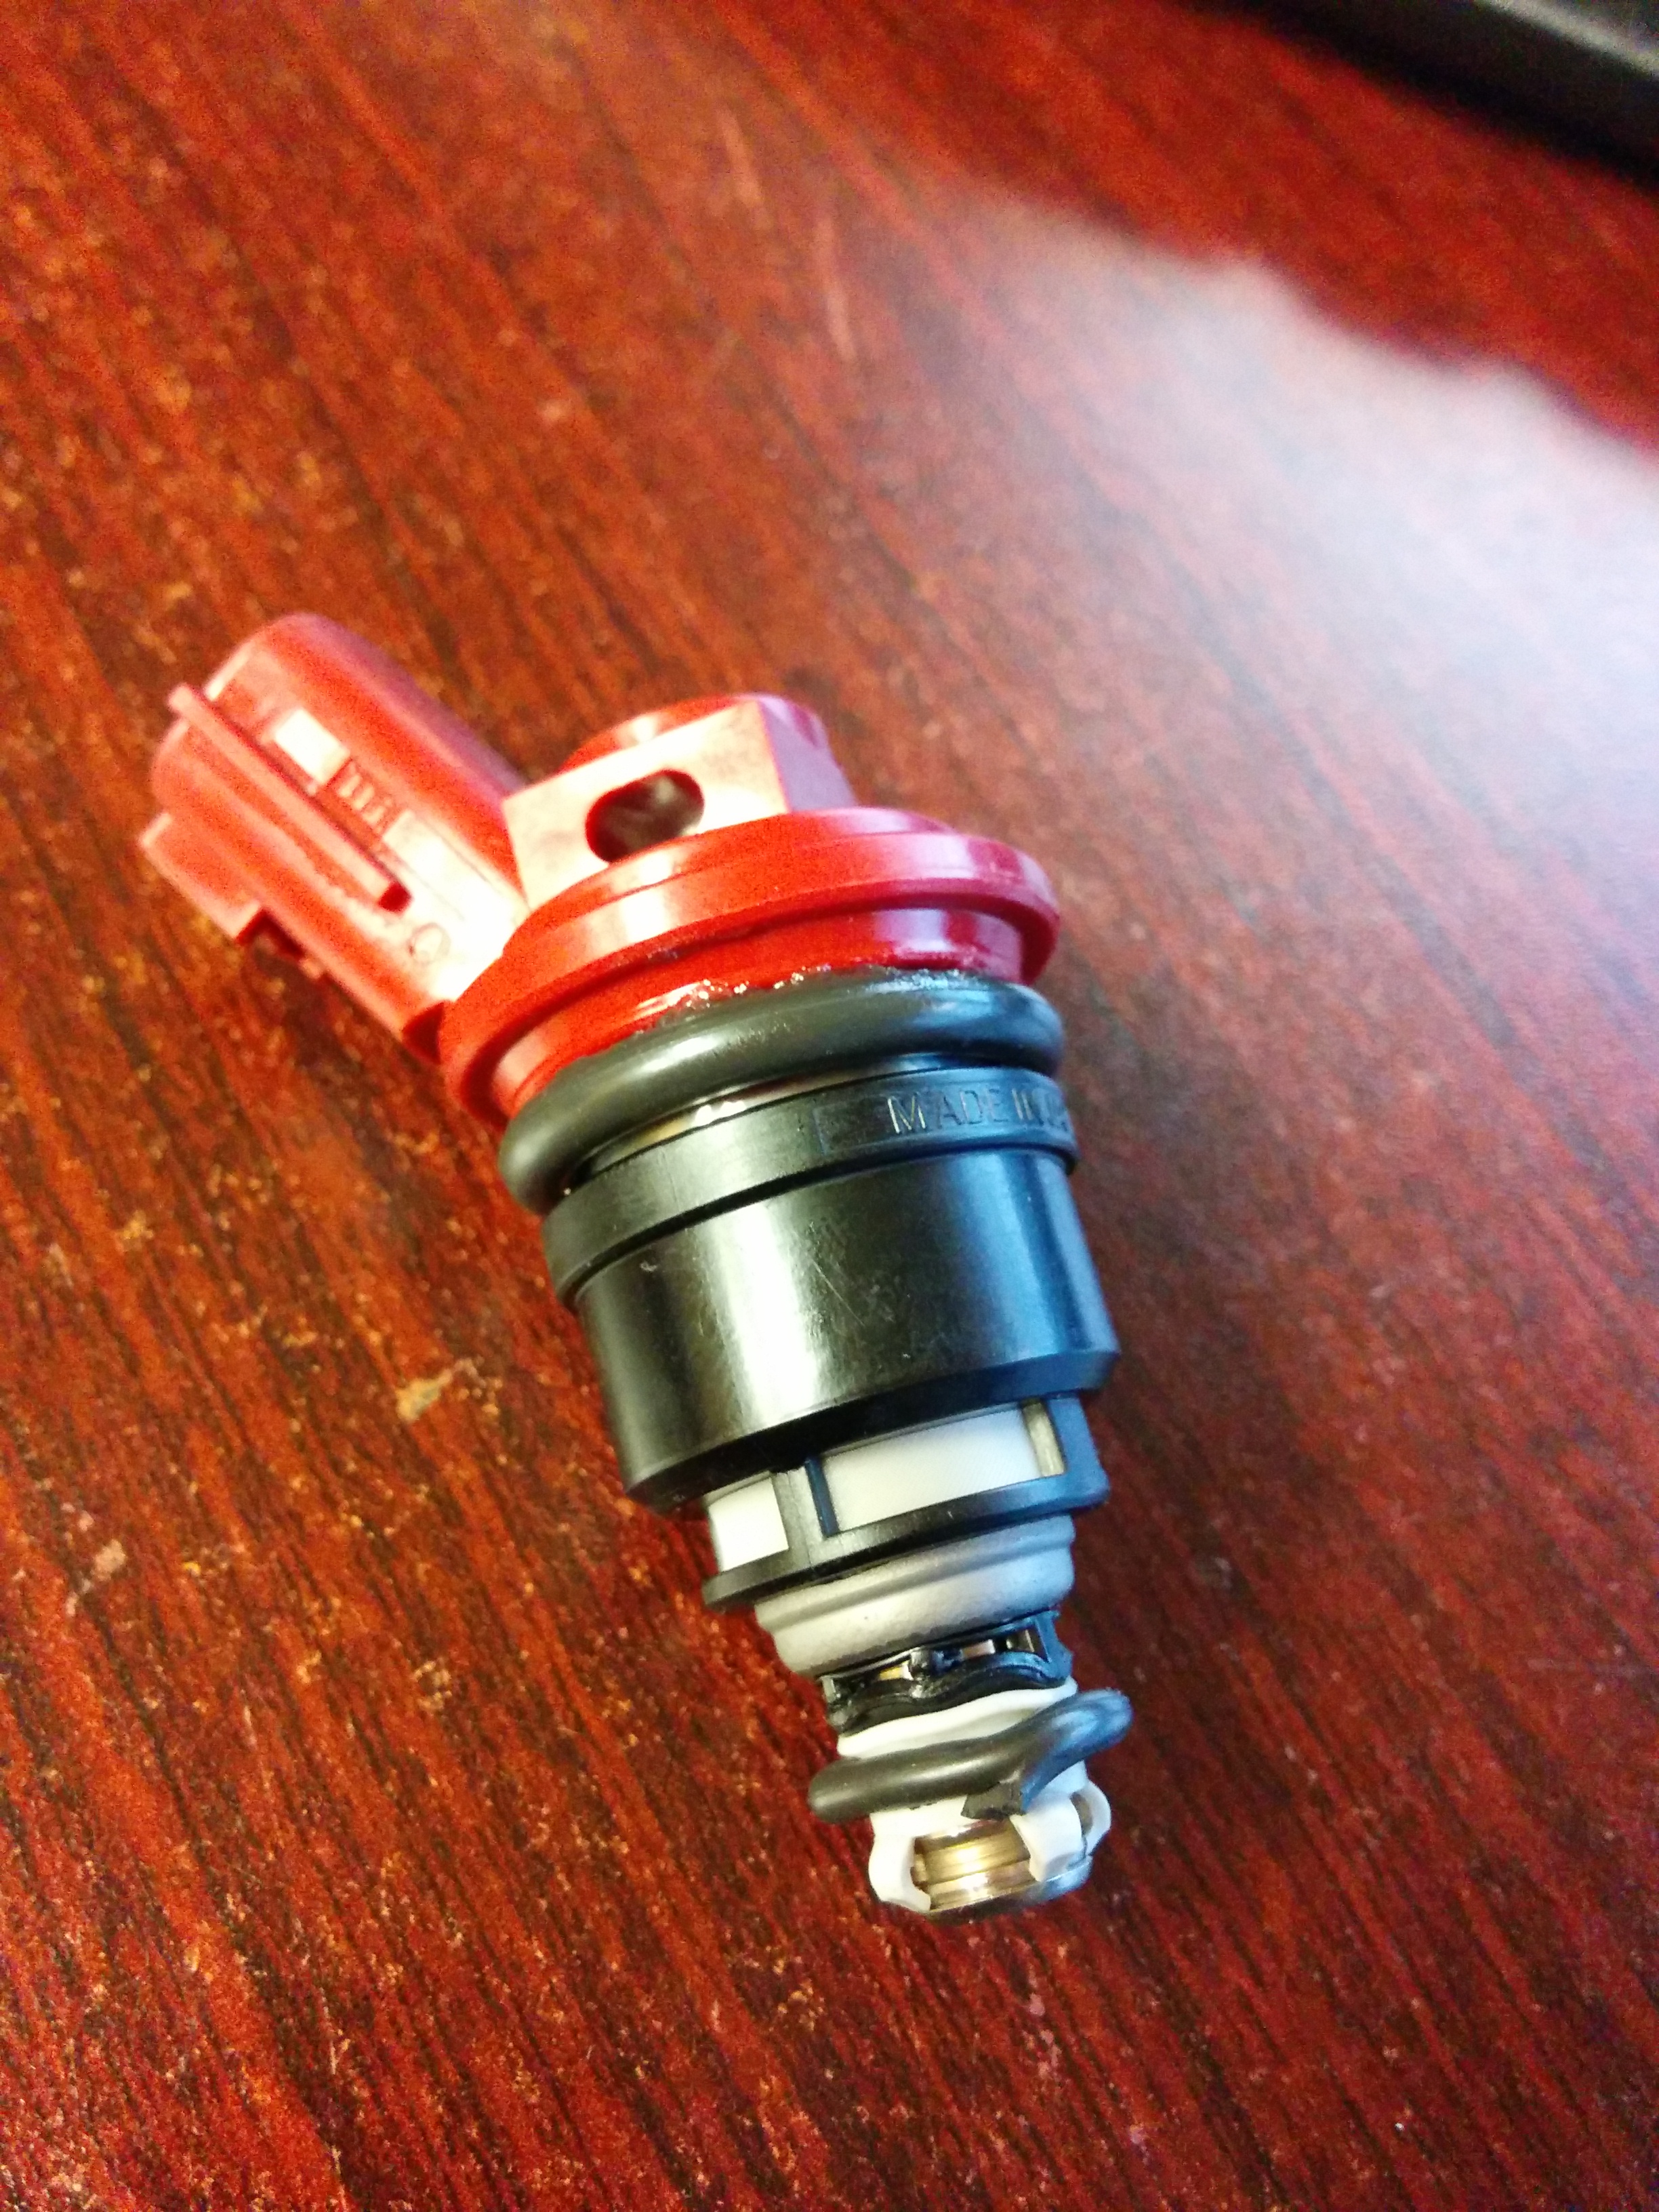
If you can’t tell, he installed the O-ring over the protector cap, then forced the entire assembly into the rail, which broke the protector cap and crushed the plastic spacer while destroying the O-ring.
So if you’re ever not sure or doubting yourself, it never hurts to ask!
Good Write up tho!!
I just had my ZX on jack stands due to the clutch was gone. I had to order a 800 dollar clutch recommend byZ1 Motor Sports, car ran shifted like new. A couple days go by my car lost HP I ran some injector cleaner in the gas it helped I feel I regained horsepower. Now I have 130,000mil. Should I replace my old injector’s with the new kind?
Also when I get off the high way and start my way down off ramp my Z will just die? Then I have to restart the car it acts fine again but only happens when I maintain a speed over 80 for 10Mins,when I slow down it dies WTF??? SoS could it be the iacv ideal air control valve?
Or the air/fuel radio??
Great write up!
Blaka, you really need to ask over on TwinTurbo.net in the technical section for more people to help you. You could also call CZP.
Common Symptoms- When a fuel injector fails, you may experience hard starting, misfires, or an engine that lacks power. The fuel injectors may also leak fuel.
Common Misdiagnoses- Fuel injectors may be replaced when the problem is actually dirty fuel filter(s), low engine compression, worn out glow plugs, failed fuel supply pump, defective glow plug relay, improper injector pump timing, and/or poor fuel quality.
Hey can you tell me on the pigtail witch wire should go with what
They actually don’t care, they’re not polarized!