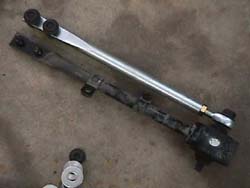
Tension Rod
The tension rod is a suspension component responsible for maintaining caster of the front wheels. It does this by limiting the fore-aft movement of the wheel hub assembly.
Contents
Location & Function
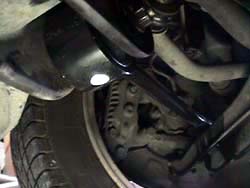
Tension rods are located between the front lower control arm and the front crossmember. They control the caster of the wheel. Stock tension rods also have clamp-on air guides to help direct cool air to the front brakes.
Upgrades
As tension rods wear, they tend to cause a sloppy feeling in the front end, in addition to a shimmy under braking. As this happens, it becomes necessary to replace the tension rod bushings or the entire tension rod.

Aftermarket tension rods are almost always adjustable types. This allows the user to adjust the caster of the tension rod. This is especially necessary when installing aftermarket FUCAs utilizing bearings, rather than bushings. In addition to the adjustability, most aftermarket tension rods replace rubber or urethane bushings with spherical bearings (heim joints), which provide a crisper turn-in feel and are less prone to wear and play.

Replacement
Tension rods are easily replaced with simple hand tools.
Images from TTZD and IZCC.
Parts Needed
- 10mm, 14mm, and 17mm wrenches & ratchets. Air tools are helpful, but not required.
- Jack & Jack-stands
Removal
- Raise the car and support it safely on jack stands.
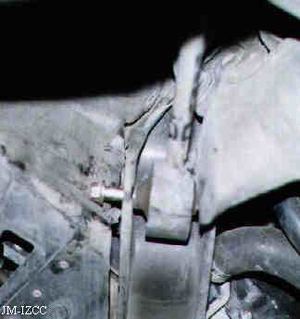
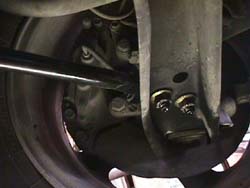
- Remove the end-nuts on the tension rod (2 x 14mm)
- Pop the tension rod arm out of the lower control arm.
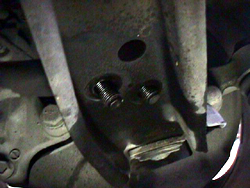
- Remove the bolt securing the tension rod (bushing-end) to the crossmember (17mm nut and 17mm bolt head).
- Remove the tension rod from the crossmember.
- Repeat for the opposite side.


Preperation
- If installing new stock tension rods, you will have to transfer their studs from the old tension rods. Simply hammer them out of the old ones, then hammer them in to the new rods.
- If installing adjustable tension rods, adjust the new tension rod so it's approximately the same length as the stock one. This won't be perfect, but it will get you to the alignment shop.

Installation
- Position the tension rod in place, and insert the 17mm bolt for the bushing side. Torque it (and the nut) to 80-100 ft-lbs.
- Pull the front wheels to allow the front tension rod studs to go through the lower control arm holes. It will take some persuasion.
- Install the tension rod end-nuts (2 x 14mm). Torque to 80-94 ft-lbs, or 69-83 ft-lbs on the convertible model (for unknown reasons).
- Repeat for the opposite side.
- Have the car aligned--major suspension work often changes the suspension geometry slightly, throwing off an alignment. This is especially true with adjustable tension rods.

