Throttle Body
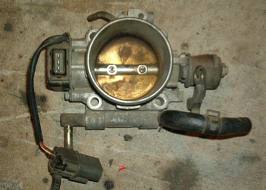
A Throttle Body is a device which houses a butterfly valve to vary the amount of air the engine intakes, as well as various auxiliary and related components, like springs (to return them to a closed position), vacuum ports for emissions control devices, and water ports for internal warming. The VG30DE(TT) uses twin throttle bodies.
Contents
Location and Function
Throttle Bodies are directly connected to the gas pedal, and control the amount of incoming air that for the engine to ingest and combust. By way of their butterfly valve, throttle bodies allow the driver to control the speed and power of the engine.
The Z32's throttle body setup includes:
- Twin 52mm (?) throttle bodies
- A throttle position sensor
- Adjustable linkage to connect the two throttle bodies
- Coolant lines to keep the throttles warm (to prevent them from freezing over in cold driving conditions).
Installation and Adjustment
While removal of the throttle bodies is quite straightforward (just remove the four hex-head bolts securing each one to the plenum), installation can be a bit more tricky.
Installation
- Align the new paper gasket to determine its correct orientation.
- Apply a very thin smear of liquid gasket to either side of the new paper gasket.
- Place the paper gasket on the intake manifold.
- Place the throttle body on the intake manifold.
- Insert the four hex-head bolts and gently snug them down by hand.
- Repeat for the opposite side throttle body.
- Attach the "accel-drum" (linkage) unit to the center mount on the plenum.
- Insert the three hex-head bolts and gently snug them down by hand.
- Torque the bolts in the following order.

- 1 --> 2 --> 3 --> 4
- 6.5 - 8.0 ft-lb
- 1 --> 2 --> 3 --> 4
- 13 - 16 ft-lb
- A --> B --> C
- Tighten by hand
- A --> B --> C
- 3.5 ft-lb
- A --> B --> C
- 14 ft-lb
- 1 --> 2 --> 3 --> 4
Adjustment
Images from Drk93TT on TT.net
- Remove the throttle body intake pipes.
- Remove the throttle cable cover (on the center of the engine).
- Loosen the 14mm bolts that secure the throttle cable (the driver's side one; the passenger side one is for the cruise control) to its bracket and remove it from the bracket. You can leave it attached at the throttle drum.
- Open the throttle bodies and secure them open with a screwdriver.
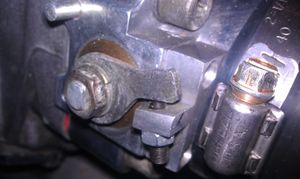
- Loosen the lock-nut under the adjustment peg (8mm) on the throttle body.
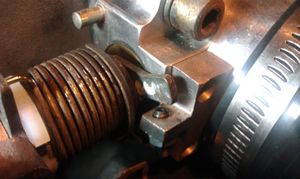
- Turn the adjustment peg to create a gap in between the arm and the peg.
- Close the throttle bodies.
- Loosen the lock-nut on the linkage (8mm).
- Turn the adjustment peg while observing the throttle body's butterfly valve.
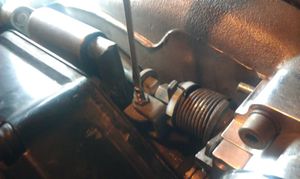
- There is a vacuum port on the underside of each throttle body. When the valve is fully closed you should be able to see the opening for this port from the inside. Turn the peg until the throttle closes all the way and this port is visible. Do not over-turn it, or it may cause the throttle to stick.
- Tighten the lock nut on the linkage (8mm).
- Turn the adjustment peg on the throttle body until it just meets the stopper (but not so much that it forces the throttle open). It may be necessary to open the throttle again while adjusting.
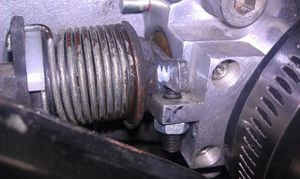
- Tighten the lock nut on the throttle body adjuster (8mm).
- Repeat for the opposite side.
- Insert the throttle cable back into its slot in the bracket on the plenum. It may be necessary to turn the 14mm lock nuts slightly to get it to fit properly. It should not pull tension on the throttle linkage, but there should be practically no slack, either.
- Tighten the throttle cable's 14mm lock nuts.
Upgrades
A popular upgrade to stock throttle bodies are 58mm or 60mm throttle bodies. These require honing out the intake manifold to match, but their large diameter offers better flow characteristics over stock throttle bodies, increasing response.
Honing the Intake Manifold
- Install the throttle body without a gasket. Hand-tighten the bolts so the position is true.
- Open the valve fully.
- Trace the opening (this can be tricky with the butterfly valve in place) with a sharpie.
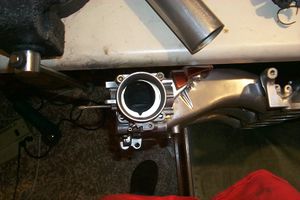
- Remove the throttle body.
- Repeat steps 1-4 for the opposite side.
- Using a carbide tip, dremel out the plenum to meet the line you traced earlier.
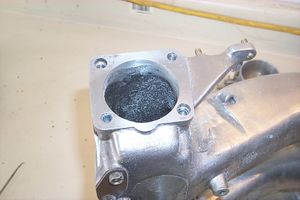
- Remove as many metal shavings as possible. Use a vacuum, air compressor, brake cleaner, whatever it takes to get it cleaned out.
- Install the throttle bodies like normal.
Coolant Ports
The stock throttle bodies feature coolant ports to circulate coolant around them. Despite the name, coolant is quite hot (around 174 degrees F) at operating temperature. These coolant lines were installed as a safety measure to prevent the throttle bodies from freezing over during extended periods of driving in extremely cold climates.
However, as these coolant ports add complexity to the cooling system and make removal of the intake manifold much more difficult, they are often bypassed with no resulting ill-effects.
Butterfly Valve
Butterfly Valves are the post-metamorphosis version of the caterpillar gasket. They are often observed and collected for their colorful wings.