If you saw my last post, you saw a little bit of what went behind the production and design of our new ZERO Widebody Kit for the Z32. Before we started final production, we decided we wanted to install it on a car to make sure we were happy with the fitment, appearance, and quality. My car was nearing completion (the engine was still out and incomplete), but had recently come back from paint and was close enough. My Z also has had a rough life (at least, before I owned it!), and because the chassis is imperfect, we decided it would be the perfect candidate to chop up and install the new ZERO kit!
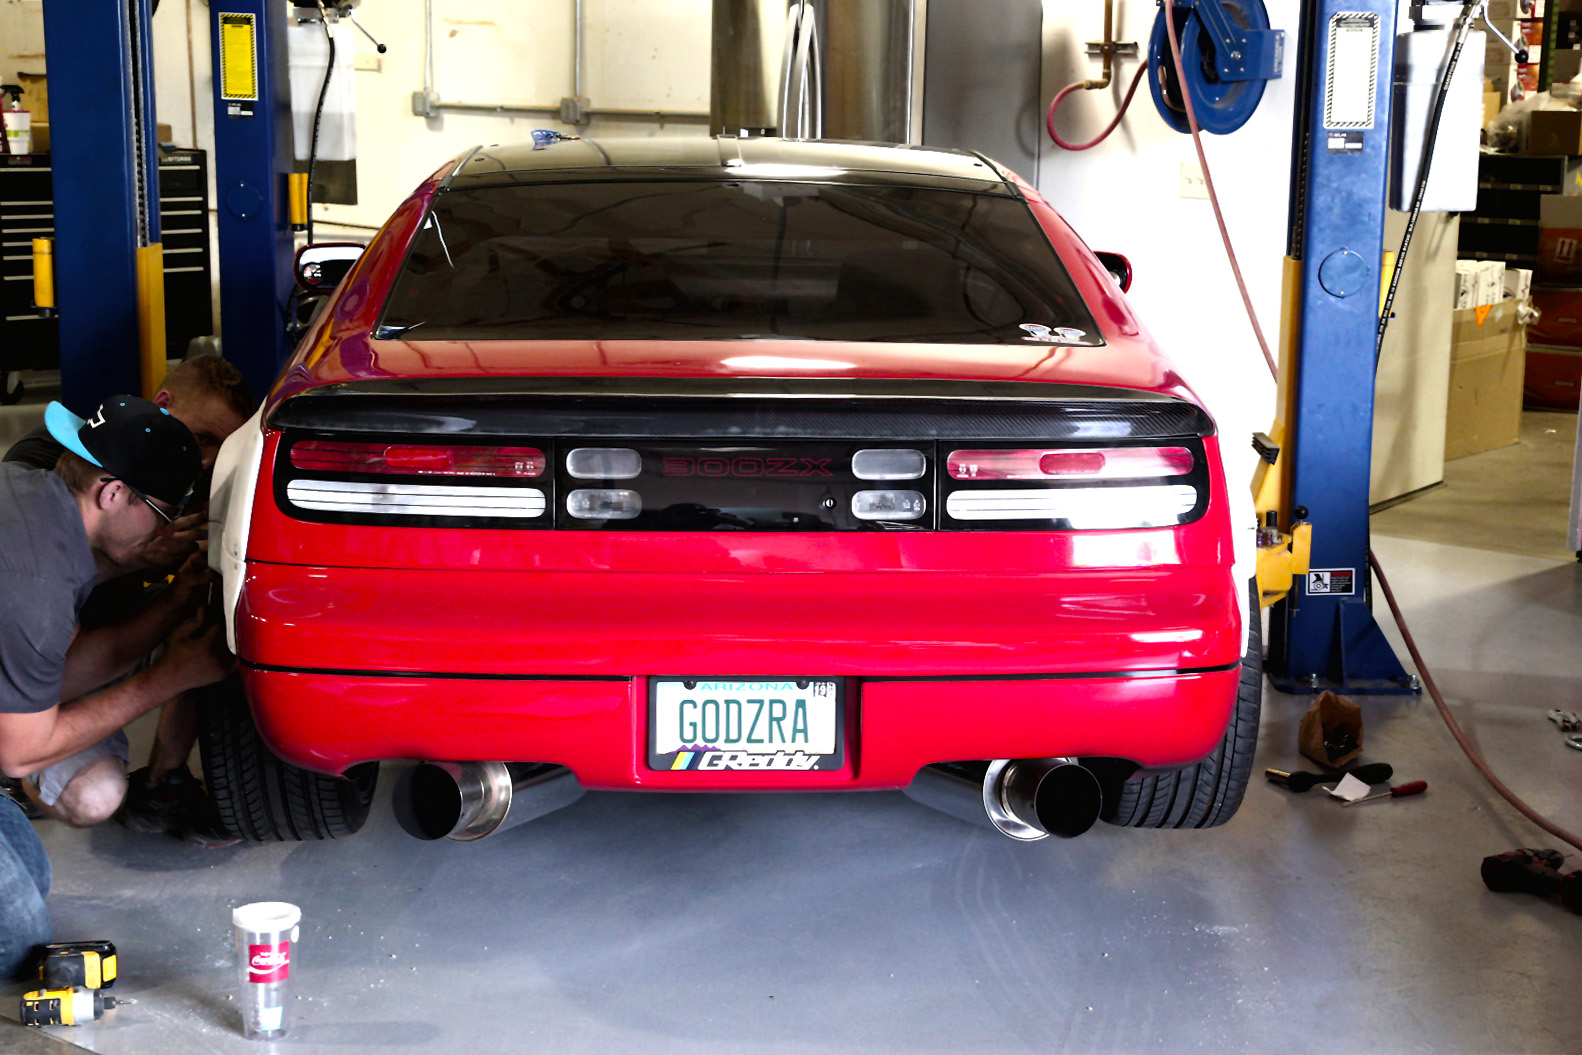
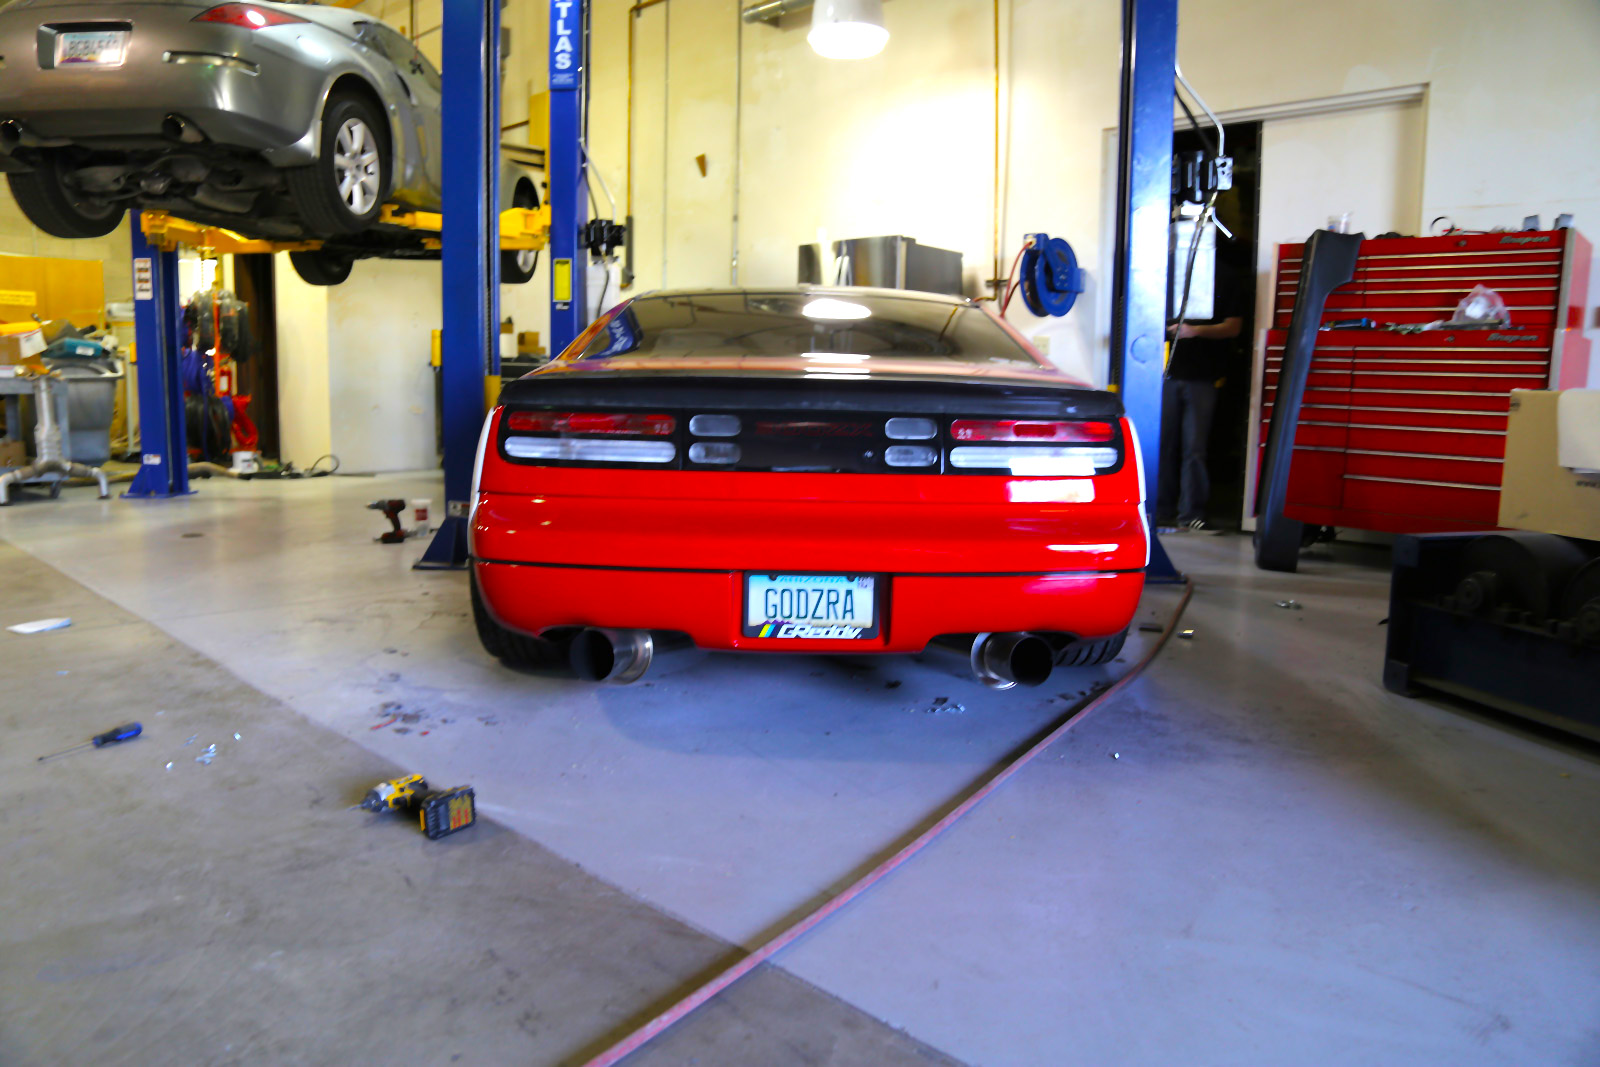
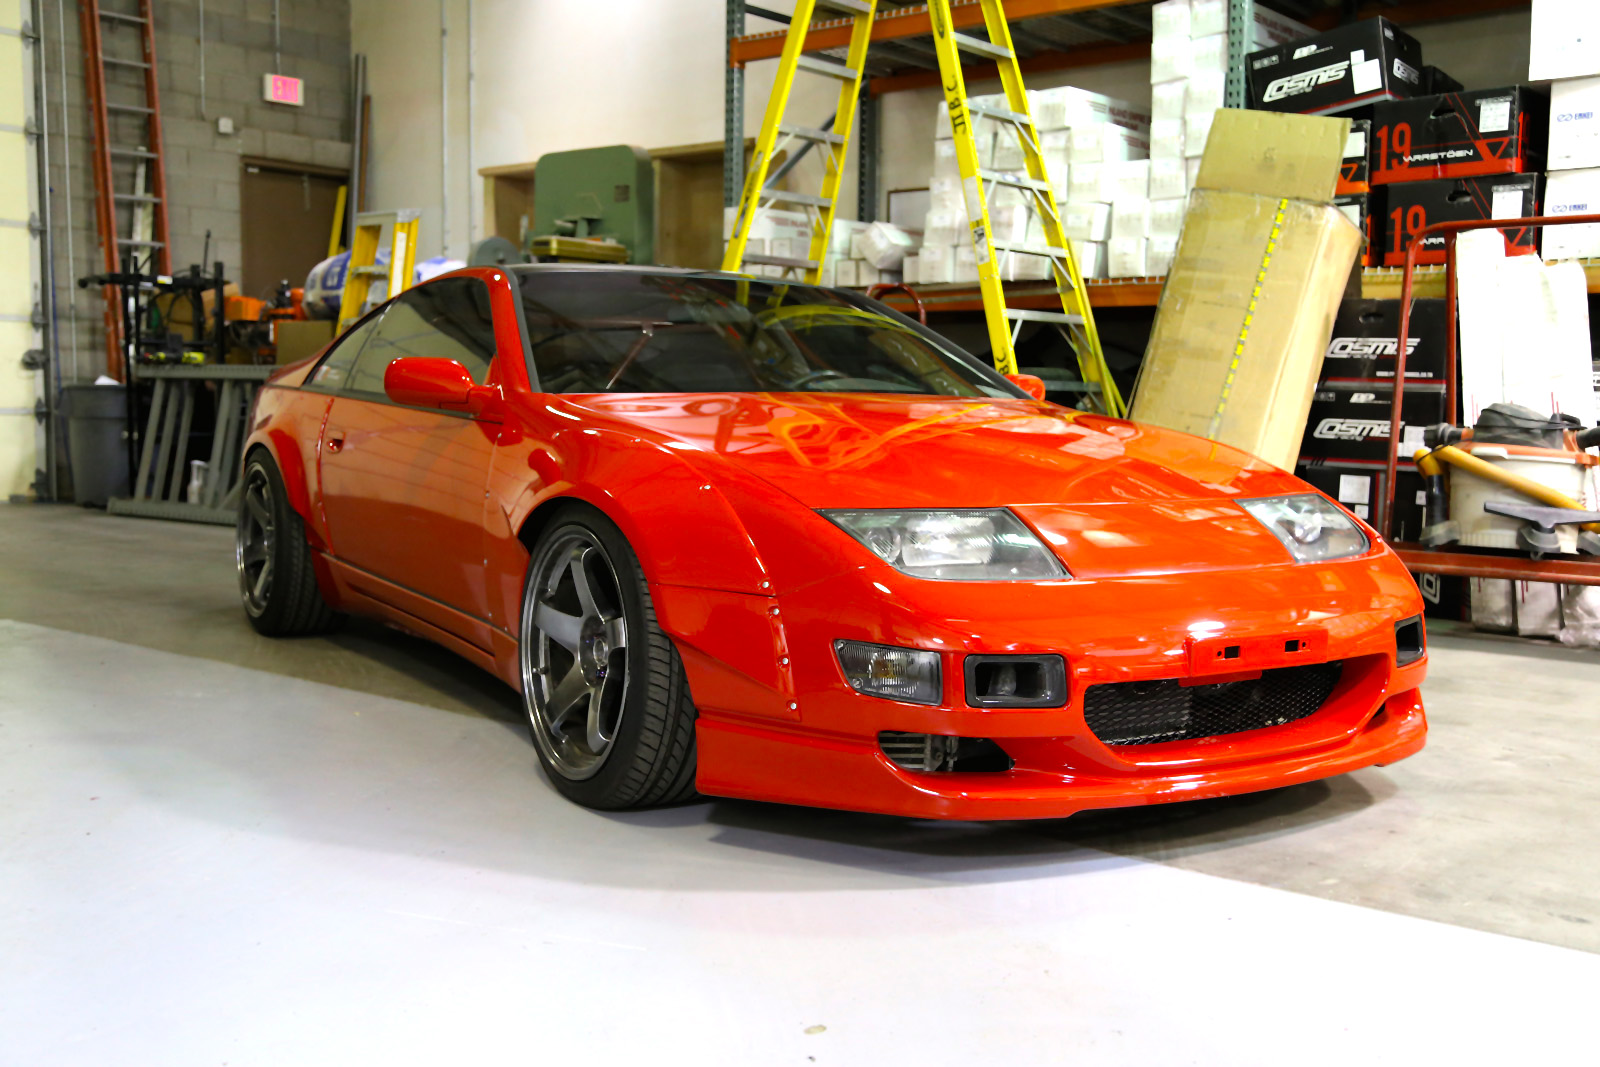
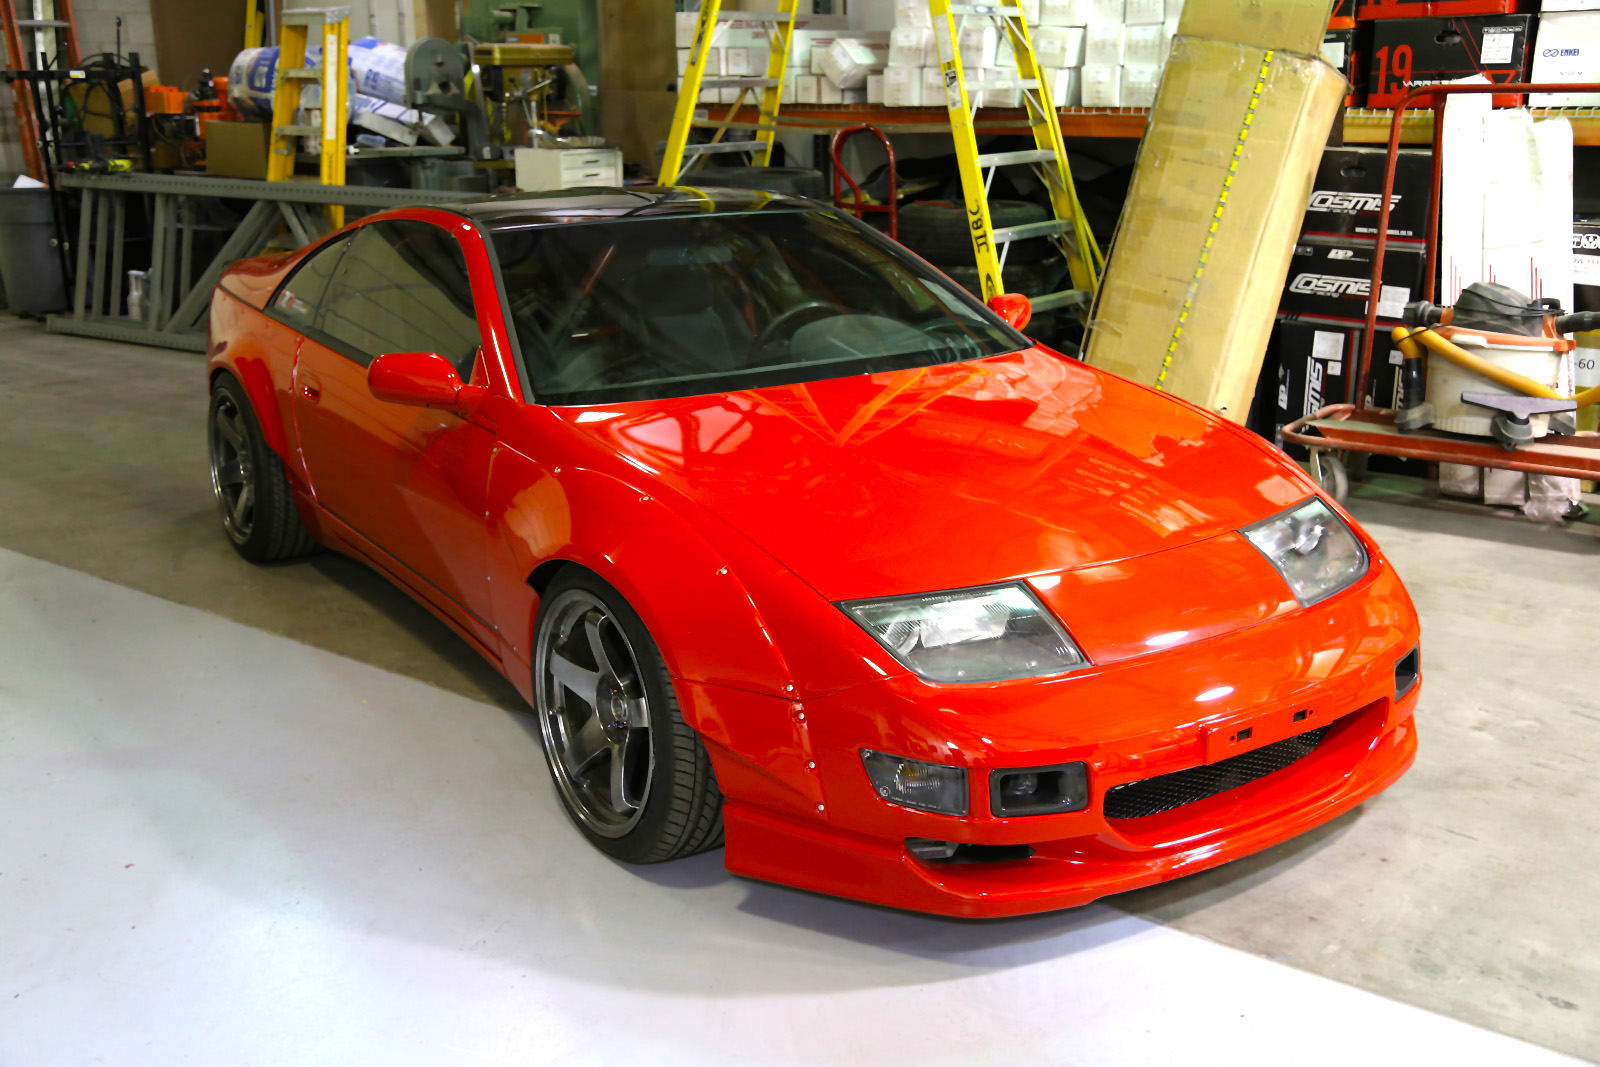
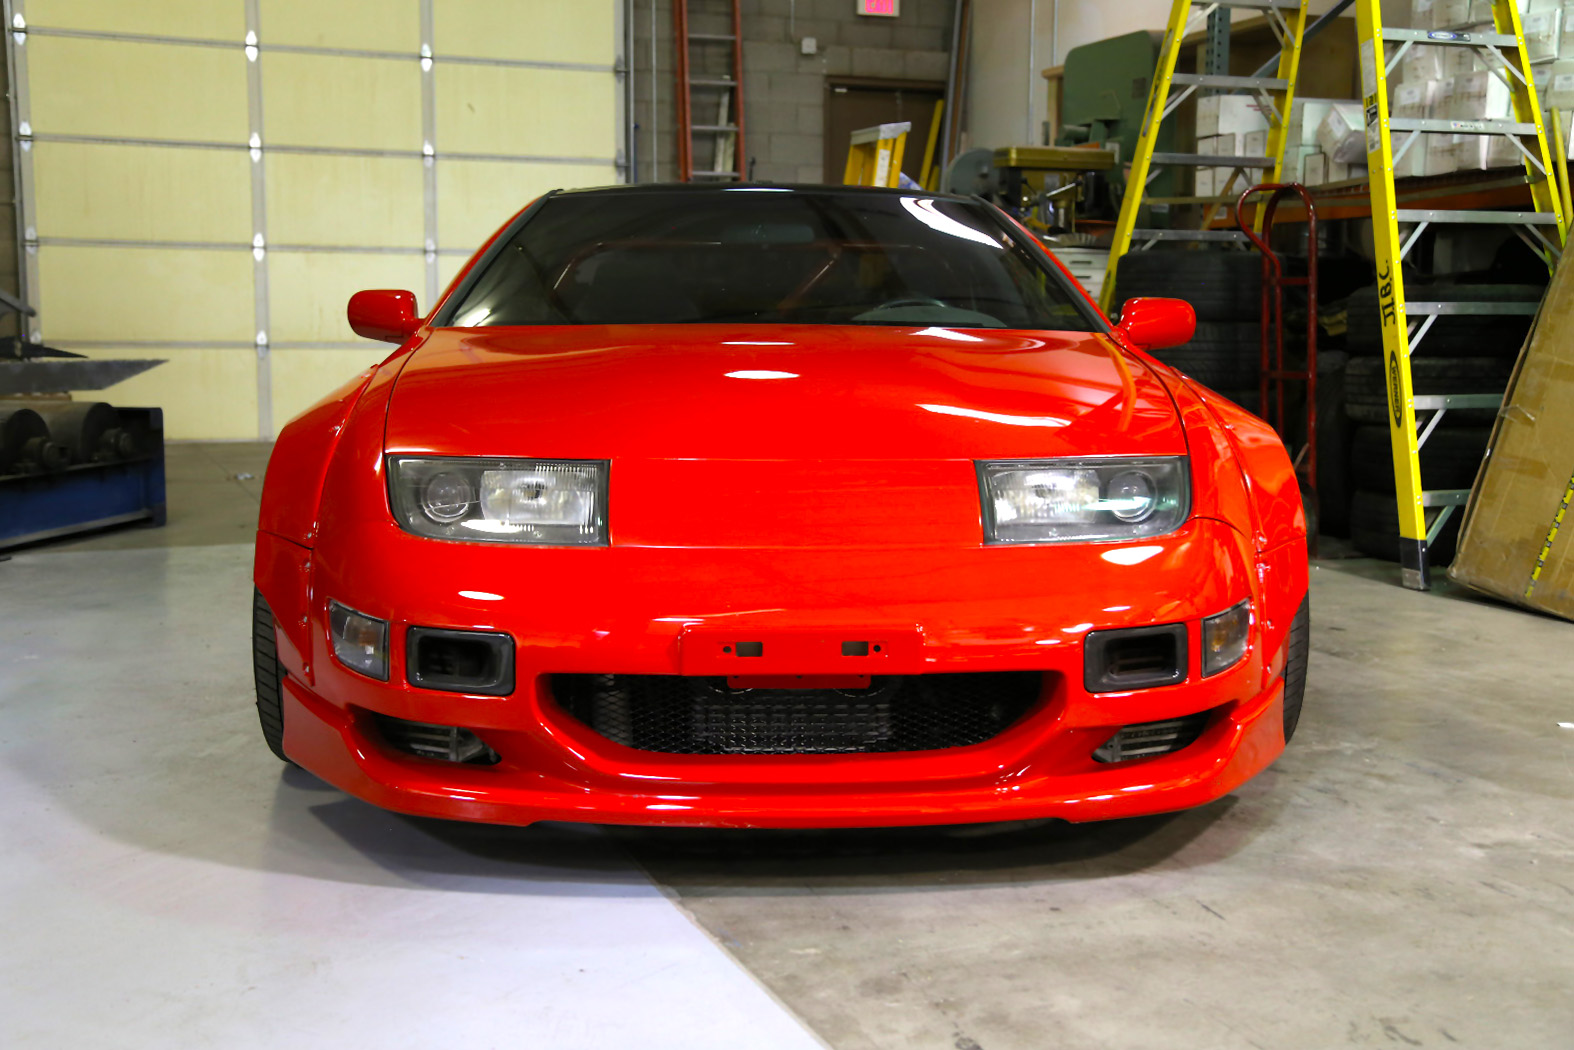
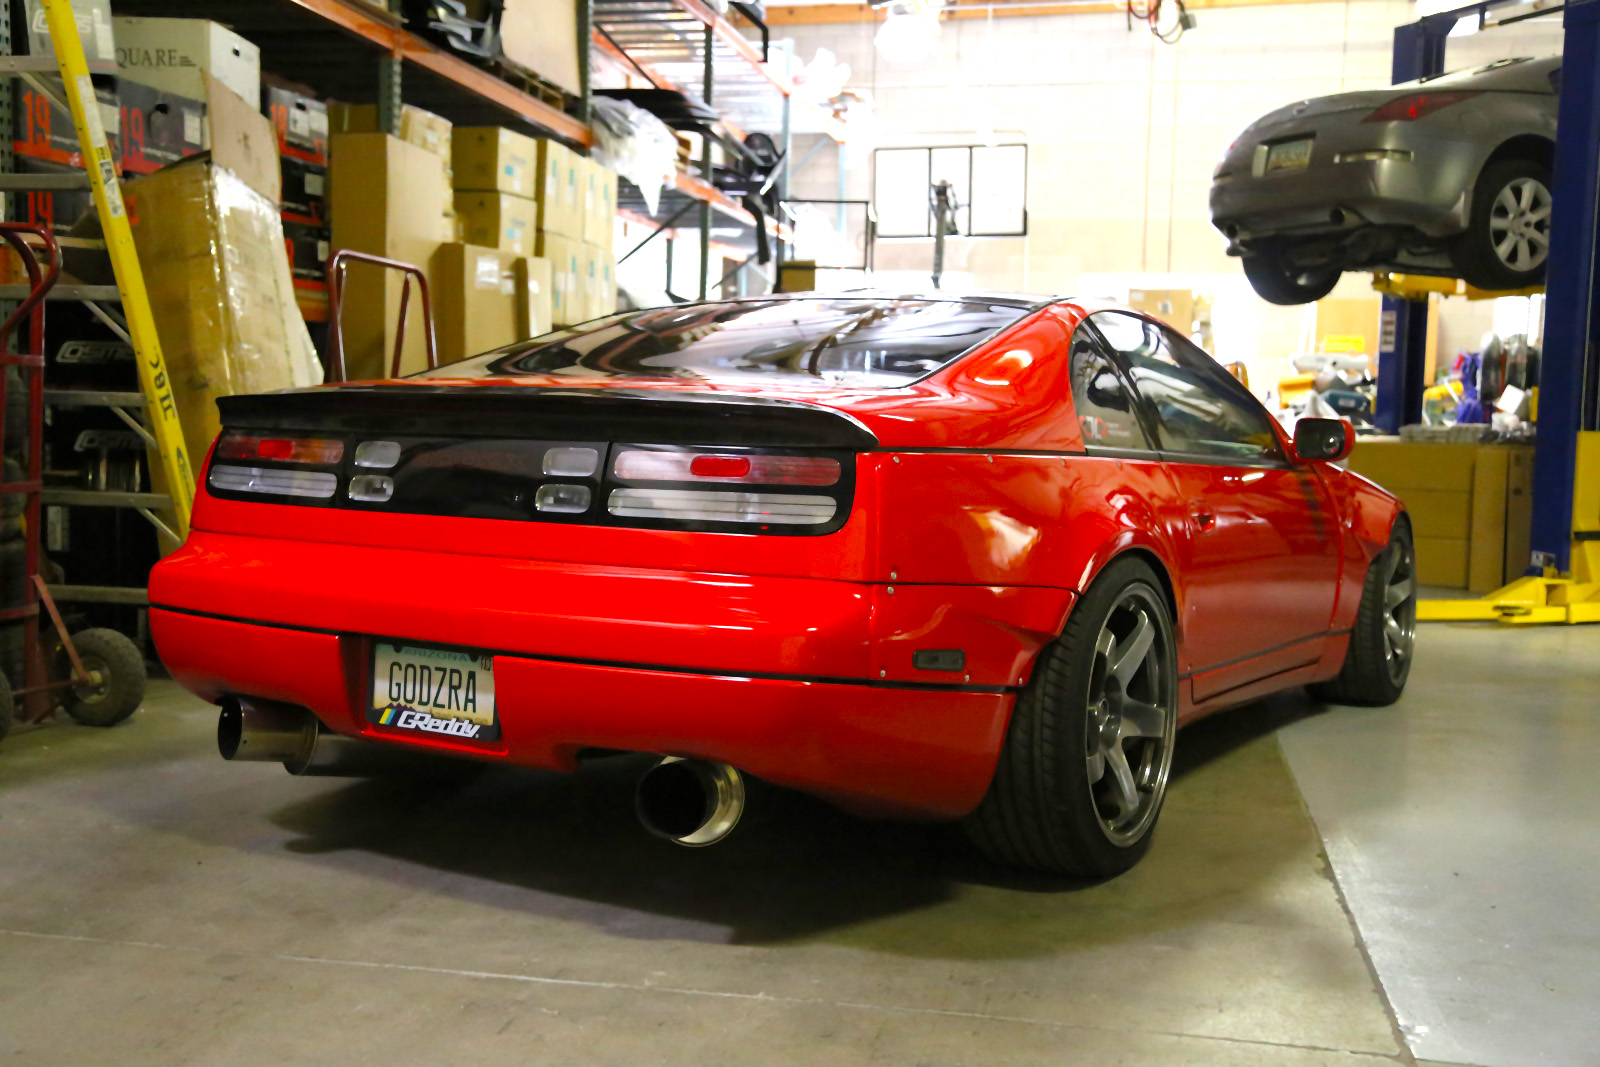
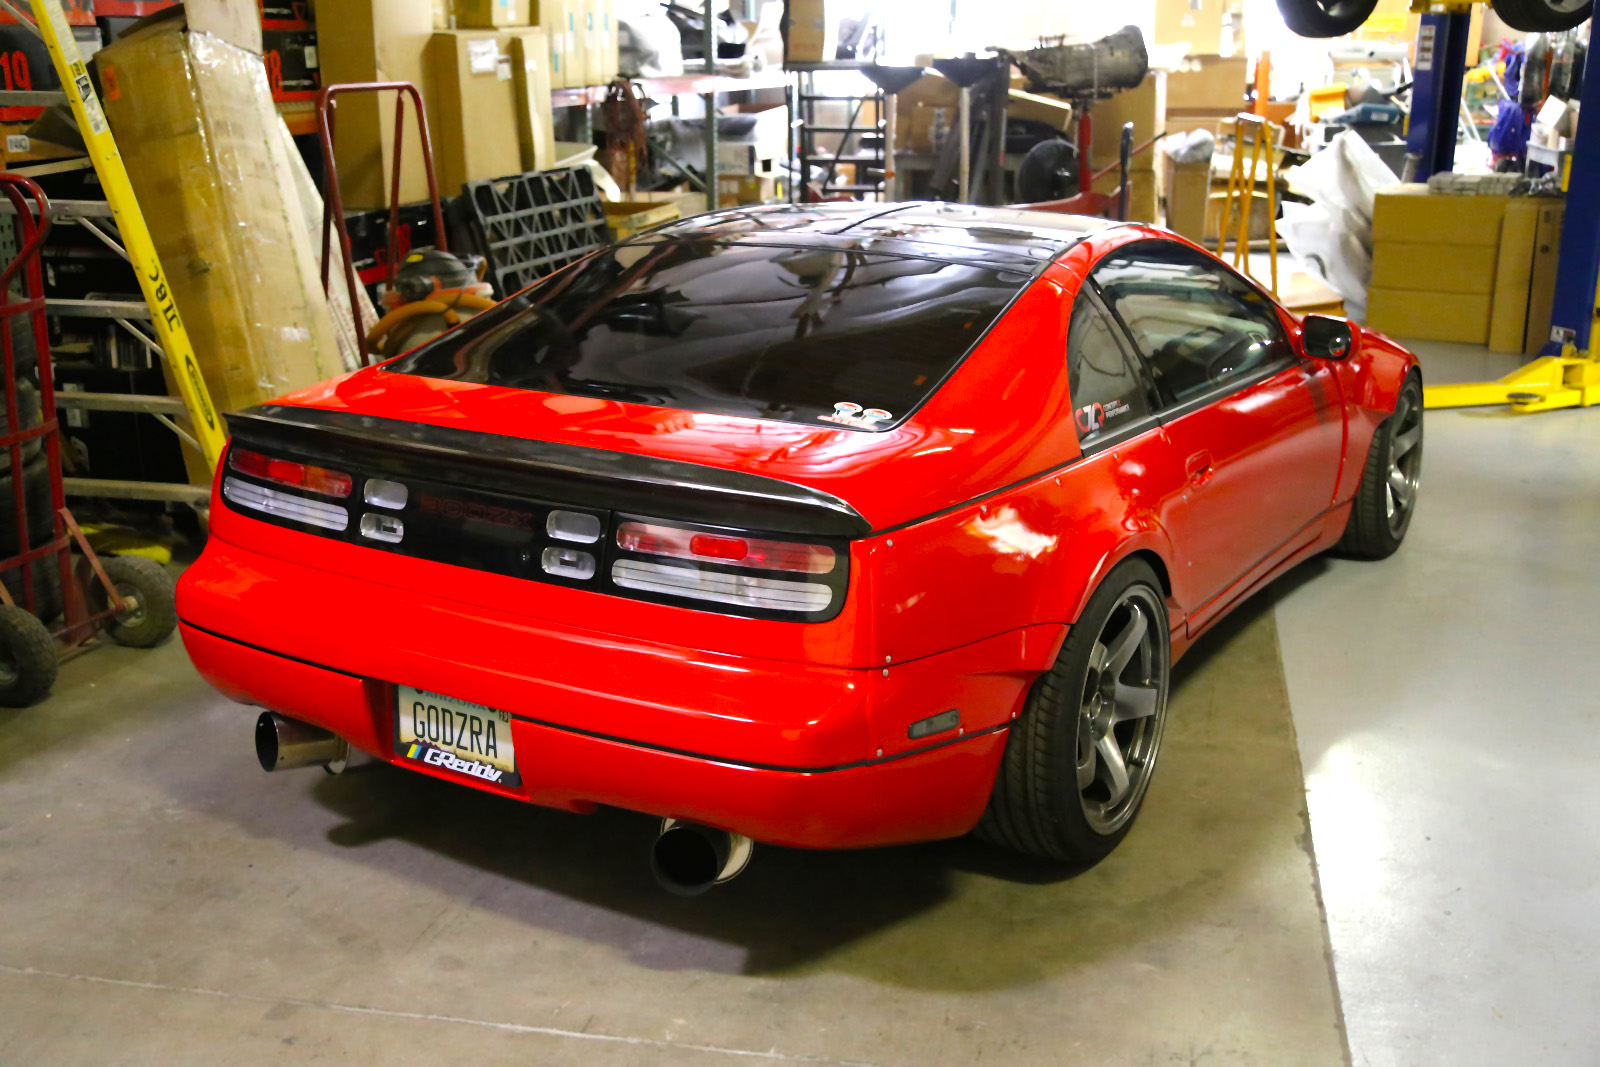
I finished the car (mostly), and had been driving it around for a couple of weeks. Just for a reference, this is what my car looked like before we started prepping it for the widebody kit.
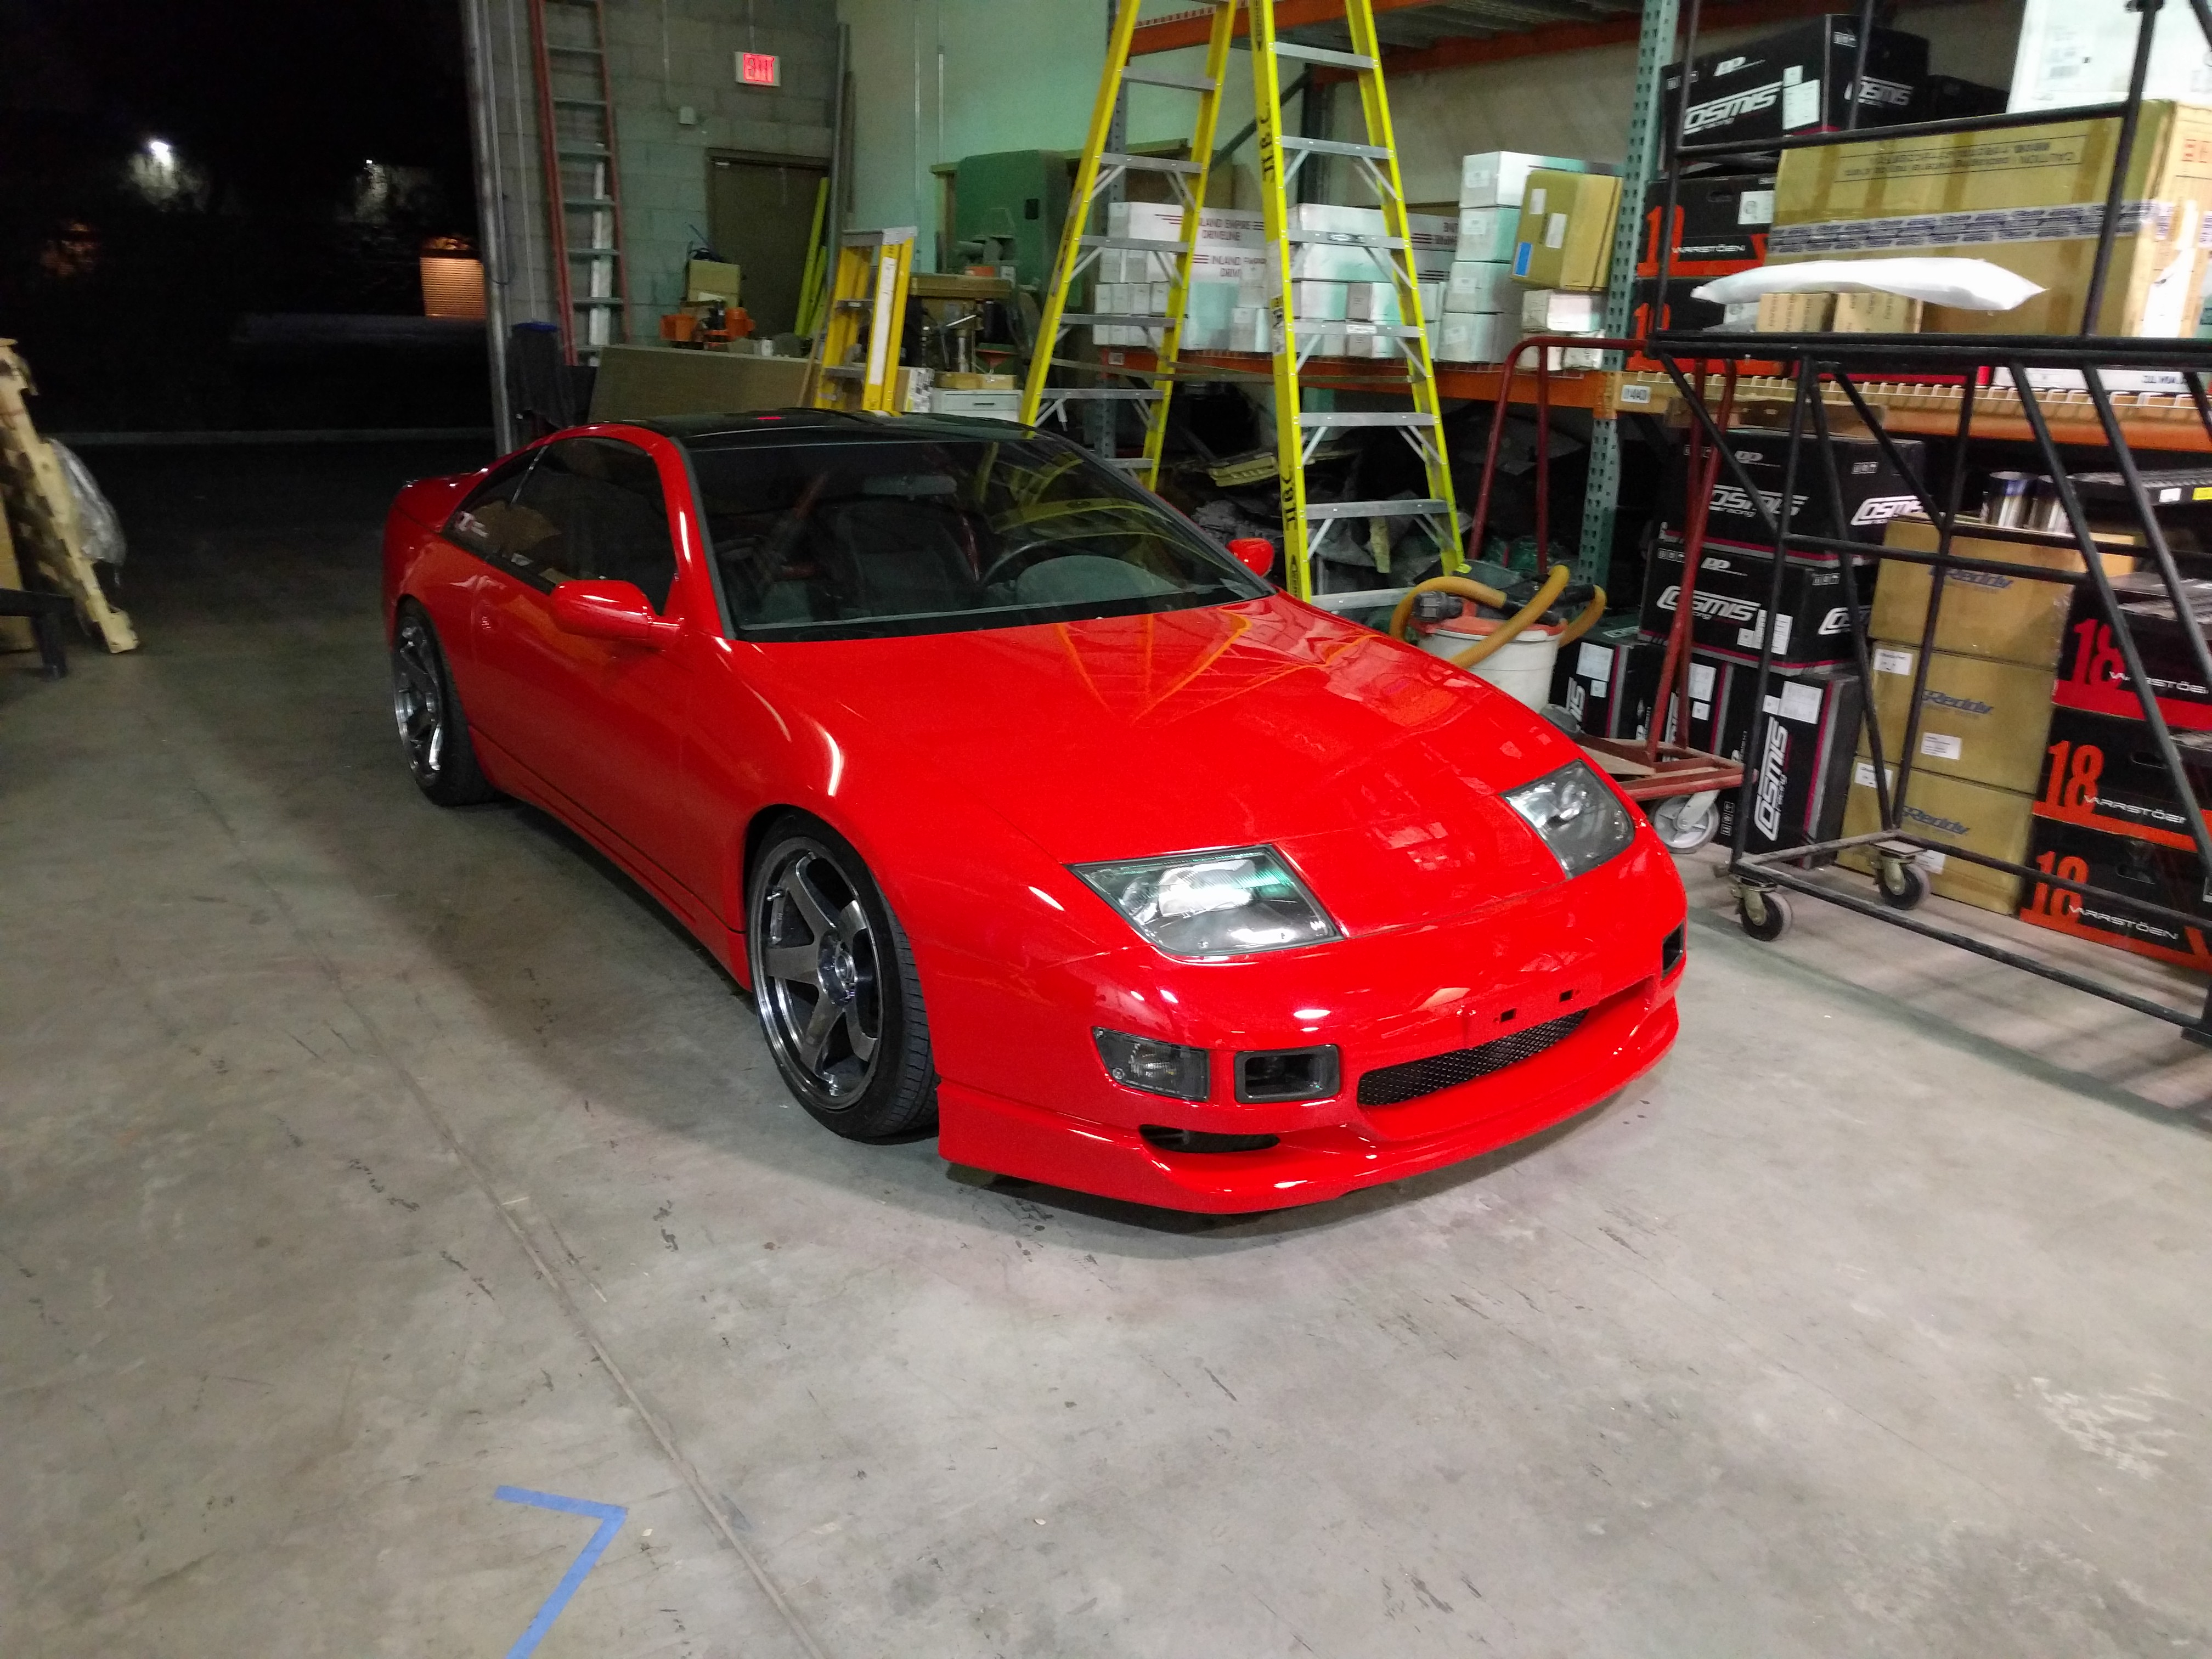
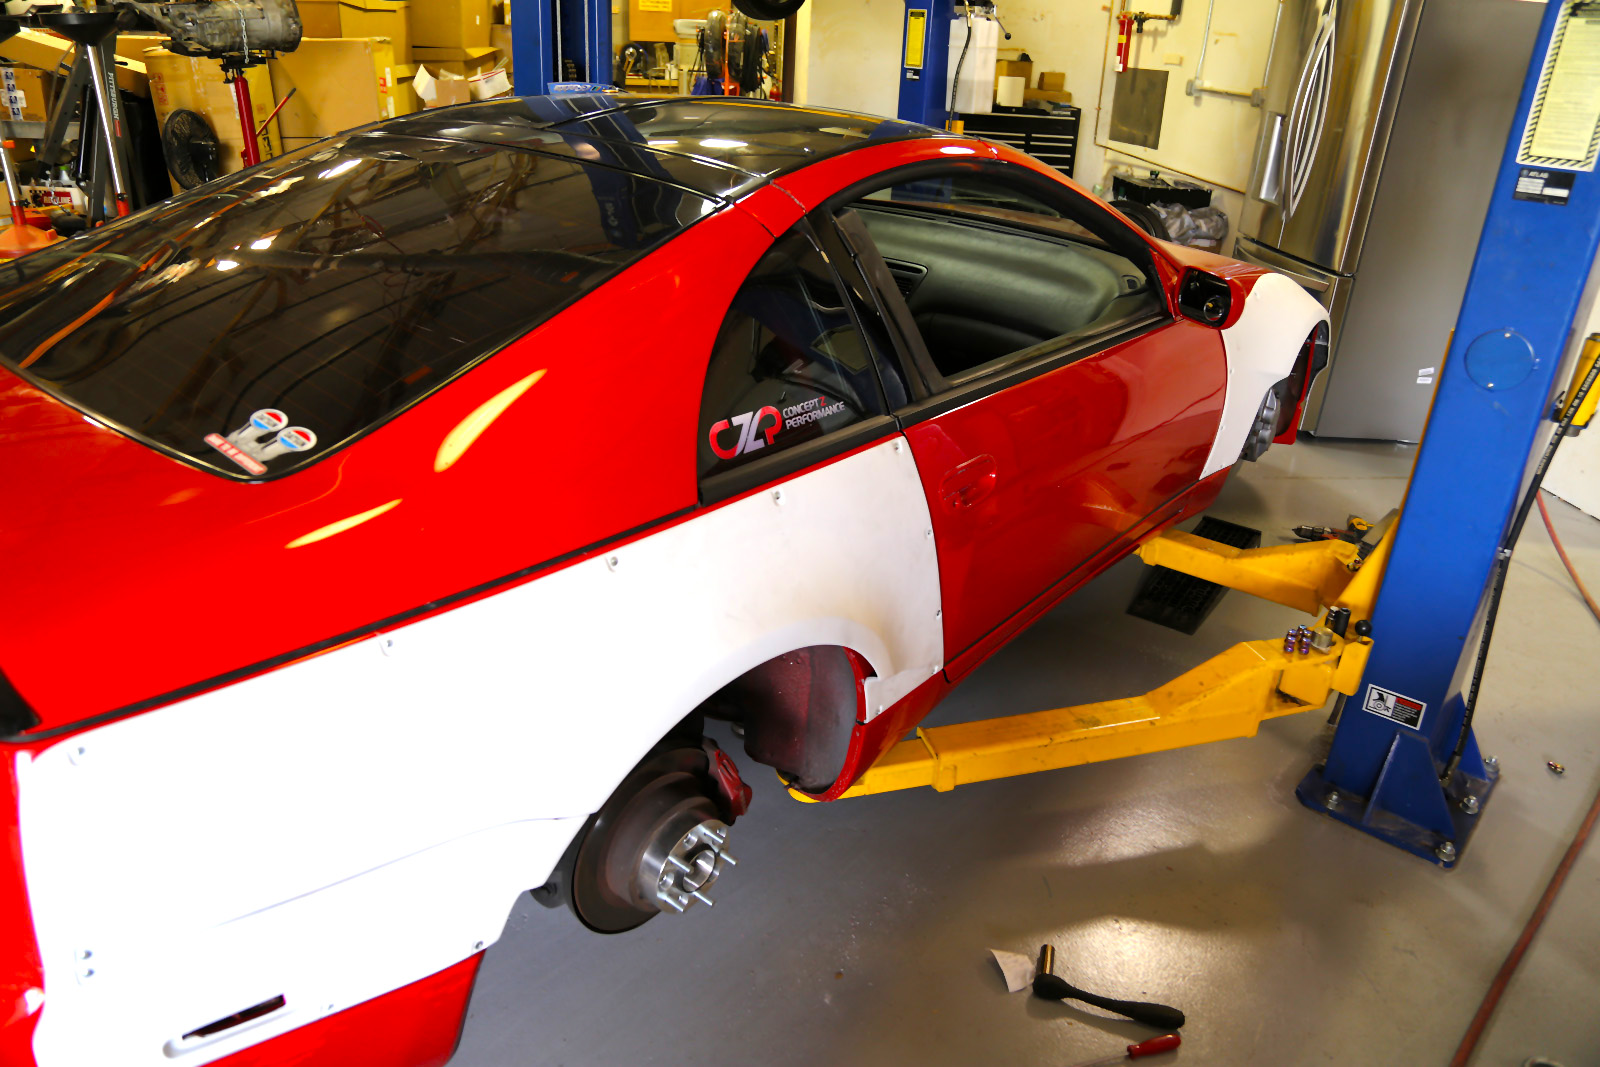
My car before preparing it for the widebody kit.
On the day of the install, I bought it and pulled the wheels off.
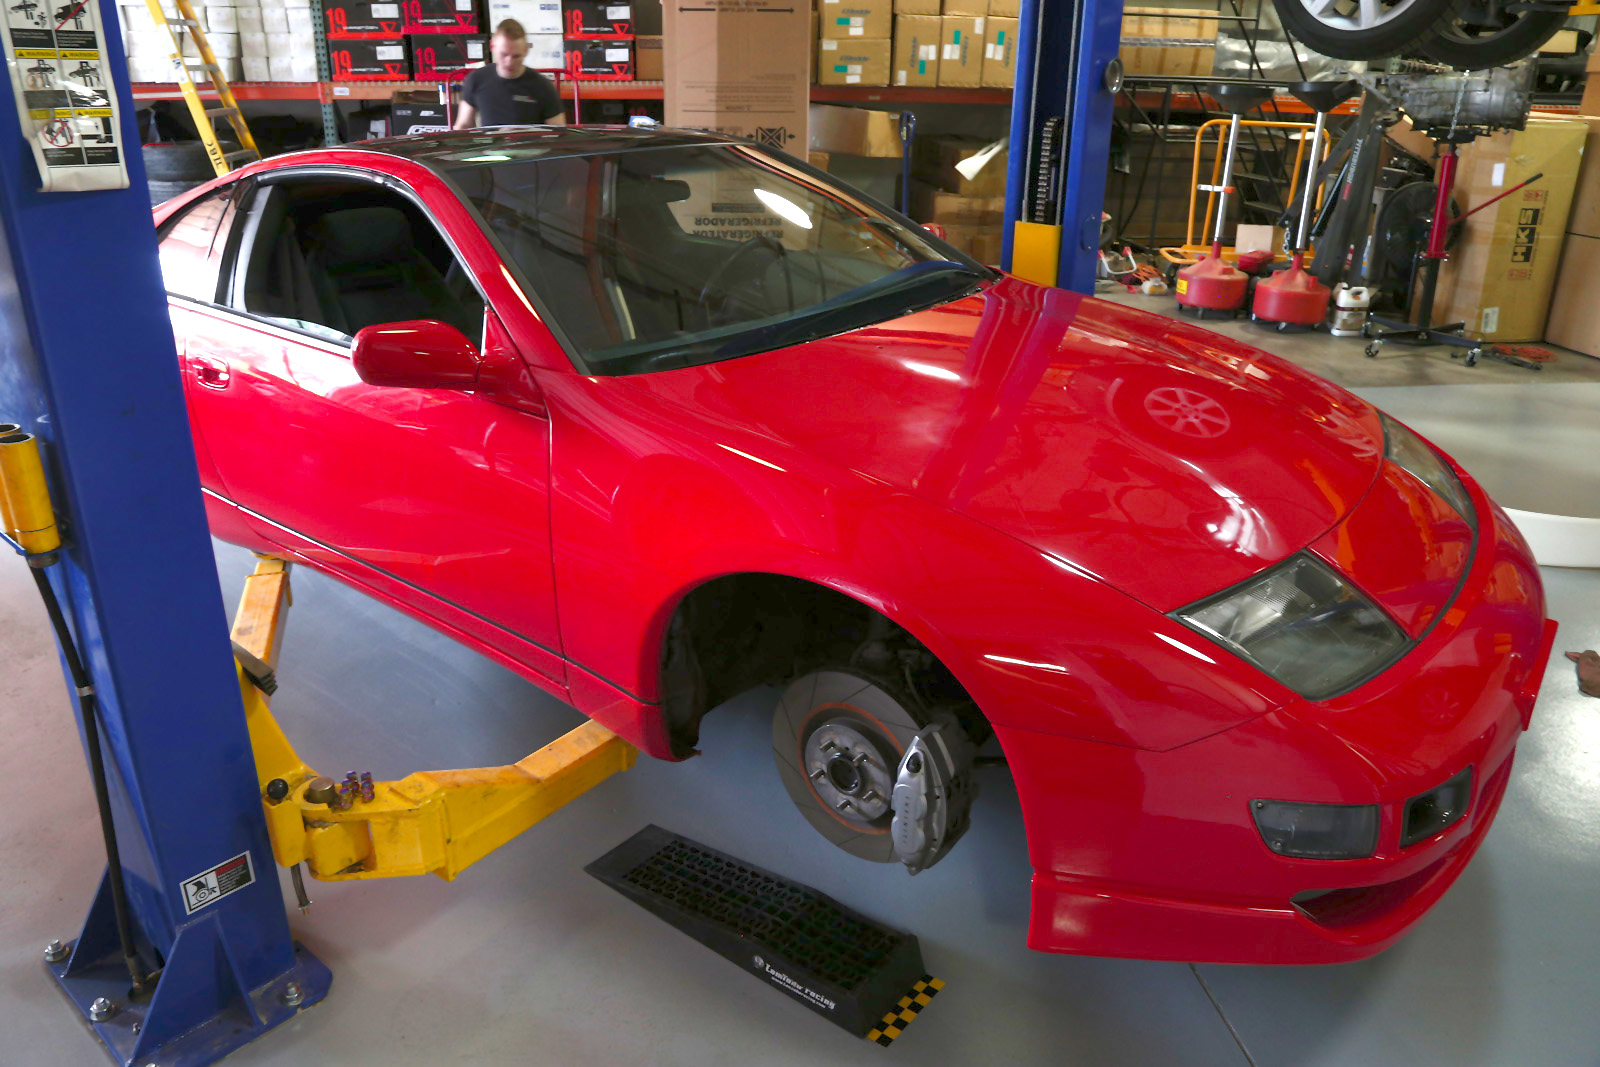
The day we started the install. This is the last time it will look stock!
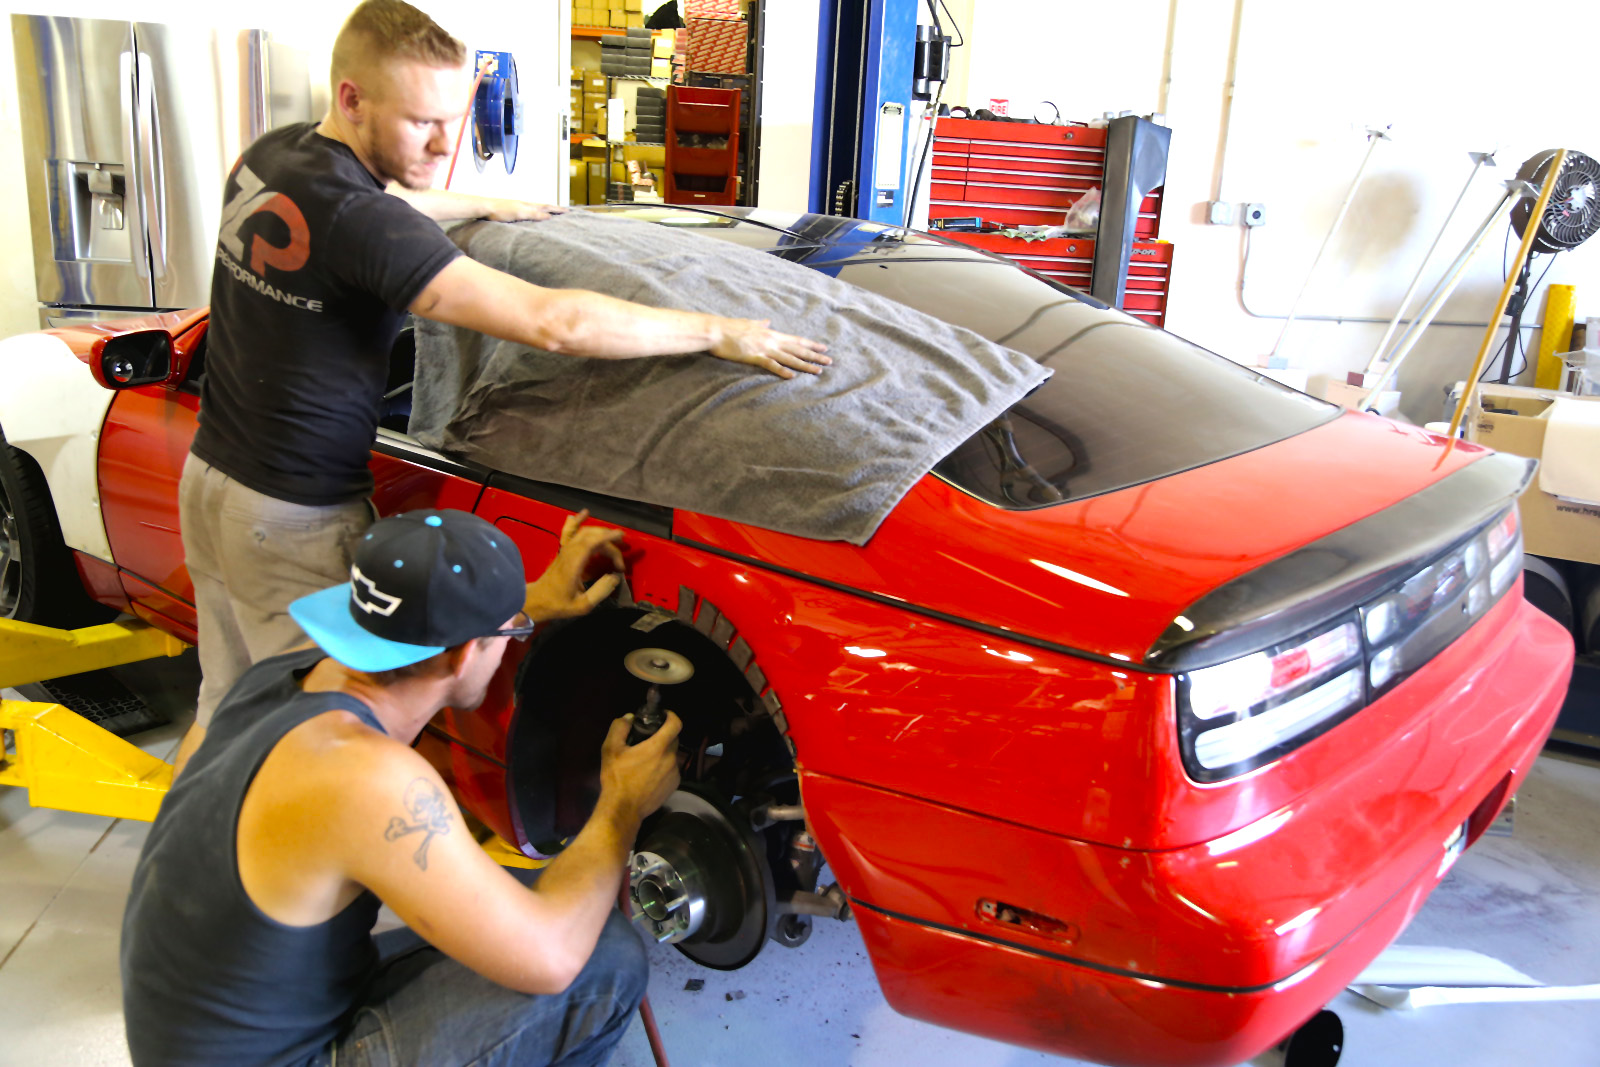
UpTuned Automotive sent over one of their techs, Taylor, who already had experience on various other cars, including S14s, some Mercs, and others. UpTuned is the same shop that painted the car a few months prior, so we figured they would be the best people to ruin their fresh paint job!
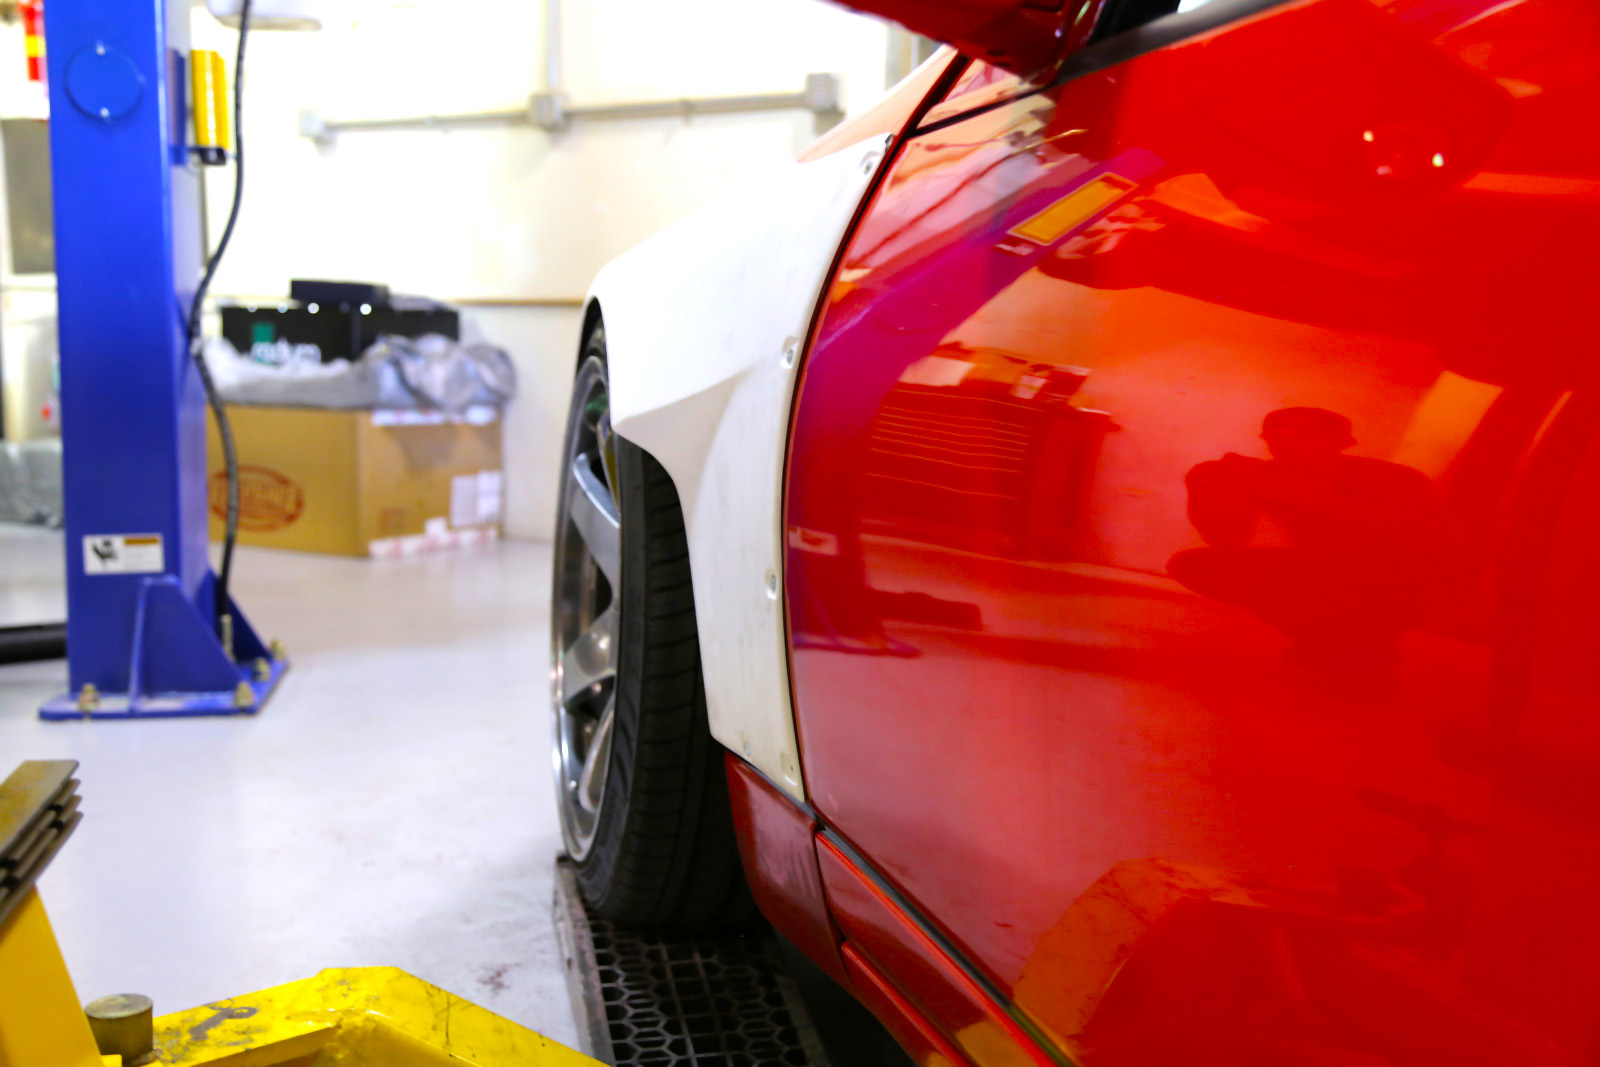
And we pretty much got started right away. For the initial mockup, we literally just positioned the panels, and started drilling pilot holes. For the sake of getting started, we’re using self-tapping screws. In the near future, it will use nutserts with allen-cap screws.

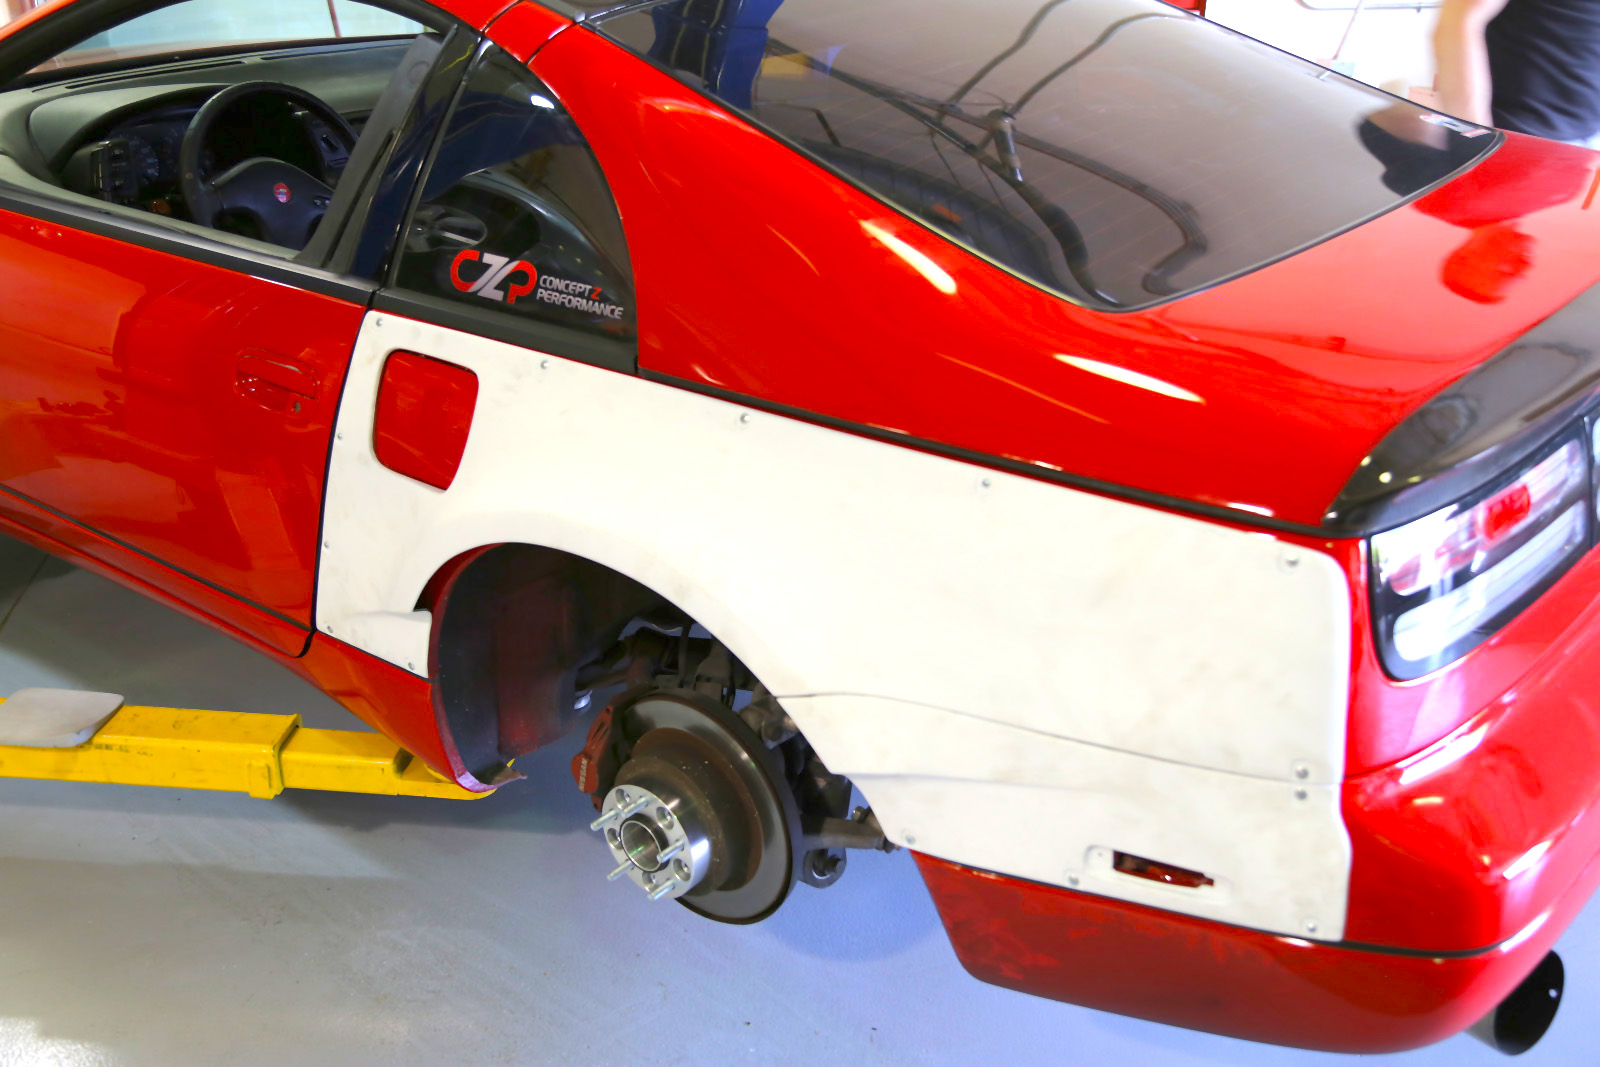
We started with the left rear quarter panel. Taylor made me do the first screw 🙁
Then we checked a couple parts for clearance.
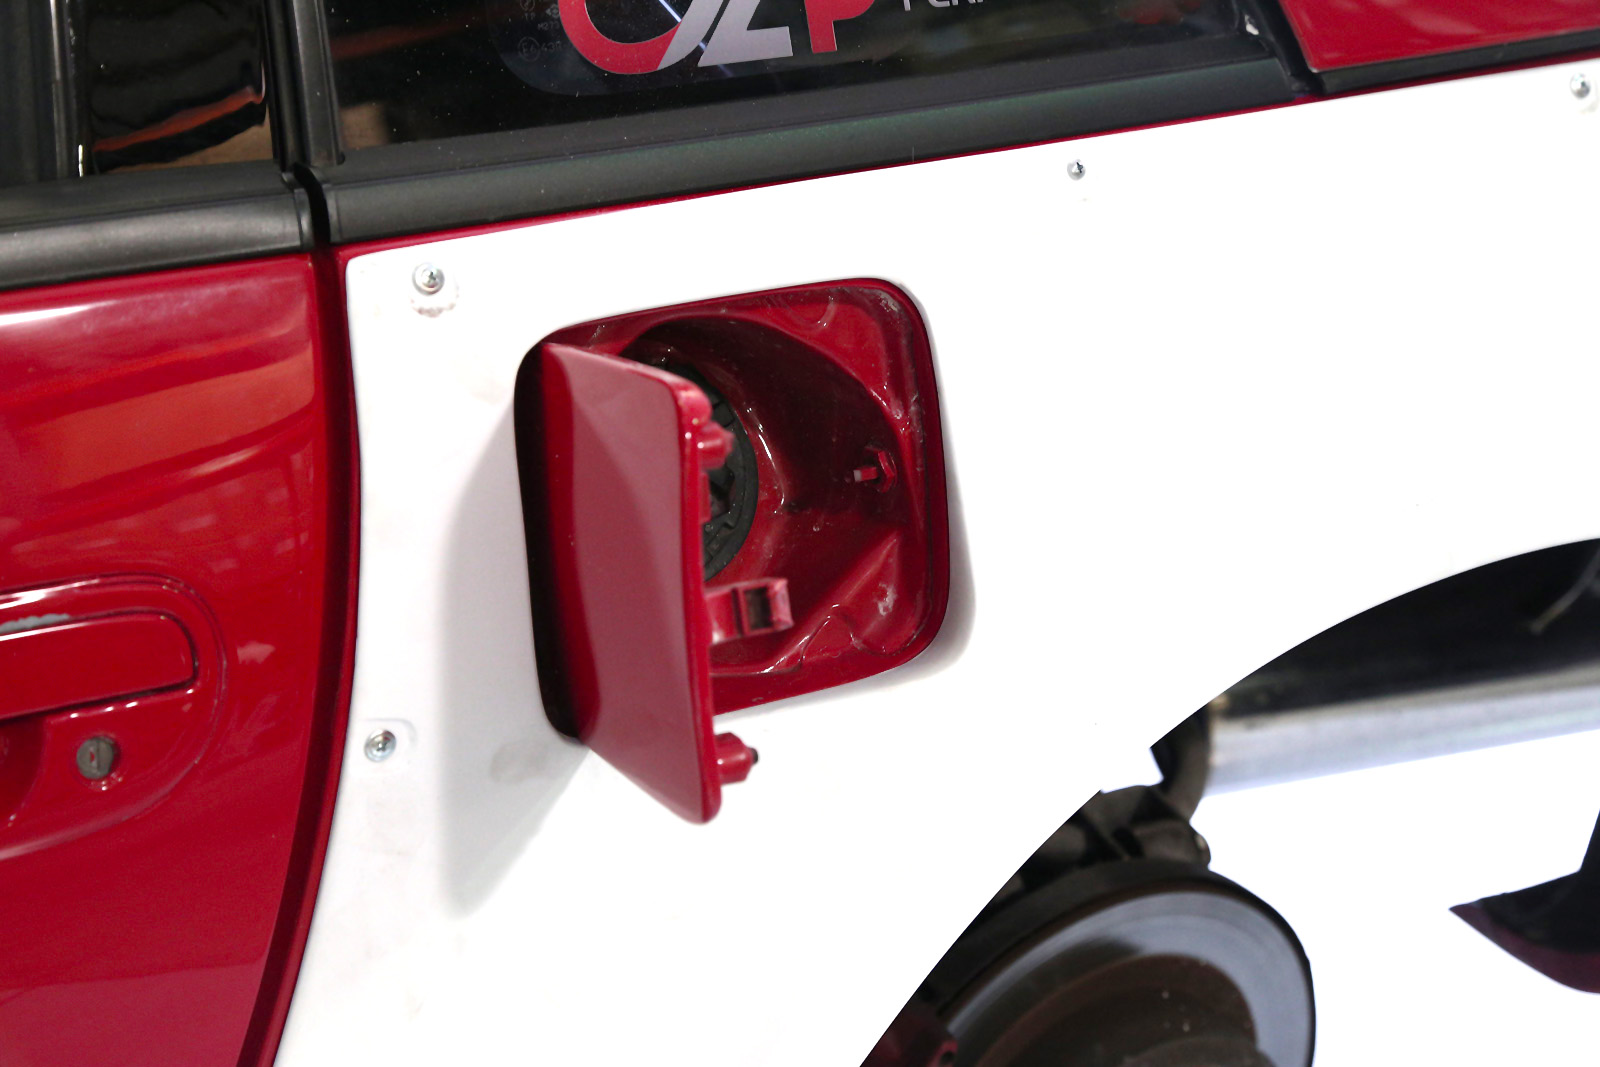
Fuel door opens!

Side Marker hole lines up!
The ZERO kit has a native mounting hole for the stock side markers, it basically replicates the mounting point on the stock bumper, and seemed to line up and fit perfectly.
After getting the first fender mocked up, I started playing with some wheel setups to eyeball fitment.

You gotta do what you gotta do…

My normal wheels, but with a 38mm spacer.
First, my stock wheels with a giant spacer. This is basically 18×9.5 -18 offset. Not wide enough to take advantage of the kit by any means, but enough to see how it looks until it gets real wheels. Then, with some help from Coz & Ray, we mocked up a Volk TE37 in 18×10.5 +15. It would probably still need a spacer to get the look we like, but could wear a lot more tire, too.
TE37 Test Fit!
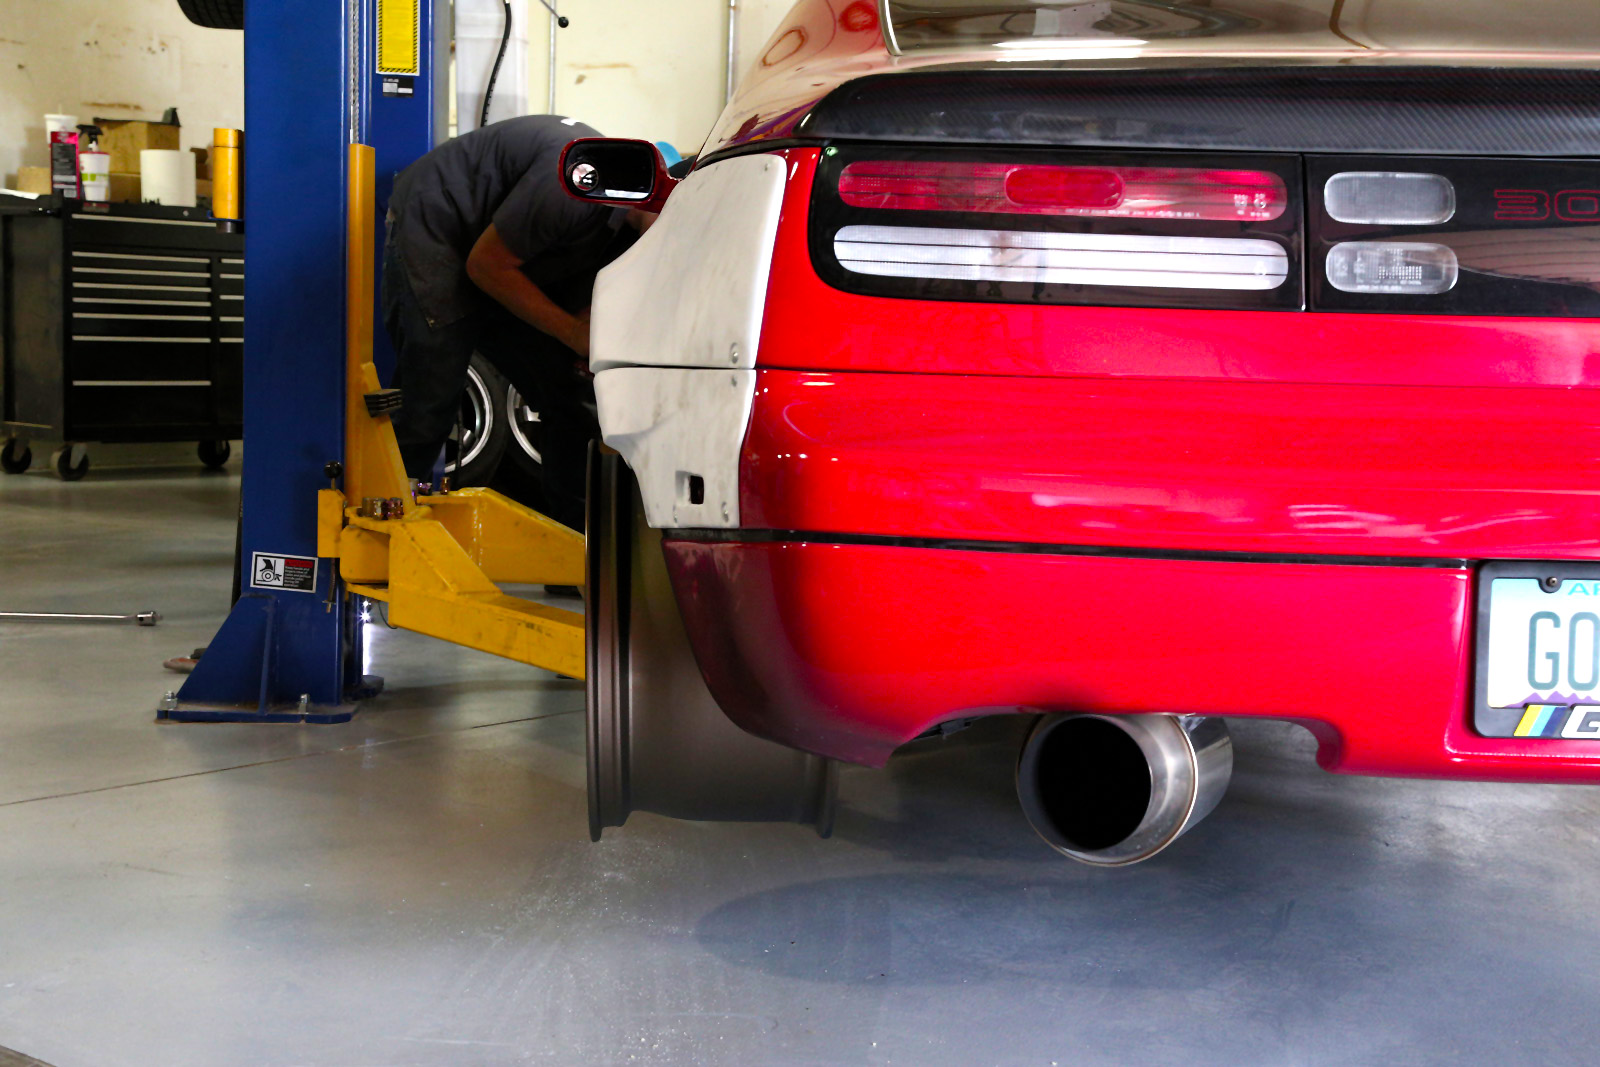
You may have noticed in these last couple of pictures, the alignment between the two panels is pretty poor. The panels, as they’re manufactured, have a “backing” lip that basically makes the sticky-outy parts touch the chassis of the car on the backside. While most people will cut the majority of this away, we decided to leave it in place so customers can cut as much, or as little, as they want. However, my car has rolled + pulled fenders already. Because my car’s body sticks out further than the kit’s design expects, this was causing the panels to bow out a bit on the mockup. Before installing the next overfender panel, Taylor cut the backing lips, before returning to the LH side and doing the same.
Trimming the lips on the bumper extension panel.
Really get up in there…
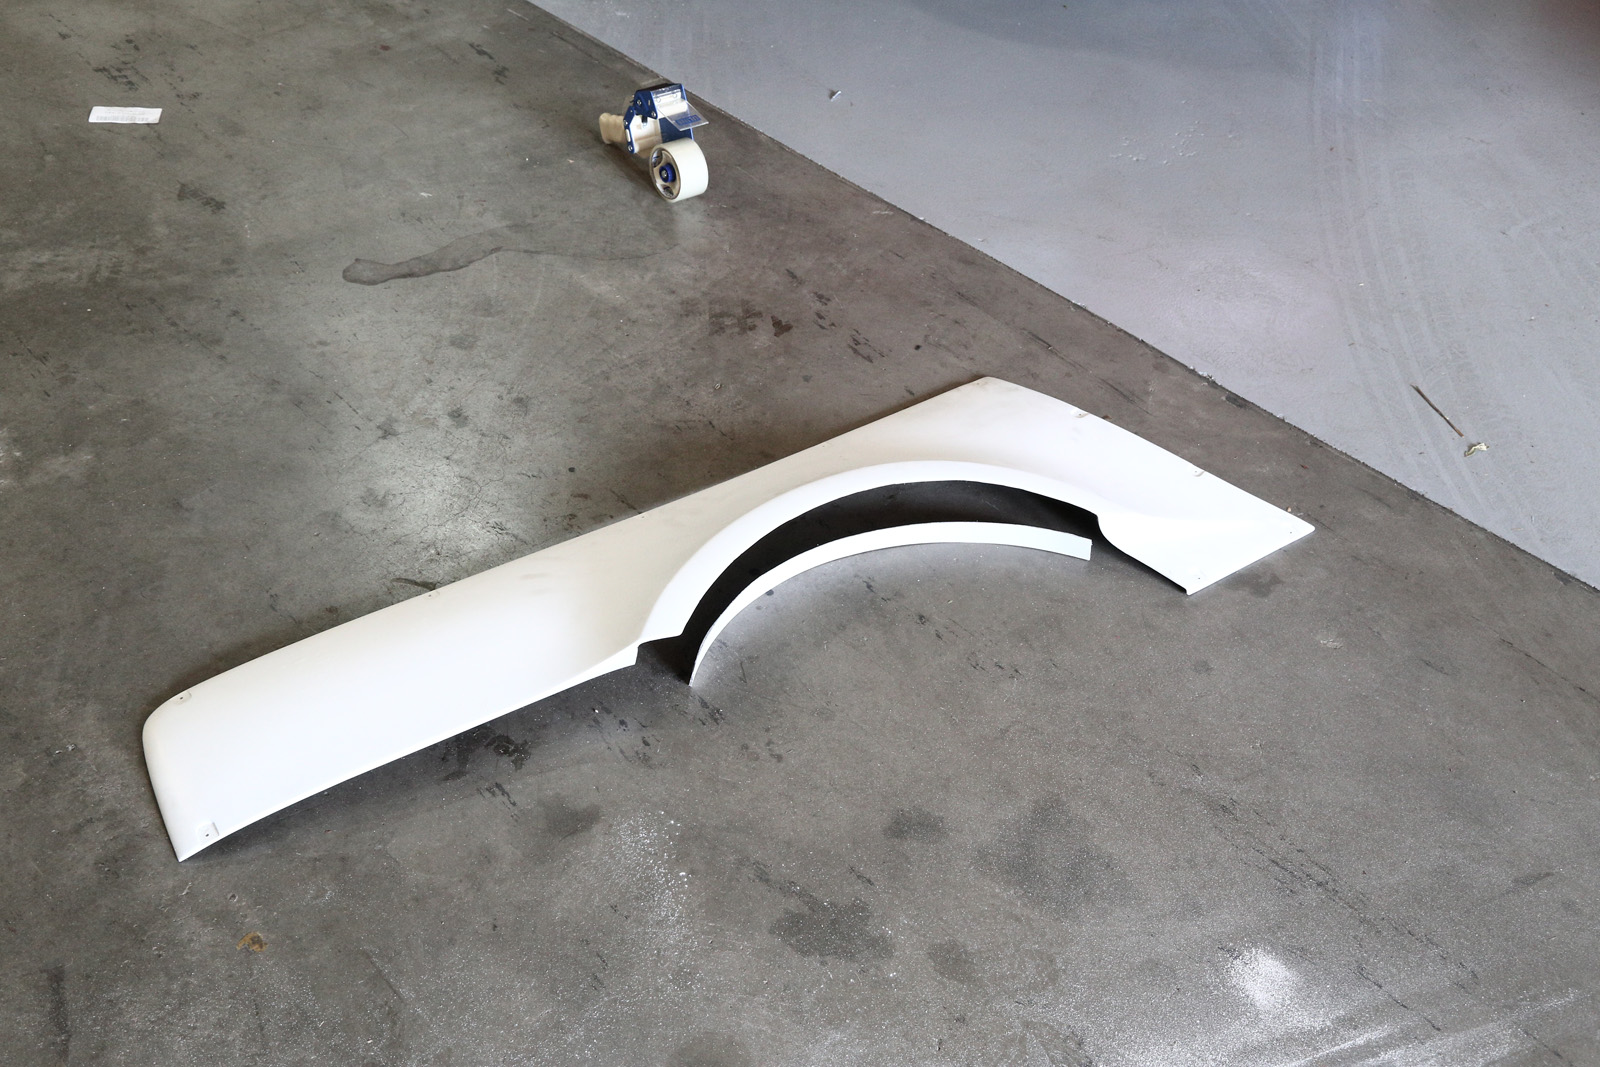
The Rear RH panel, to give you an idea of what we were removing.
As we test fit the RH side, we found this absolutely did the trick, so we pulled off the other side, and trimmed the front panels as well.

Mounting up the RH side.
RH side fitted.
After trimming the inner backing lips, the panels certainly come together a lot better. We also ended up tapping and screwing the two halves together, where they meet near the wheel well, which really helped to keep things nice and tight.
LH side corrected and fitted. Isn’t that better?
Another point to note, the production version of this kit actually has four more mounting points not shown in the above shot, that normally would be between the upper and lower panels. I opted to have them filled and smoothed out on the kit going on my car, just because I prefered the look which was truer to my original mockups. The production versions will likely keep these mounting points, to give installers additional points to line things up. Any body shop capable of installing a widebody kit would have no problem filling them in if you wish.
With spacers on both sides, this also gave us a chance to see how the wheels would fit under the rear end. We couldn’t yet drop it down, as the stock chassis was still untouched.
Dat ass.
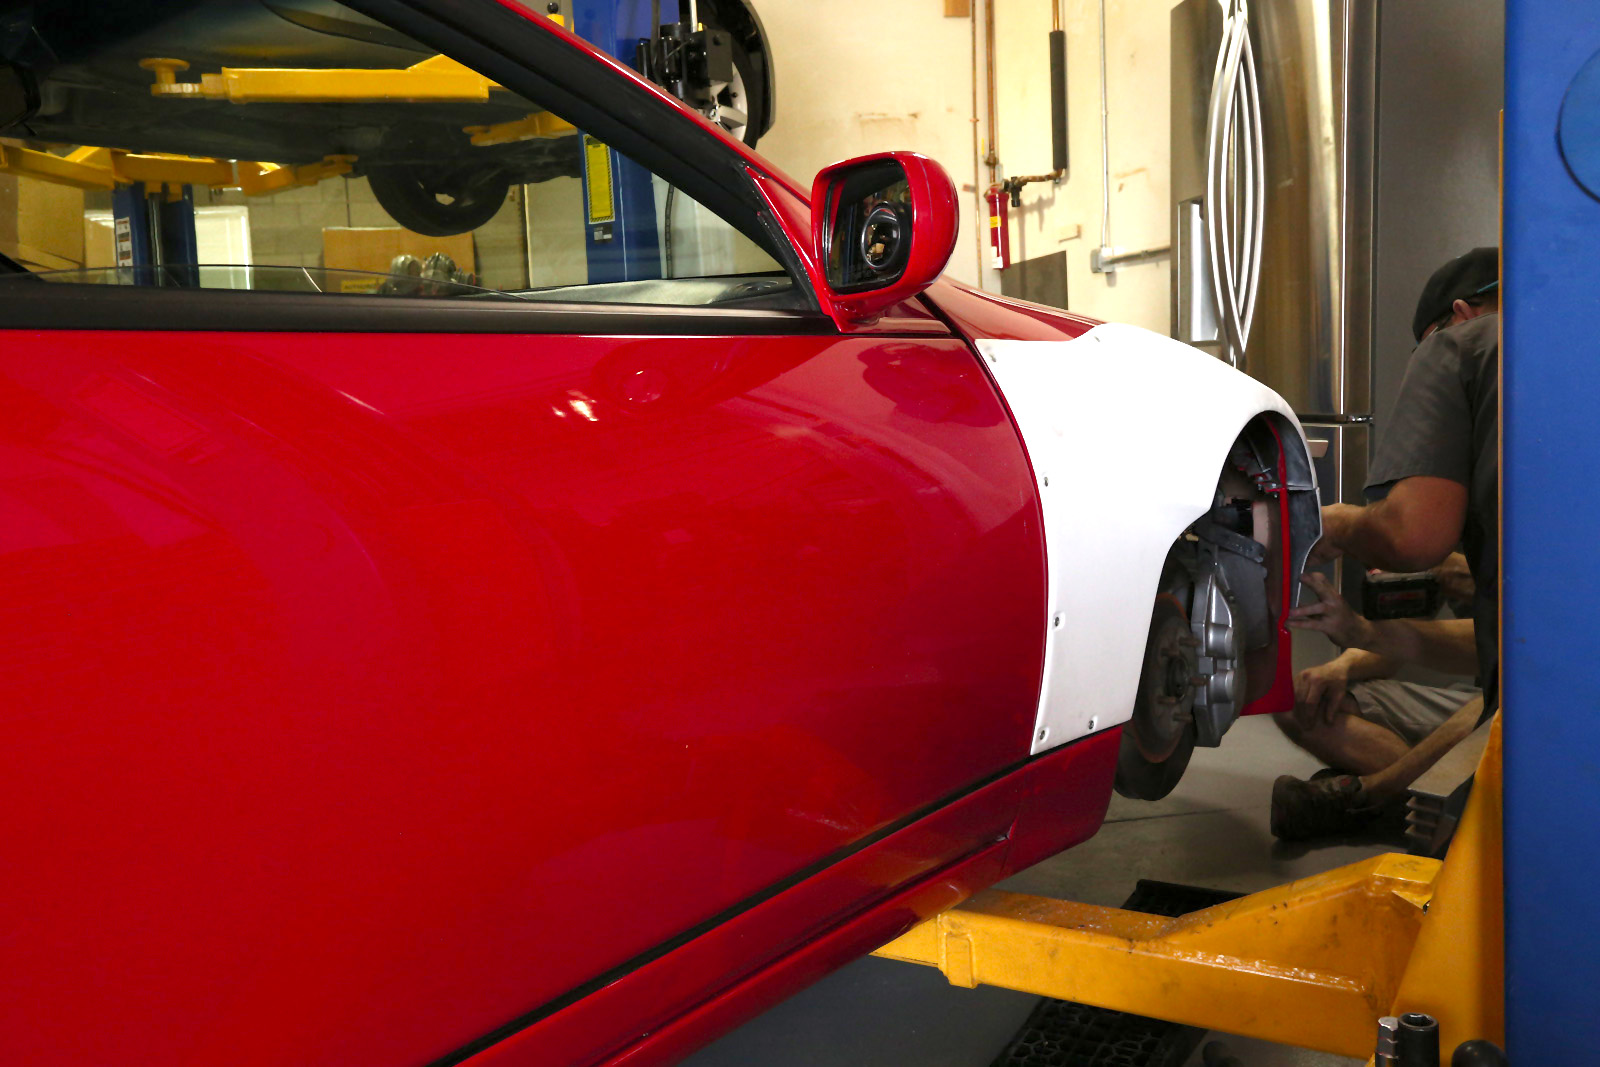
Next, we started mocking up and drilling on the front fenders.

Don’t feel bad, this fender was trashed underneath all the shiny paint anyway.

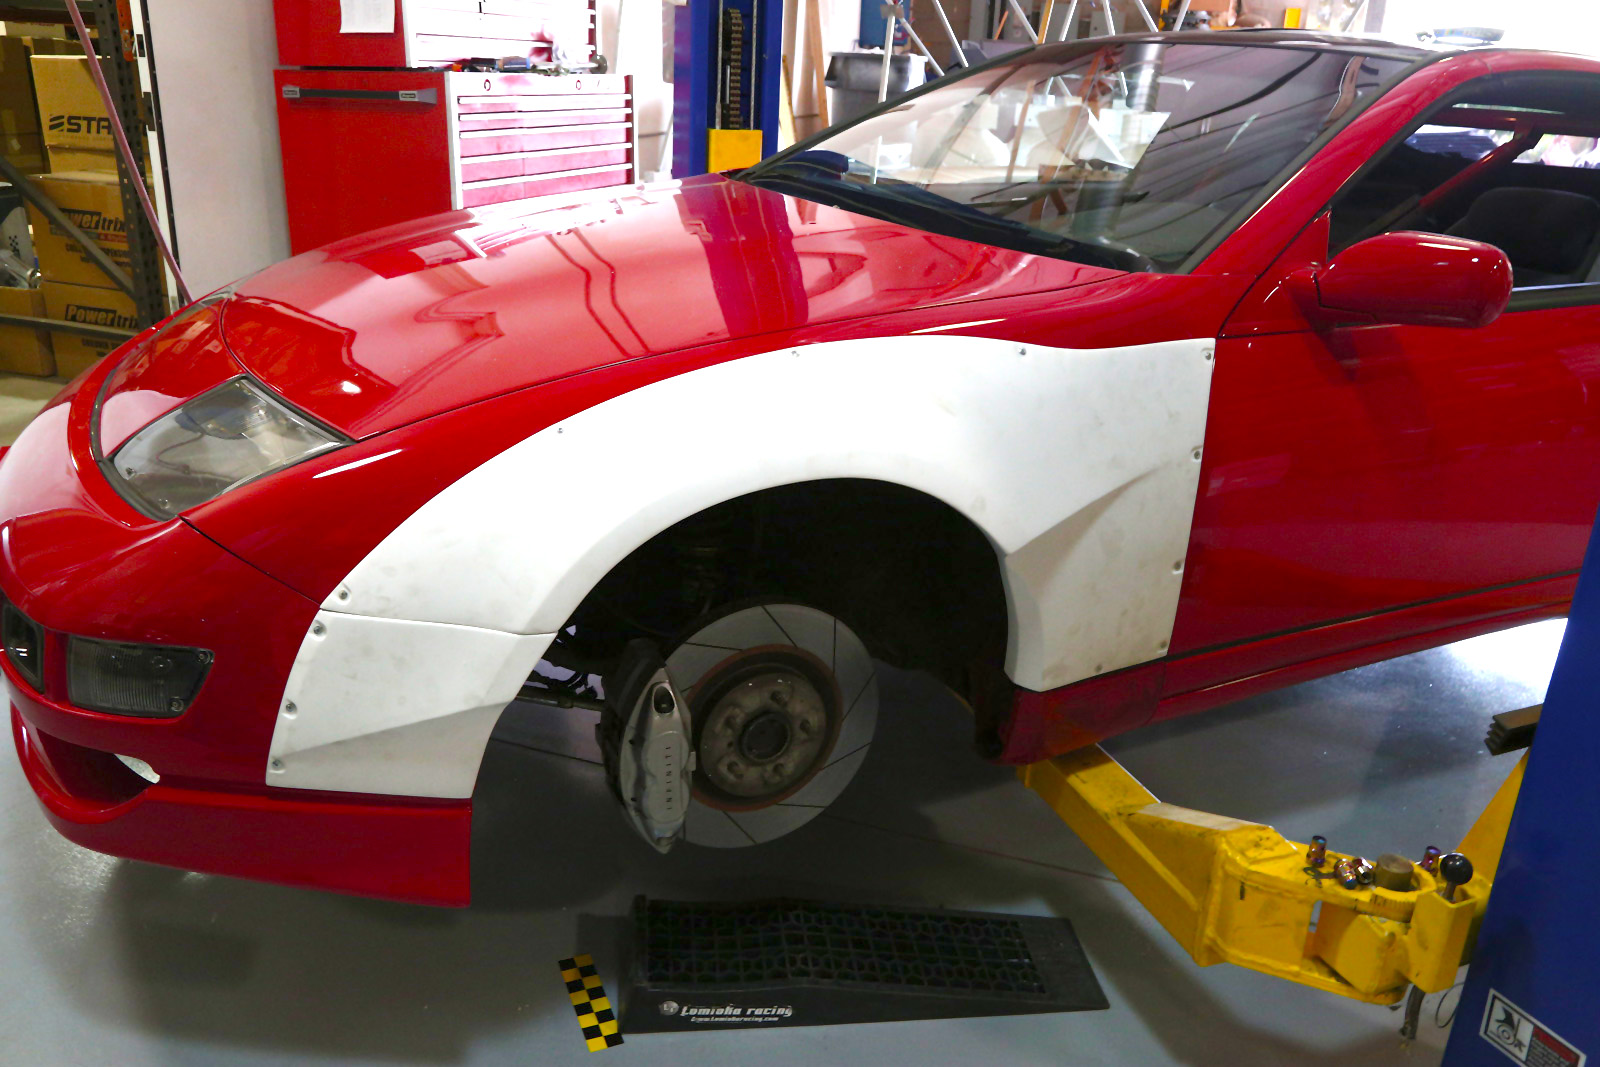
Front RH mocked up.
The front RH gave us a little trouble, but this fender had previously been damaged pretty badly, and actually repaired by Taylor when the car was resprayed. Still, we took notes to make corrections for the final production version. “Pretty good” is not good enough for this kit.
The LH side came together without issue.
LH Side mocked up and fitted.
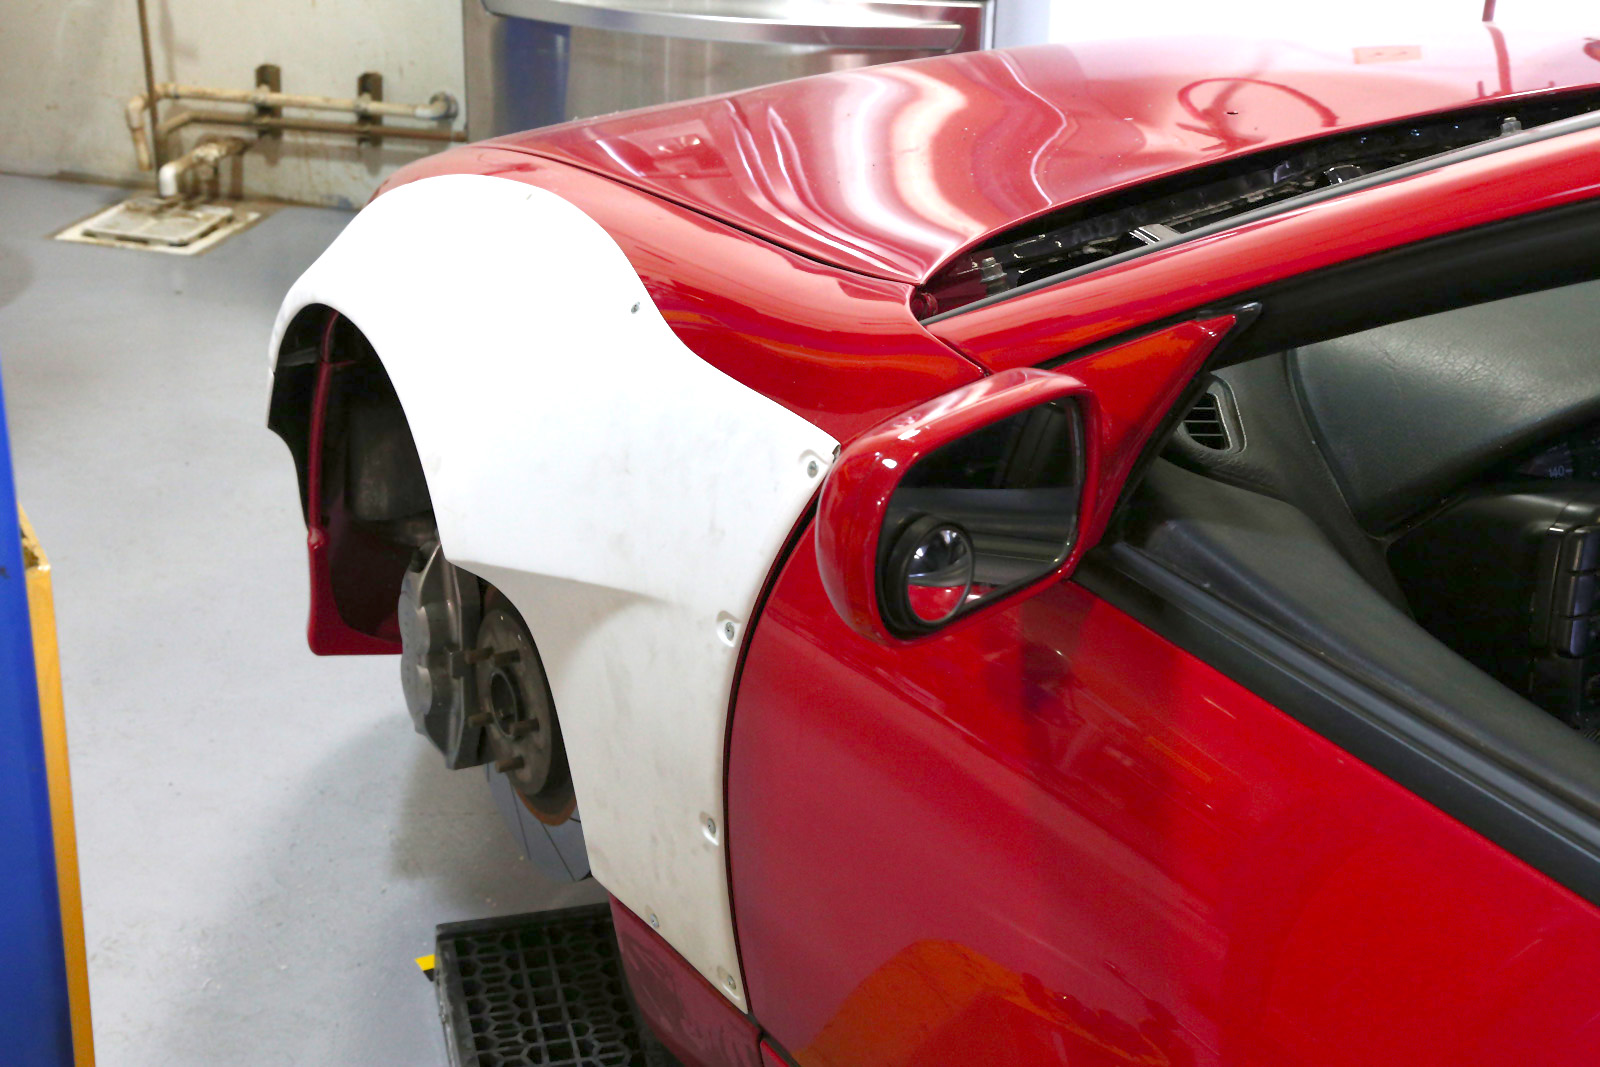
LH Side mocked up and fitted.
We also learned that, due to the design of the stock fenders, which have a folded inner liner near where they meet the door, the four screws securing the panel along the door line ended up needing to be cut down until they were only ~10mm long.
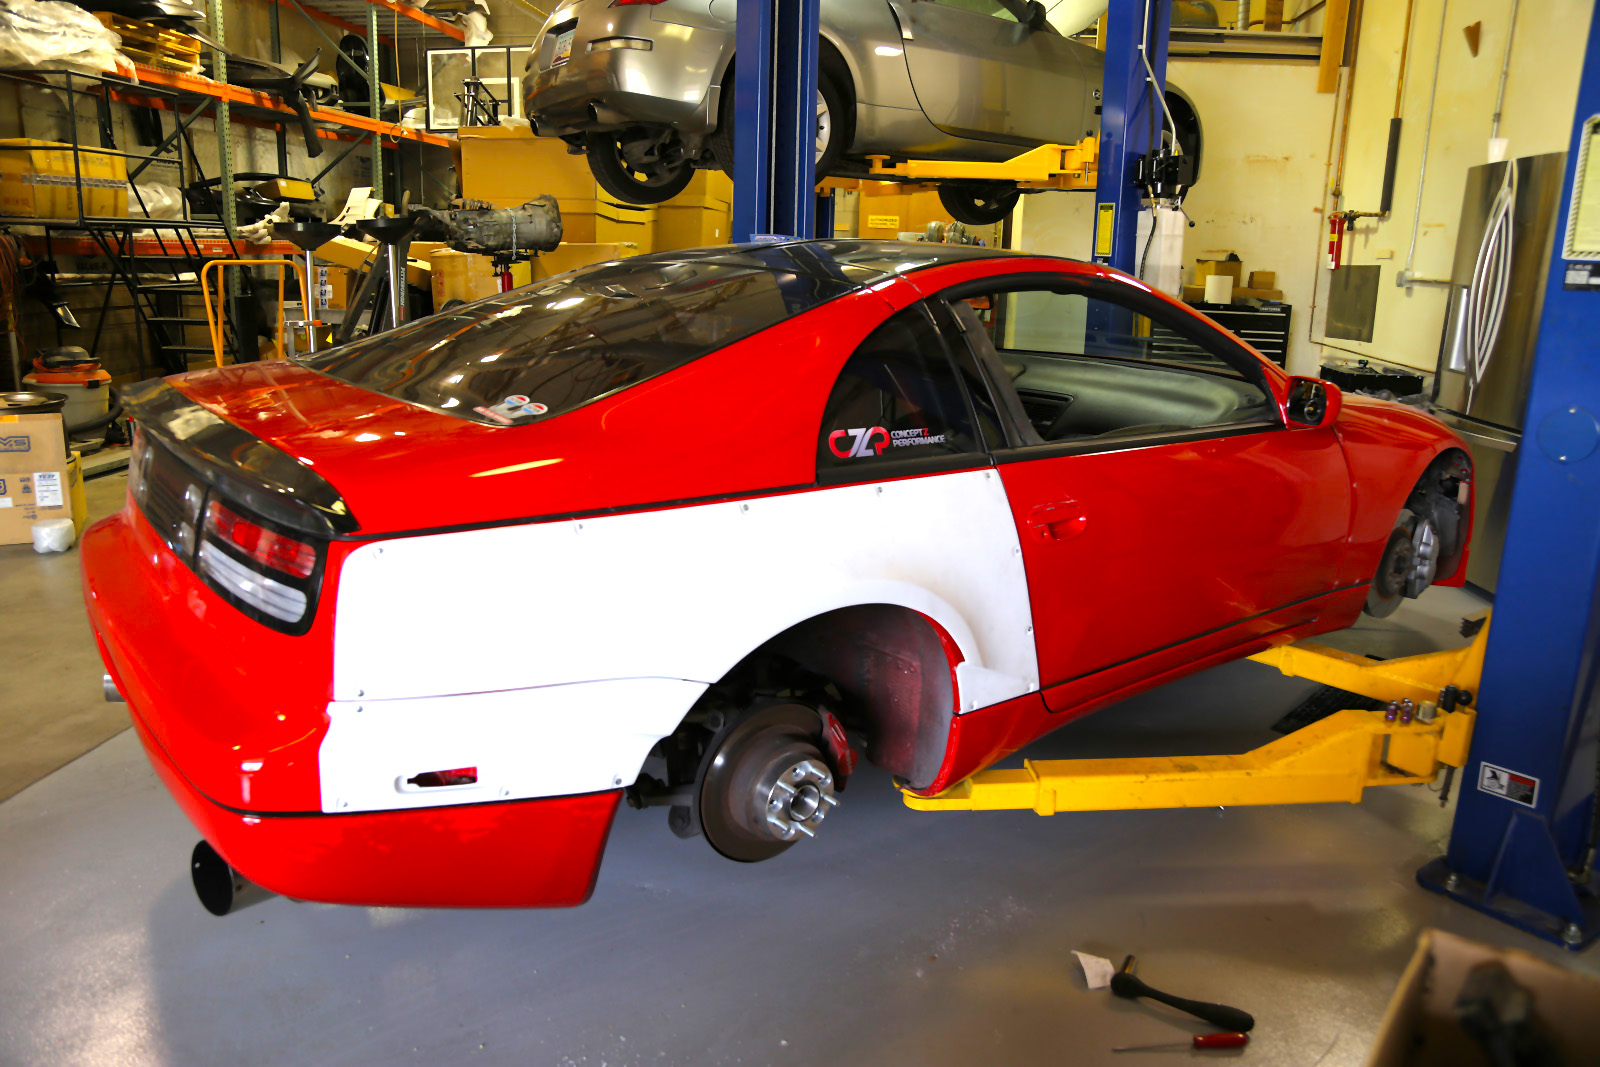
At this point, we also started to get an idea of what the kit looked like, fully installed on the car.
Fronts + Rears mocked up.

Fronts + Rears Mocked Up
As you probably guessed or already know, you can’t fit wide wide stupid fat tires under an overfender with the stock fenders still in place. They would just rub against the fenders every time you hit a bump. That meant the inevitable was next. The whole kit came off, and we began marking what had to go. We made paper templates on the LH side, then traced them out on the RH side so the openings would be made approximately the same between both sides.
Then… yup. We started with the fronts, since they’re simple sheet metal.
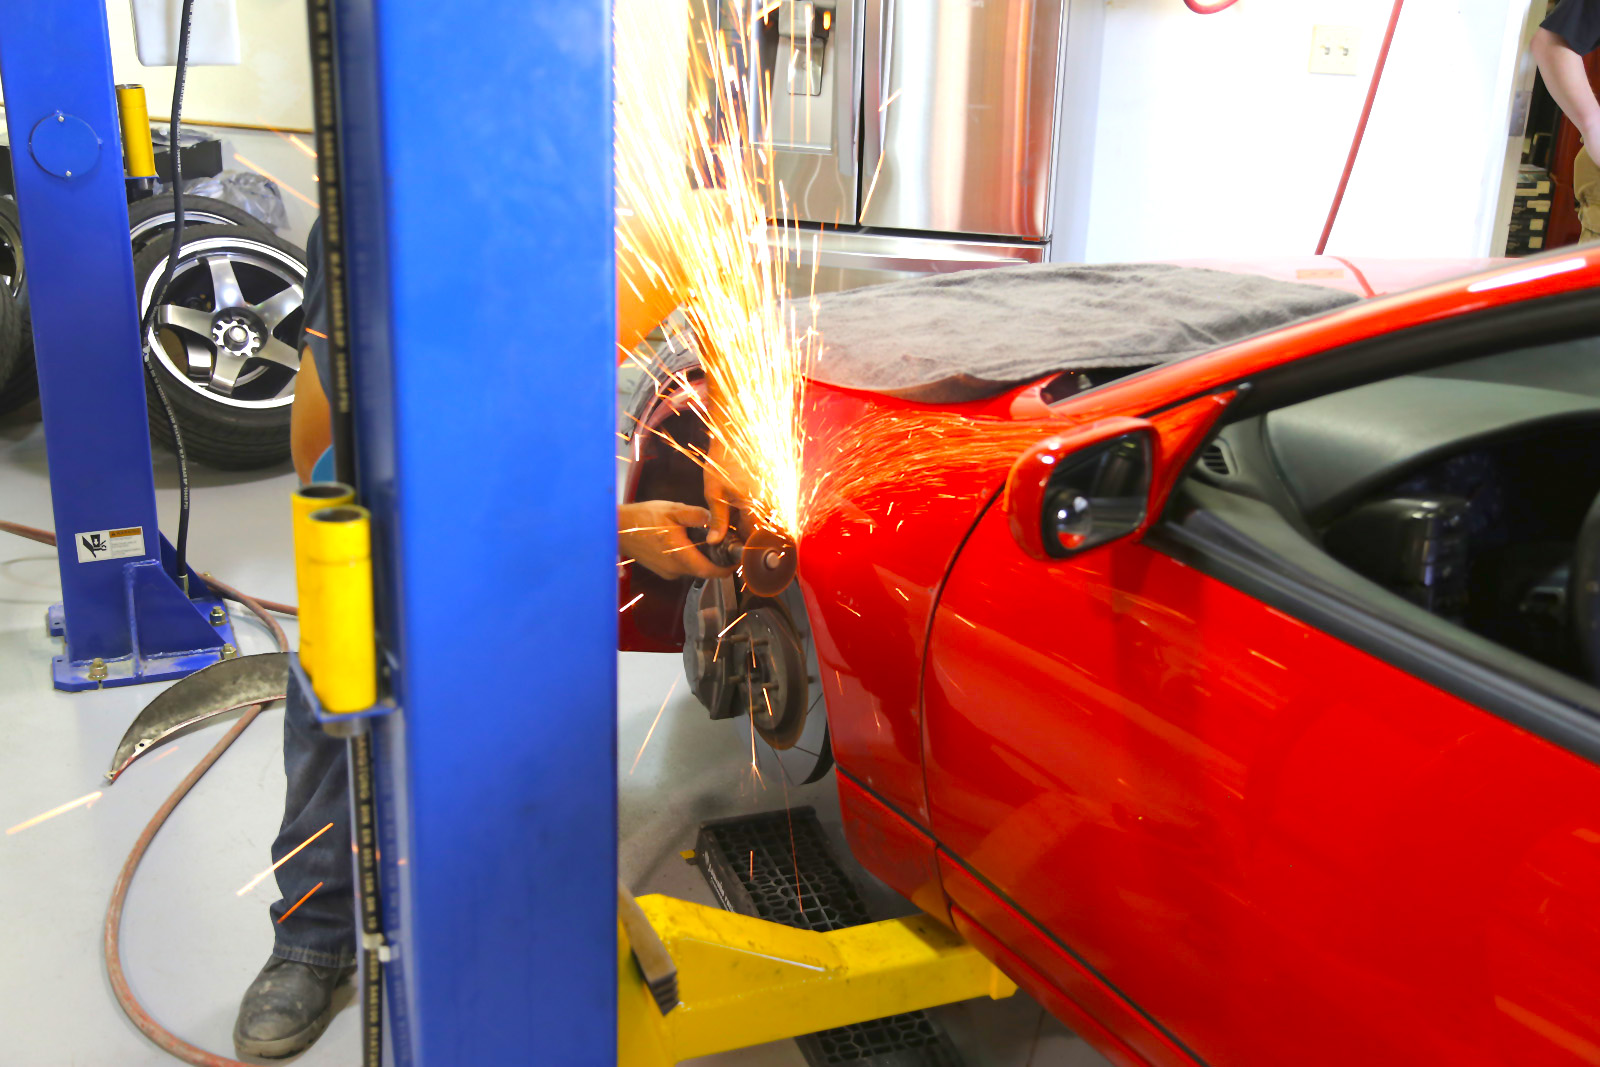
Cutting the front fenders.
Front Fenders opened up.
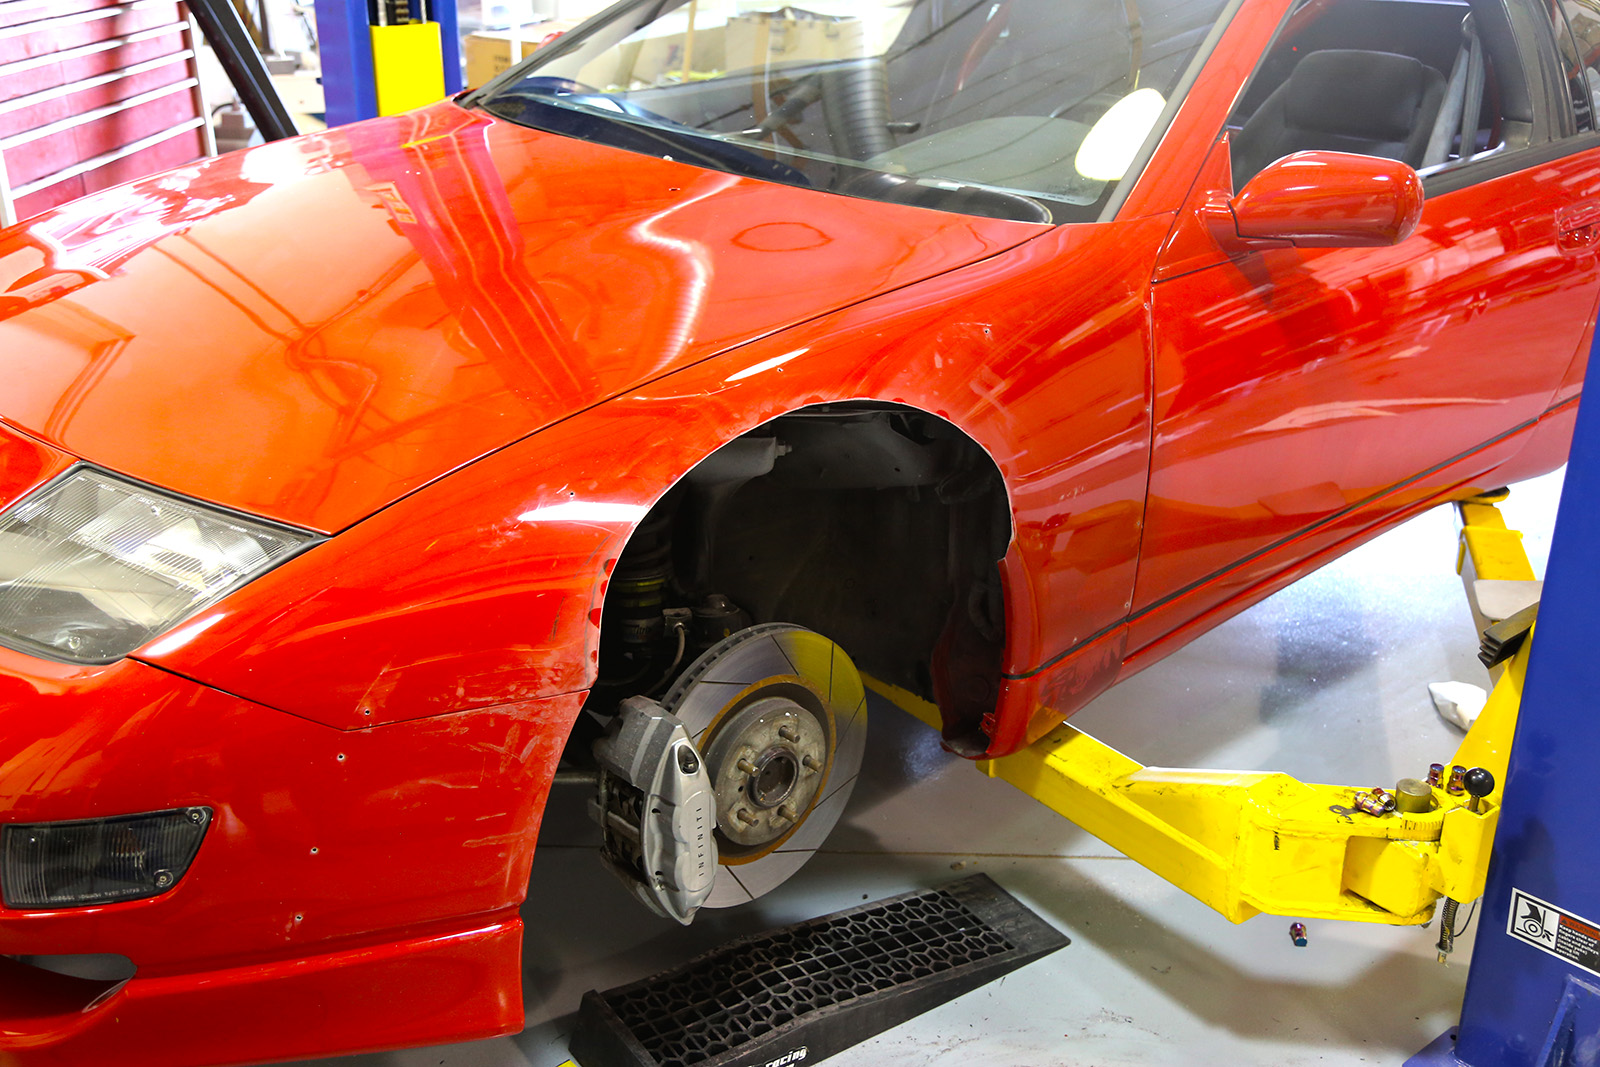
And we couldn’t help but test fit the front overfender again to see how it cleared. I ended up having to come back to the front fenders and round out their opening a bit more. I also cut the bumper tab and retainer bracket to give myself a few more inches of clearance, which just meant I had to drill a new hole in the retainer bracket and fender, and duplicate the stock mounting point, just about an inch further in.
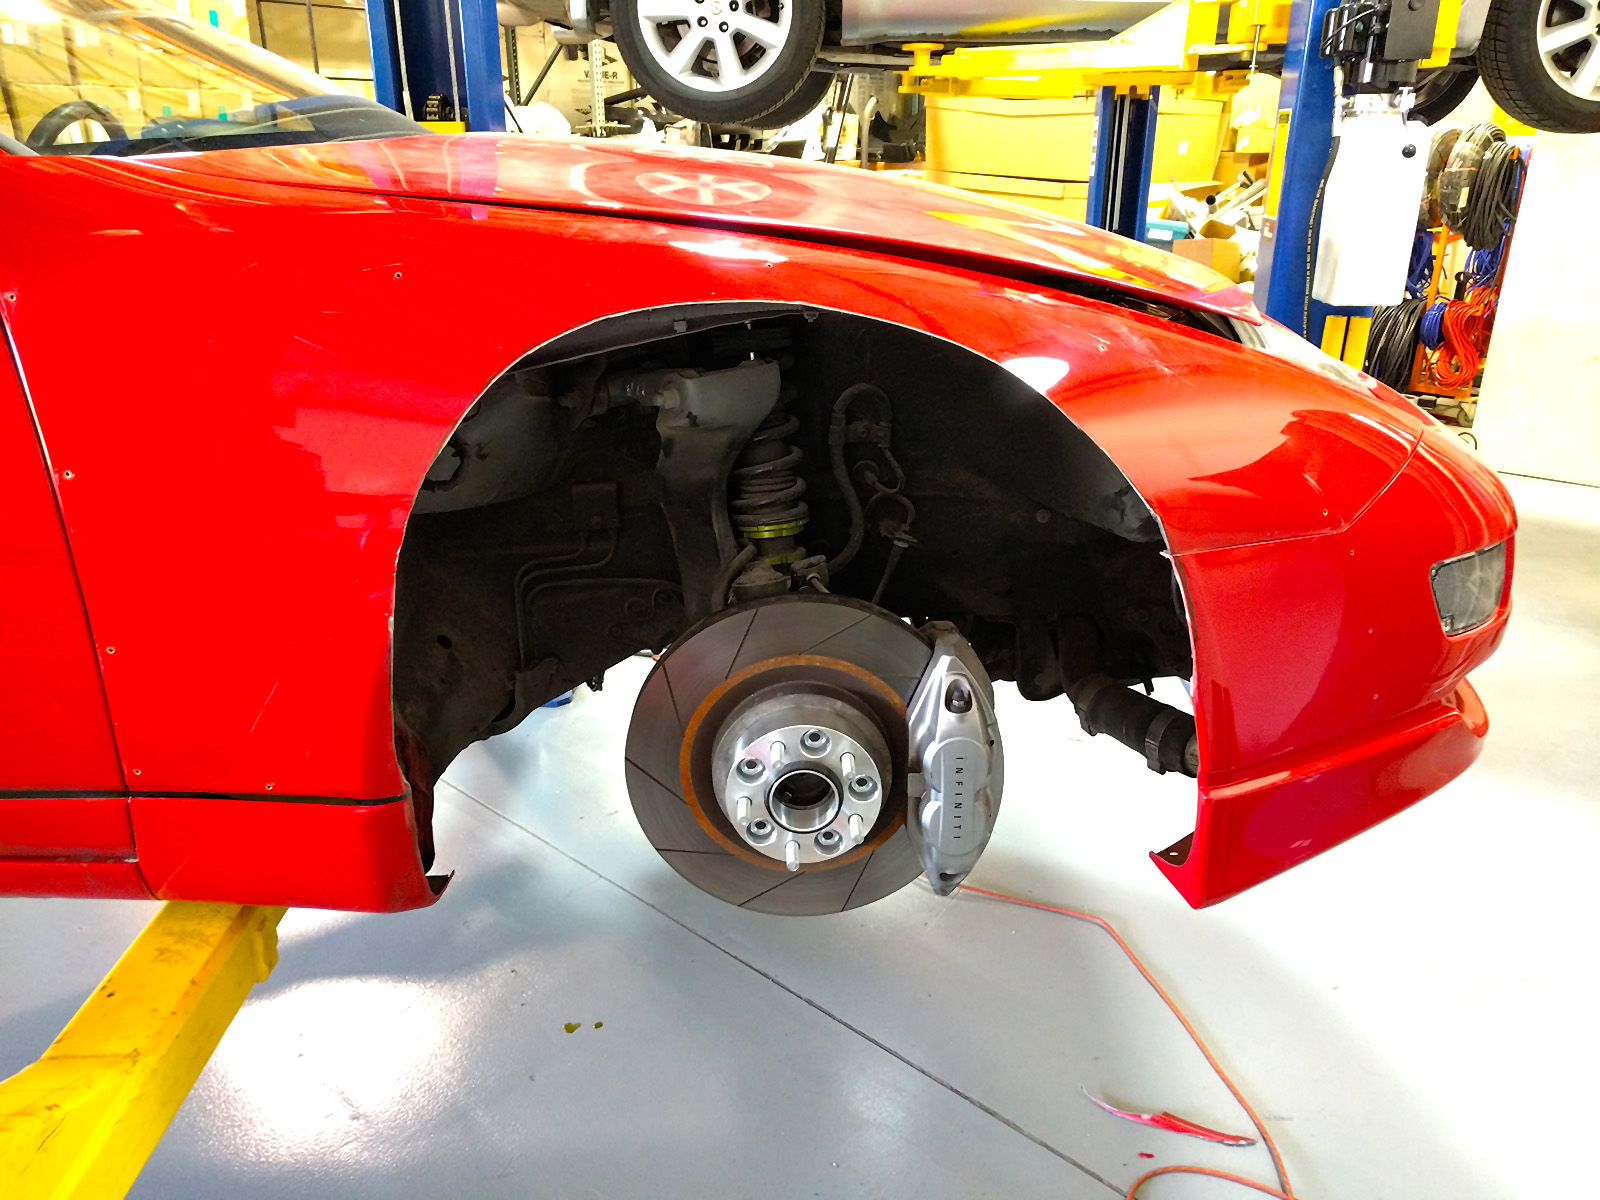
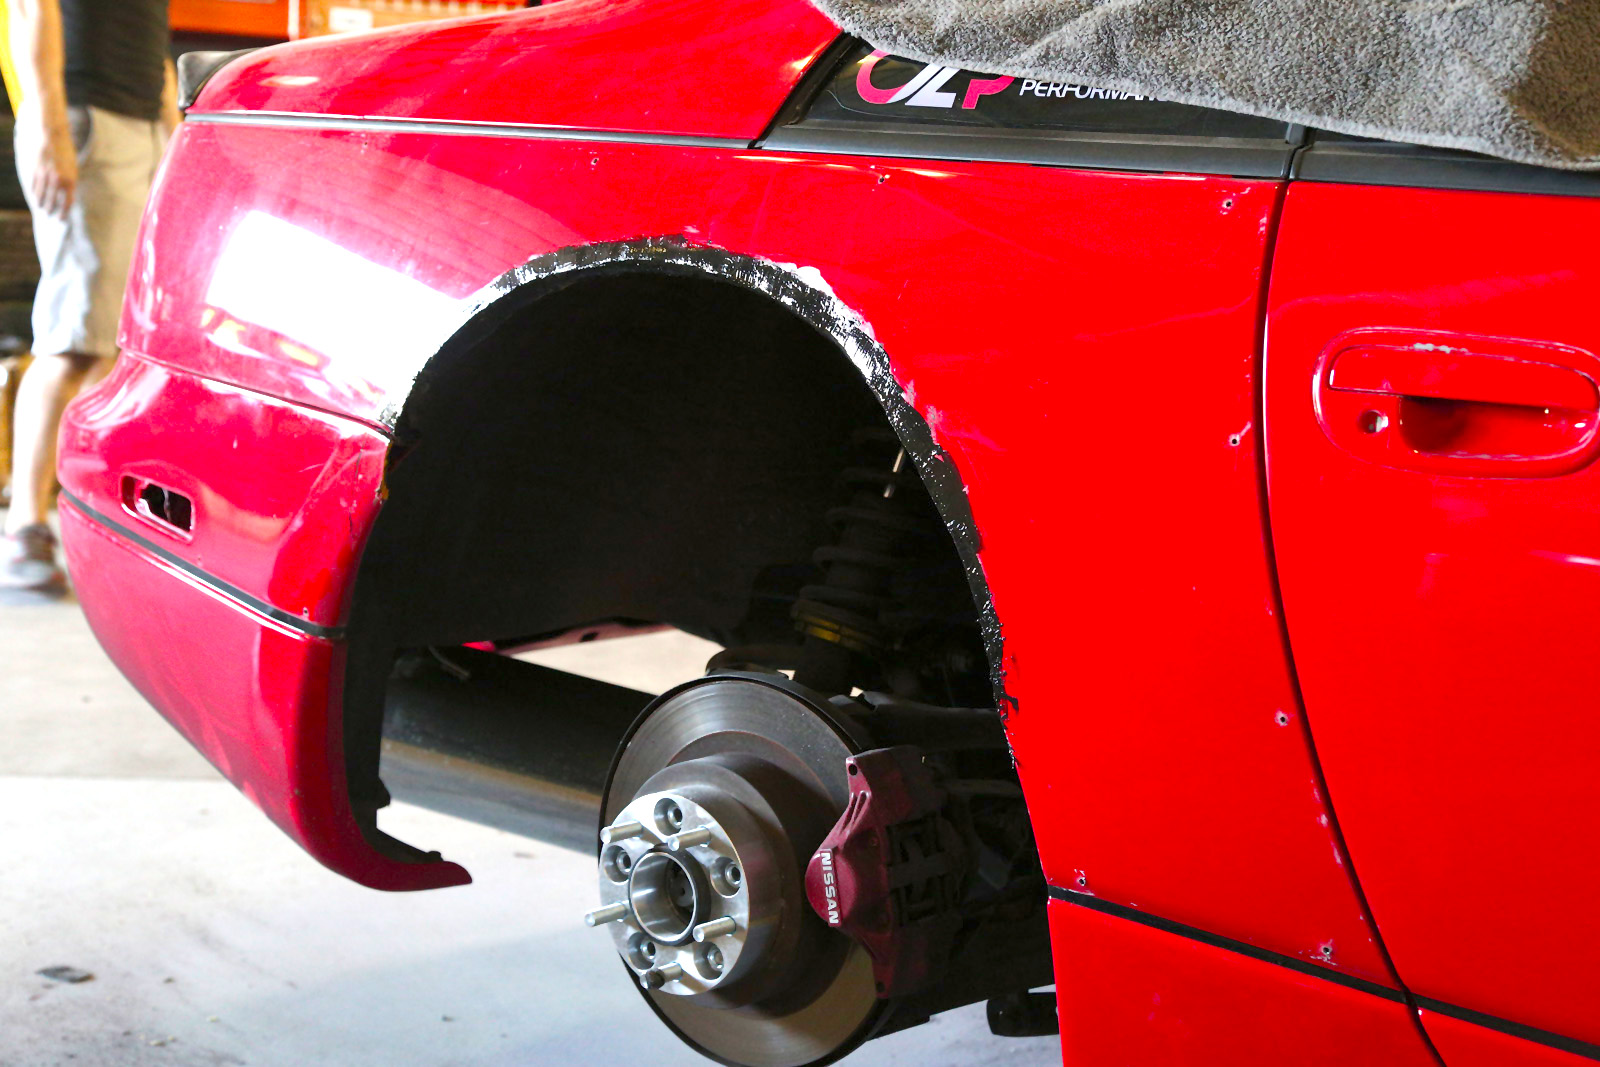
Front fenders opened up a lot more to allow the wheel to swing through its full range of motion.
This is more or less complete.
Then, it was time for the rears. The rears aren’t so simple. Front fenders can be removed and replaced with 10mm bolts. The rears are part of the unibody. No going back now!
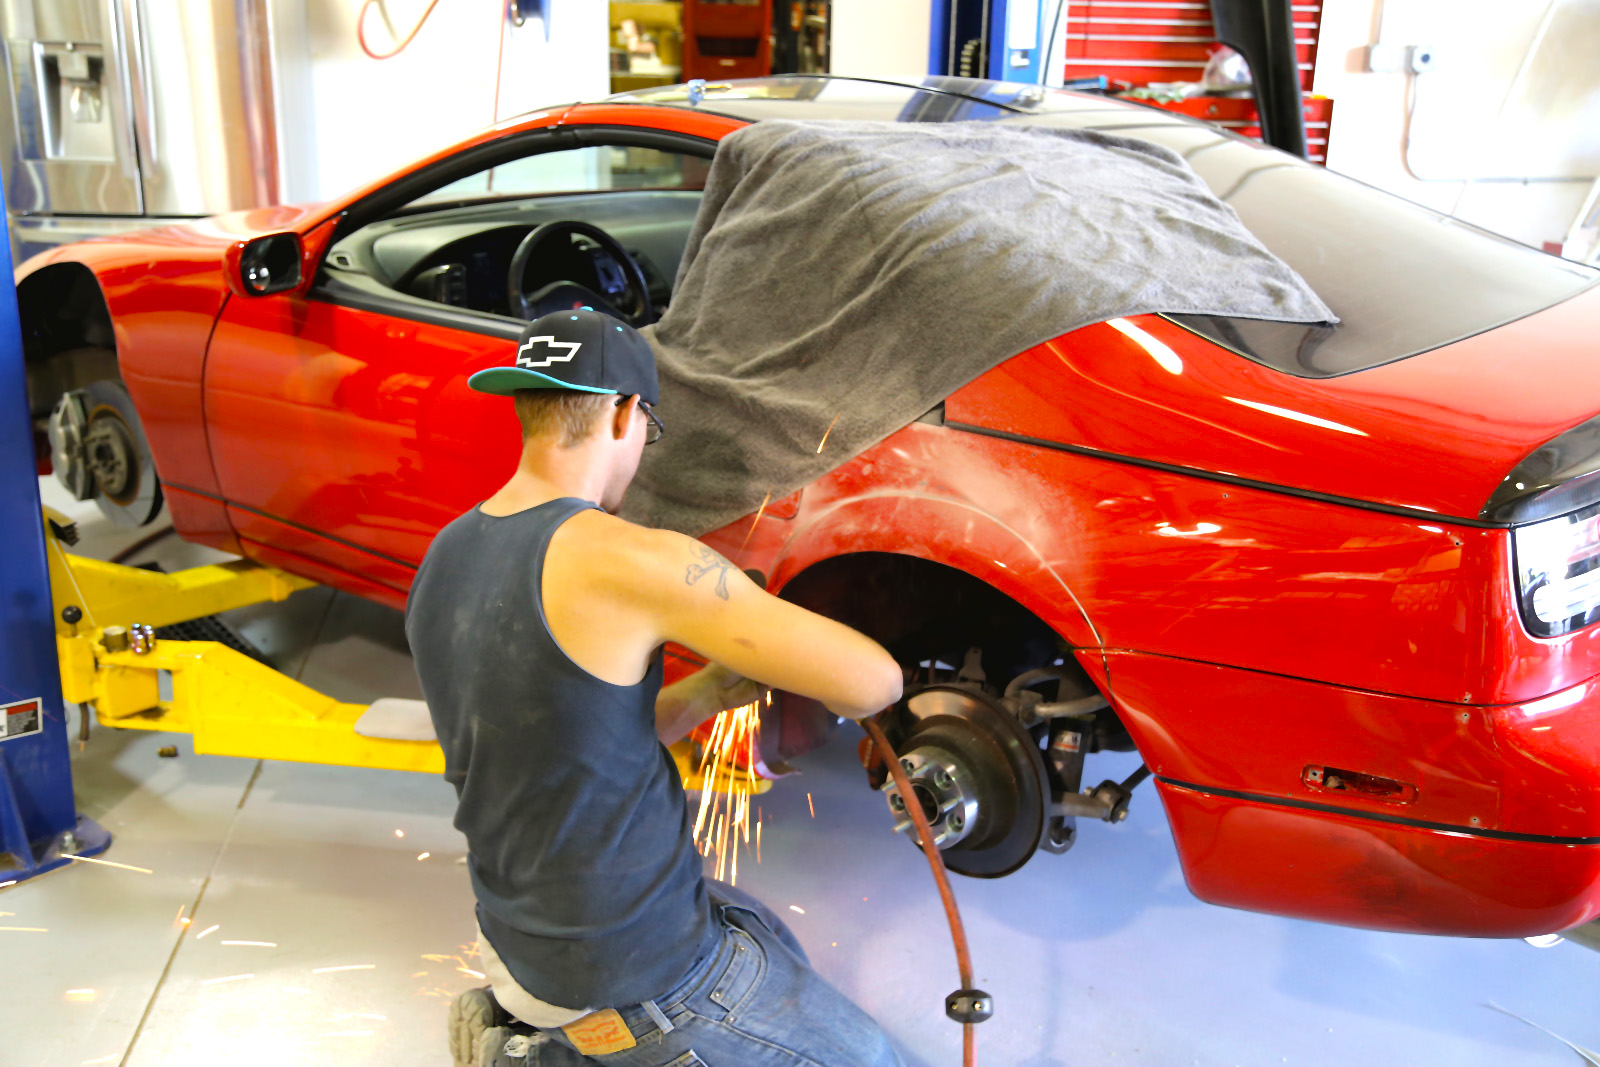
This kills the car.
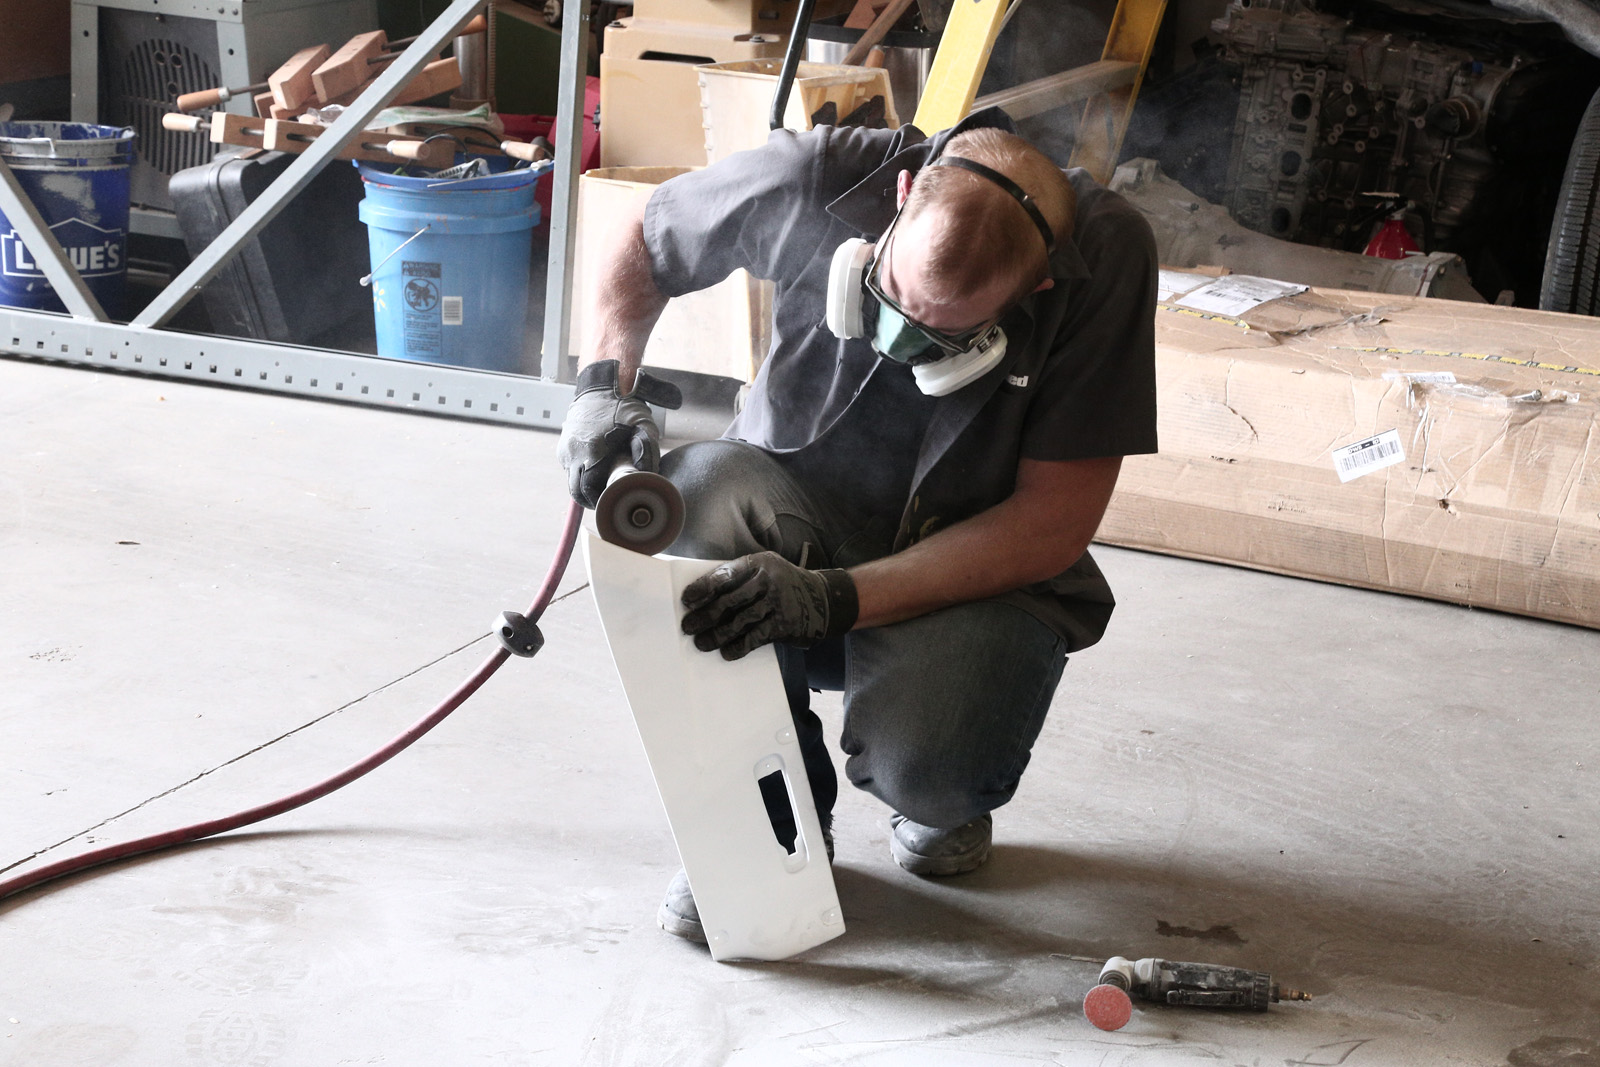
The LH side is a bit difficult because it has to clear the fuel door. I had already trimmed the rear bumper tabs in the past, so we were able to cut down into the bumper area as well for a little more clearance. Then Taylor directed his violence to the RH side.
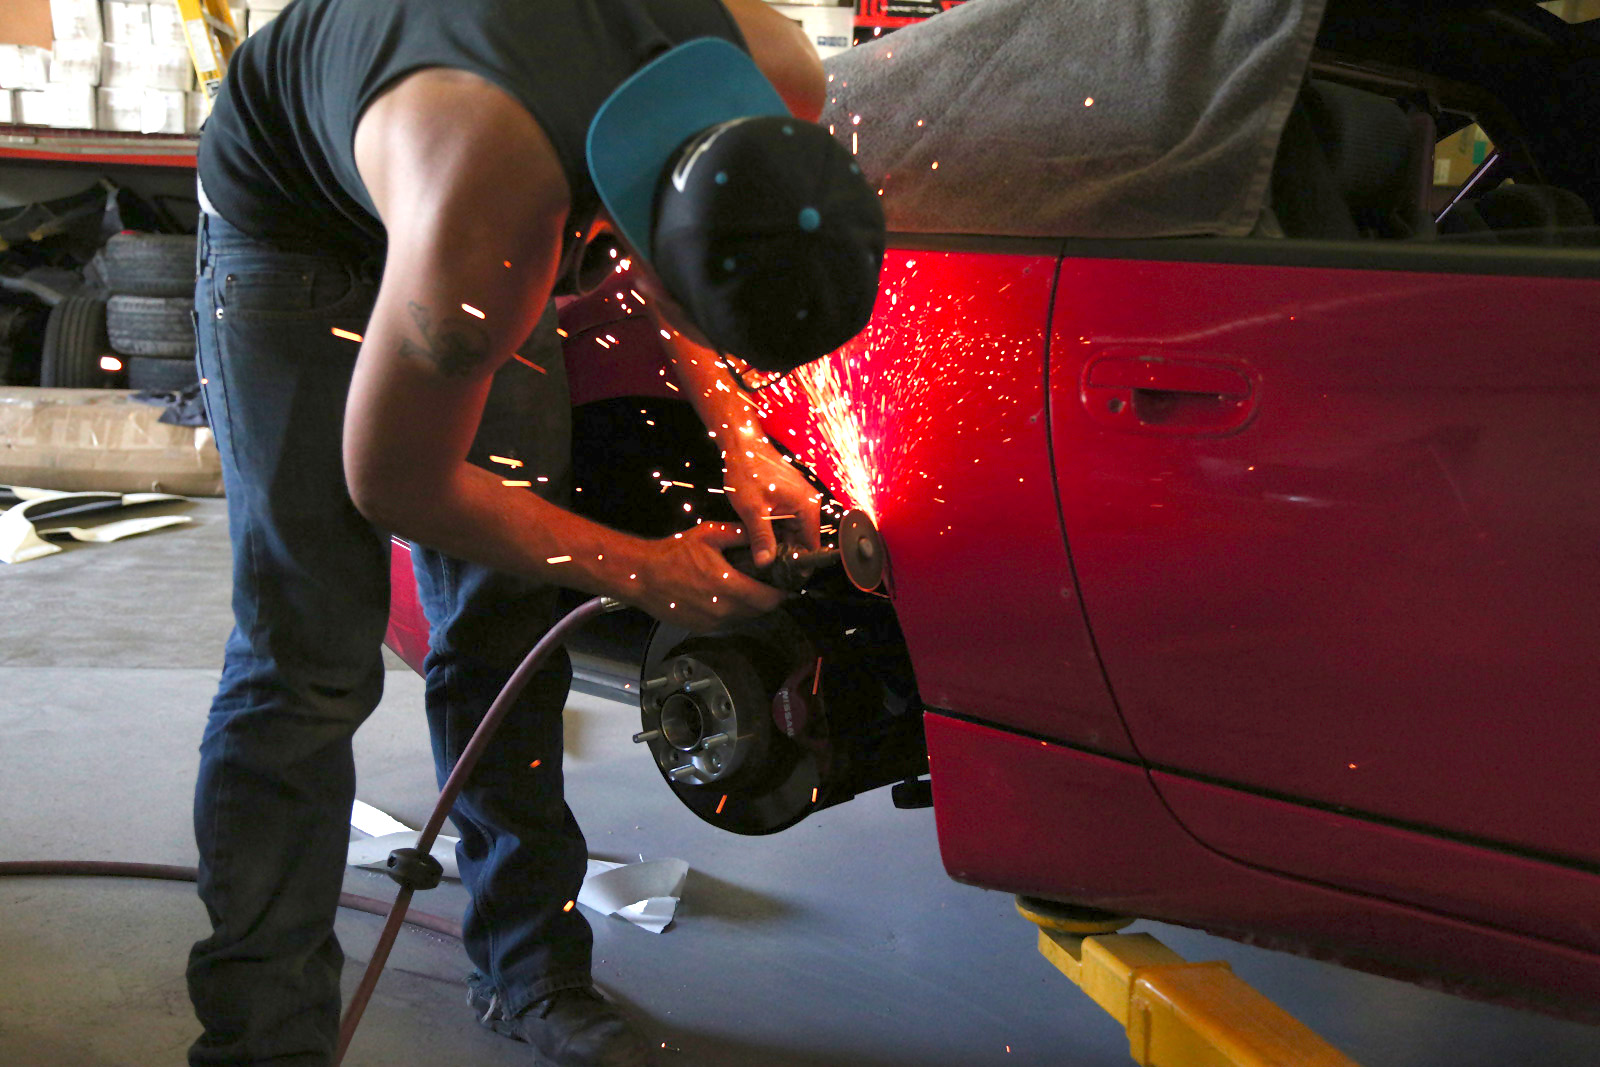
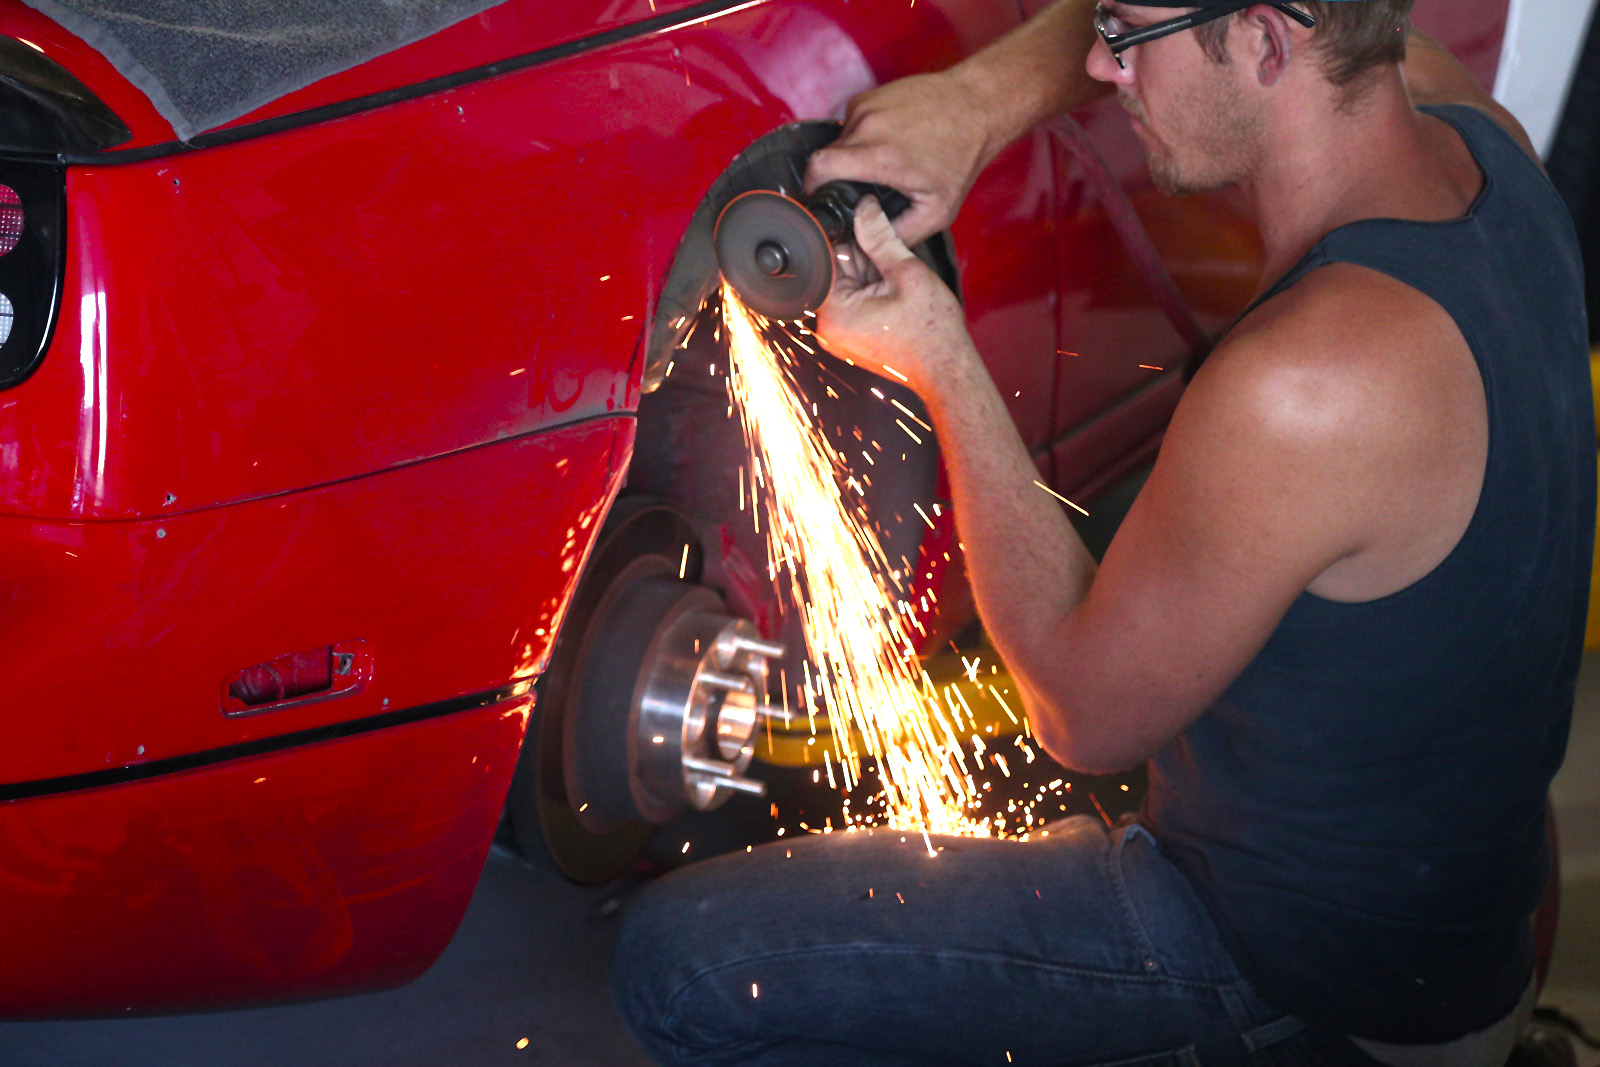
RH side getting opened up.

Cutting the rear quarter panel.
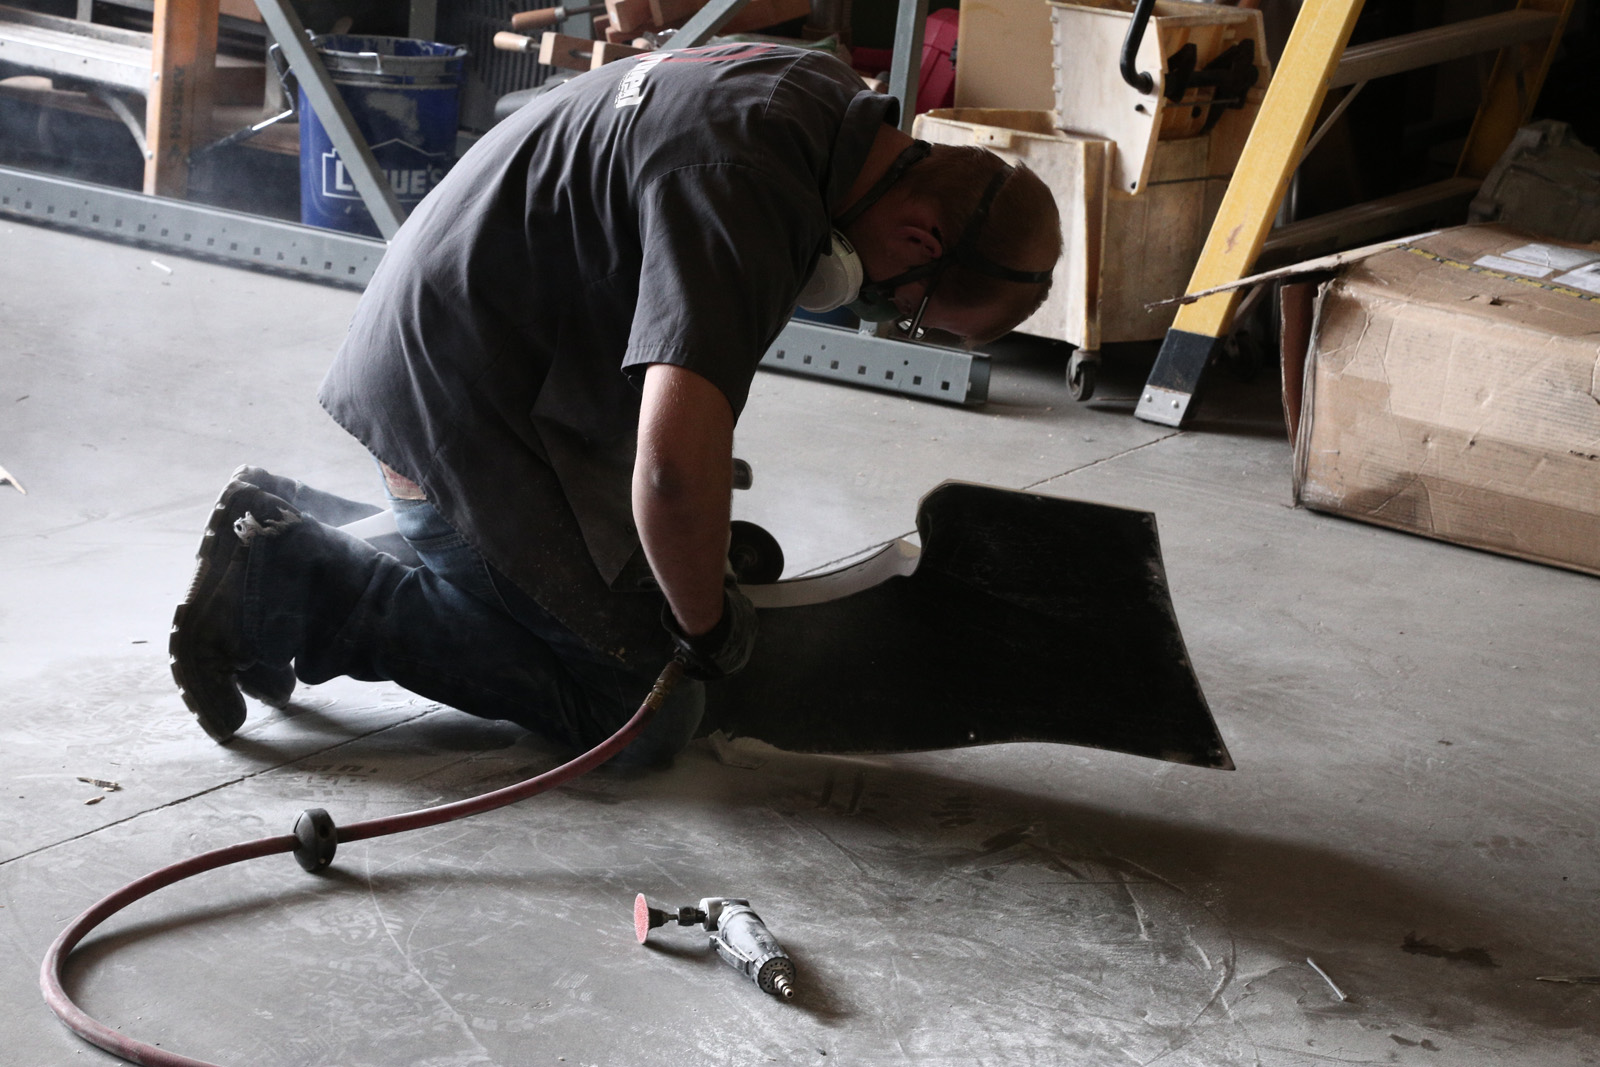
The Z32 is built like a tank. While the front fenders are ultra-thin steel to save weight, the rear consists of two layers of steel pinch welded together (that’s the outer layer), then a layer of what I believe is either a fire retardant or sound deadener, then ANOTHER layer of steel for the inner fender. This proved to be a bit frustrating when you’re trying to mangle it all. On the LH side, Taylor made several cuts in stages to get each panel off. On the RH side, he cut the outer layer and pried it away from the body.
Prying the outer panel away.
This still ultimately resulted in having to cut away the inner “lip”, which is what really slowed things down.

Separating the lip from the inner layer.
But hey, where there’s a will, there’s a way.
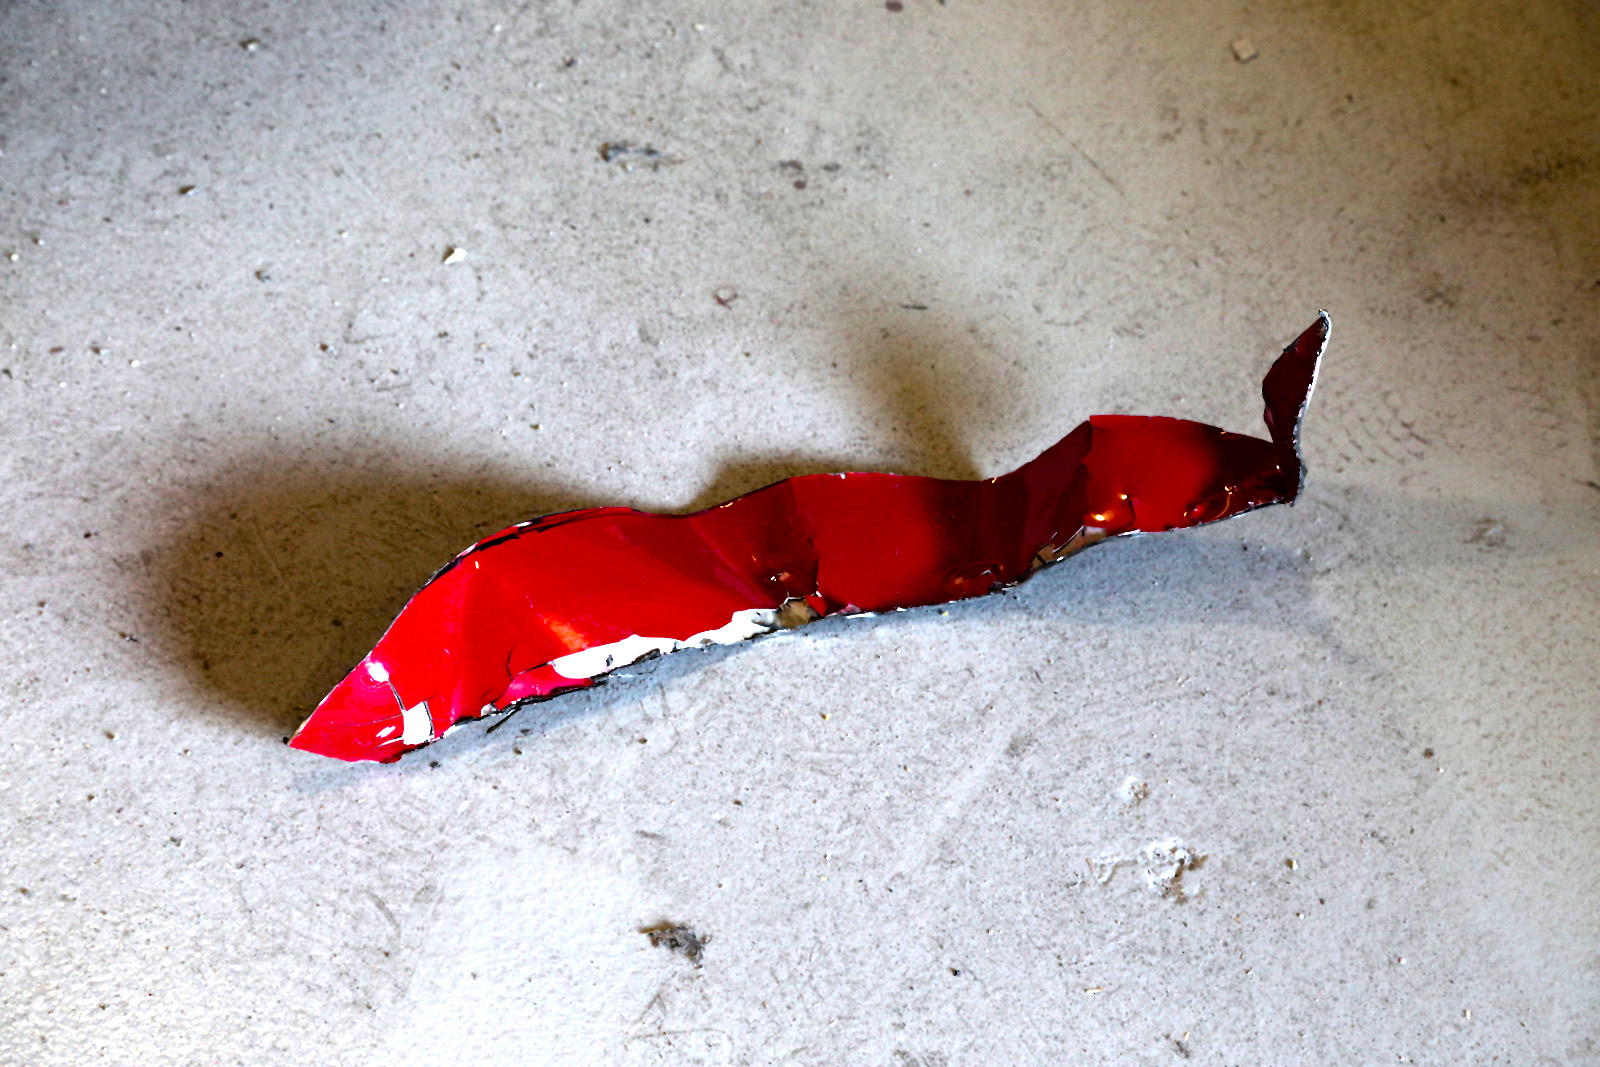
Gore.
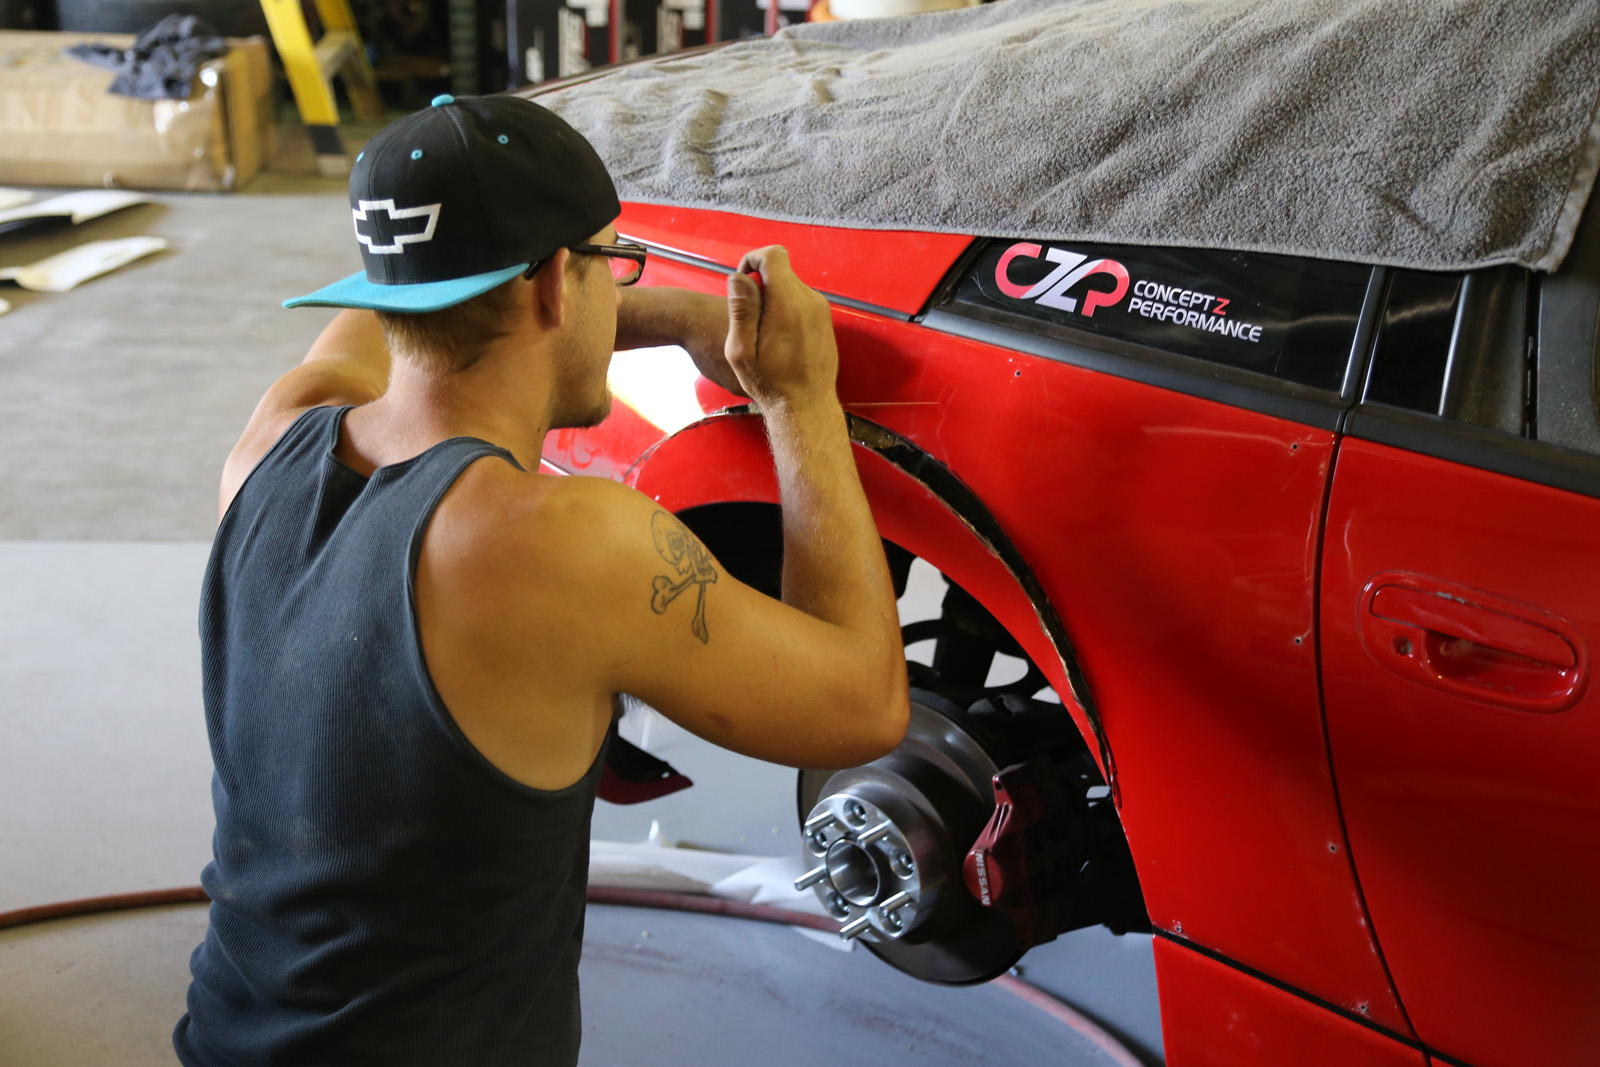
Because the rear is structural and metal panels form the inner fender liner, you have to “fill in the gap” between the outer and inner fender liners. This is done by “flowering” what’s left of the inner fender liner, then bringing it out to meet the outer layer.
Turning that fender into flower petals
After that, you’re left with a bunch of tabs that you start bending upwards.
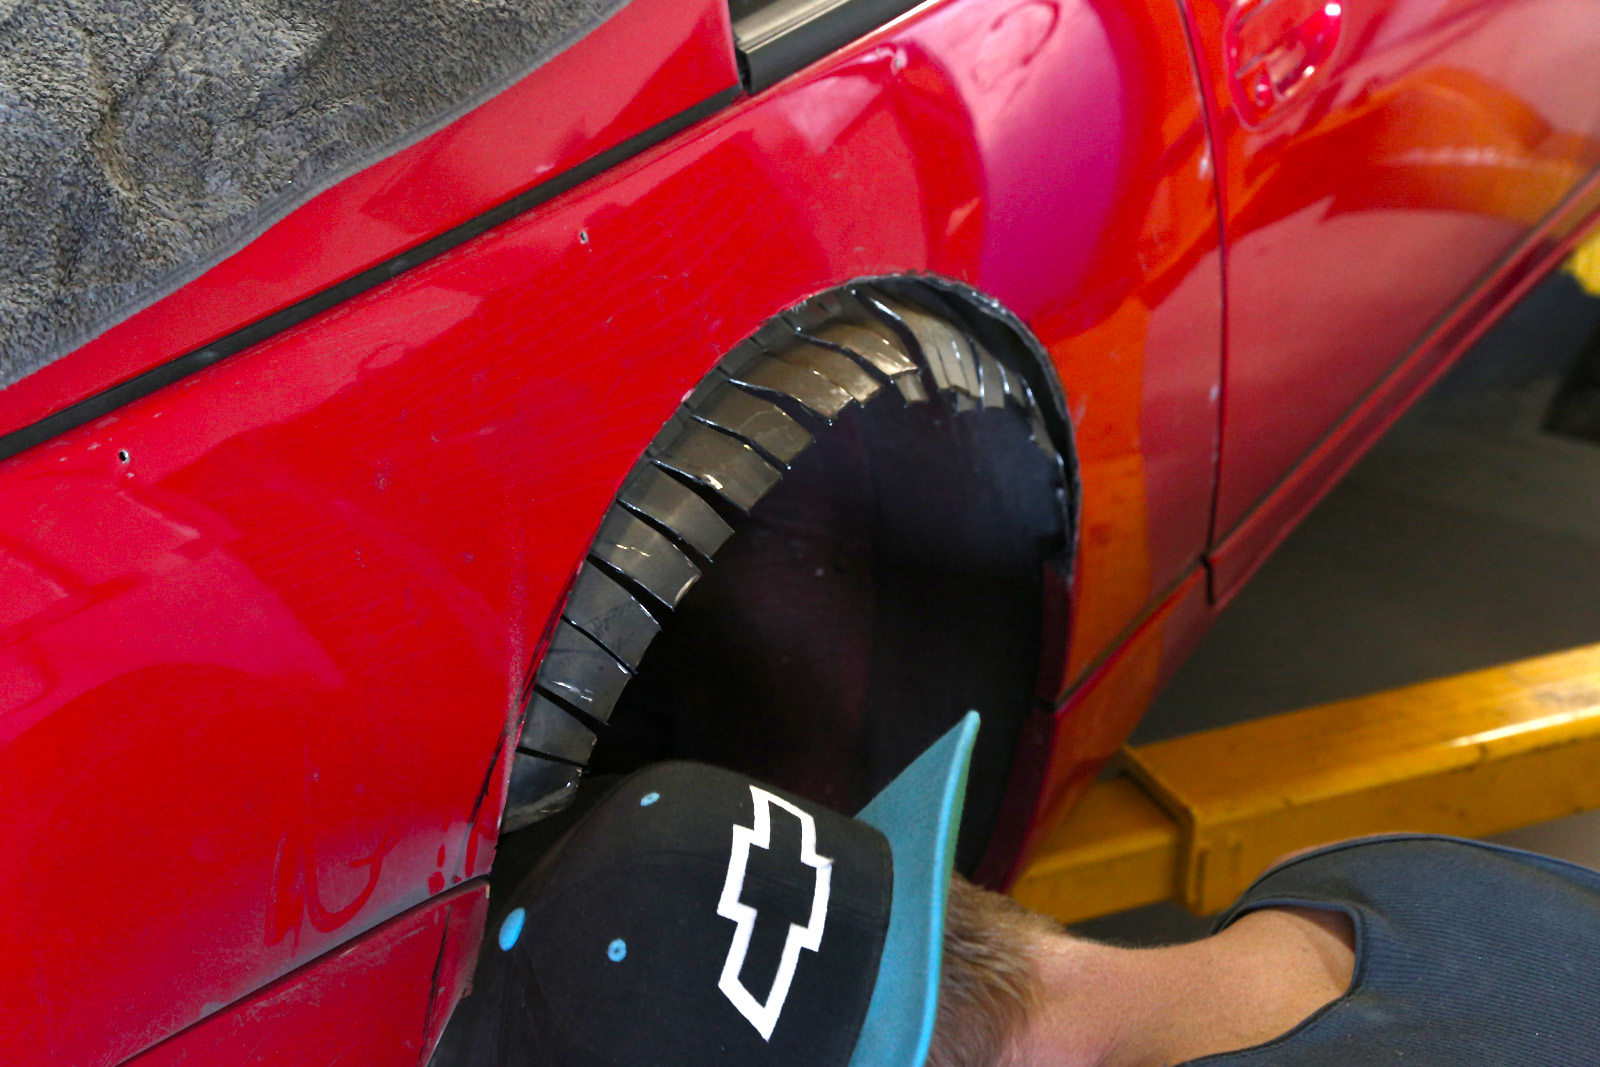
Just bring them out!
And, they’ll need a little persuasion.

Did I mention that this car is a tank?
This is what it looks like when they’re all bent up and basically in place.
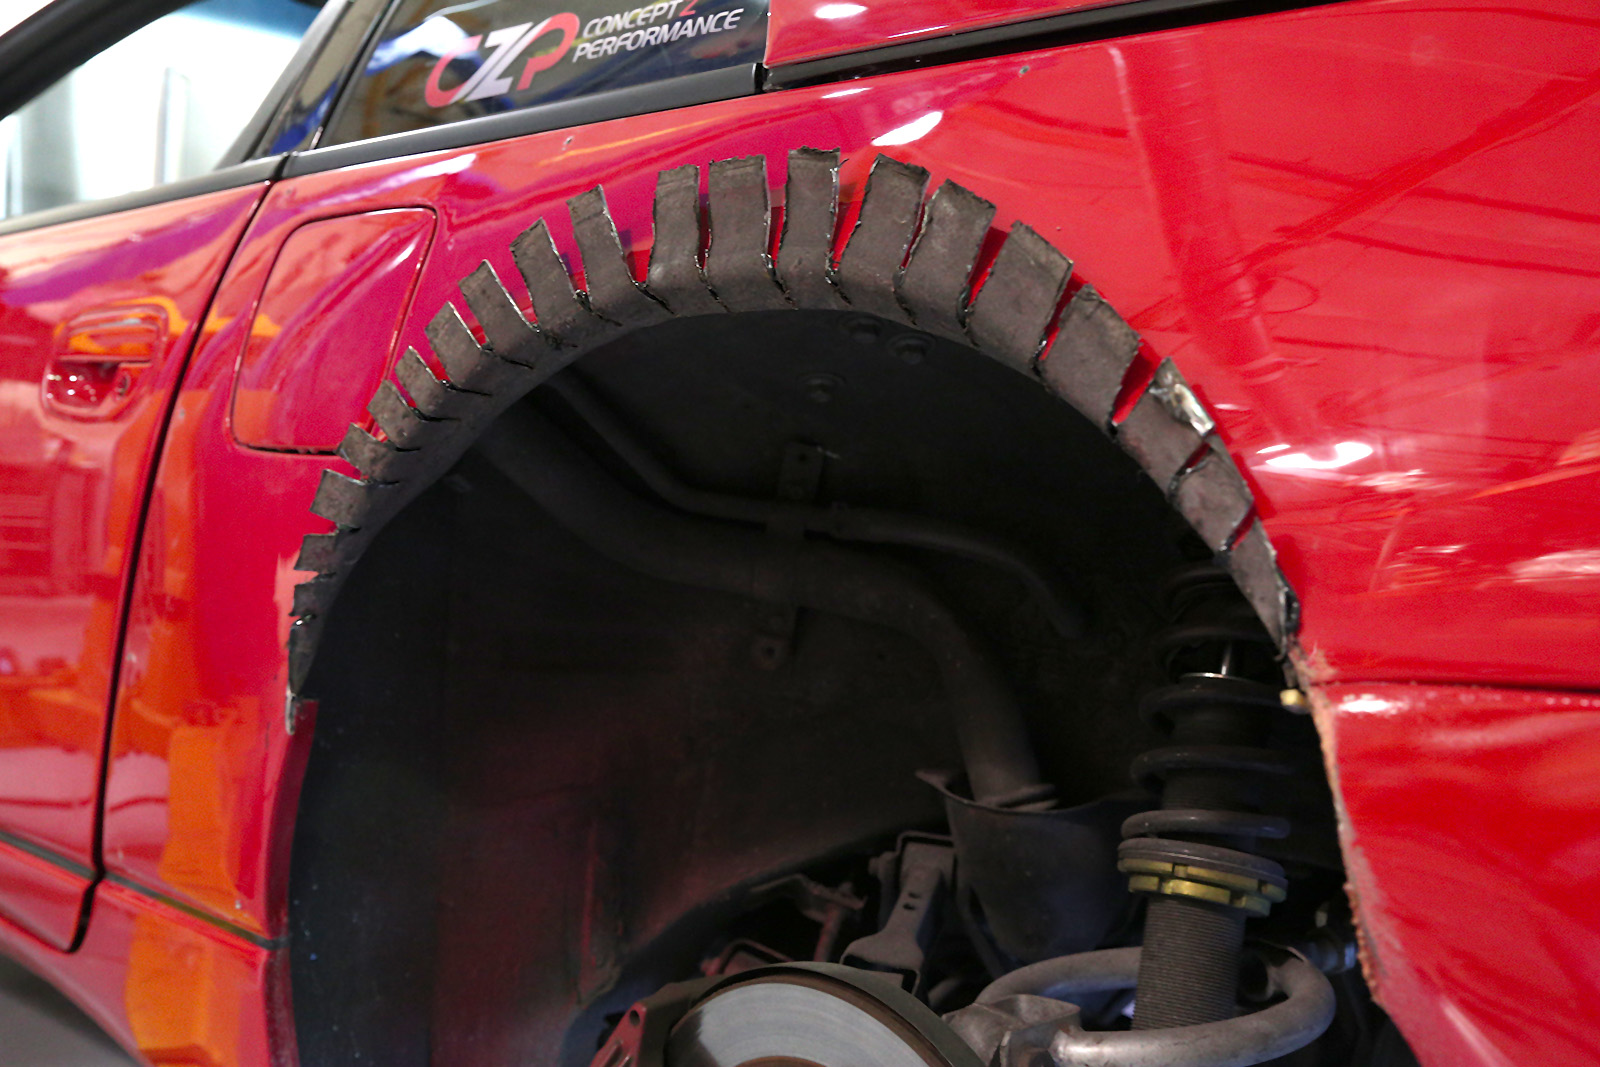
Like a flower, see?
During this process, a super super heavy duty two-part epoxy is applied. This helps the inner liner remain structural, as well as coat exposed bare metal to protect it from rust. This stuff is insanely strong. As Taylor described, “it holds Corvettes together.”
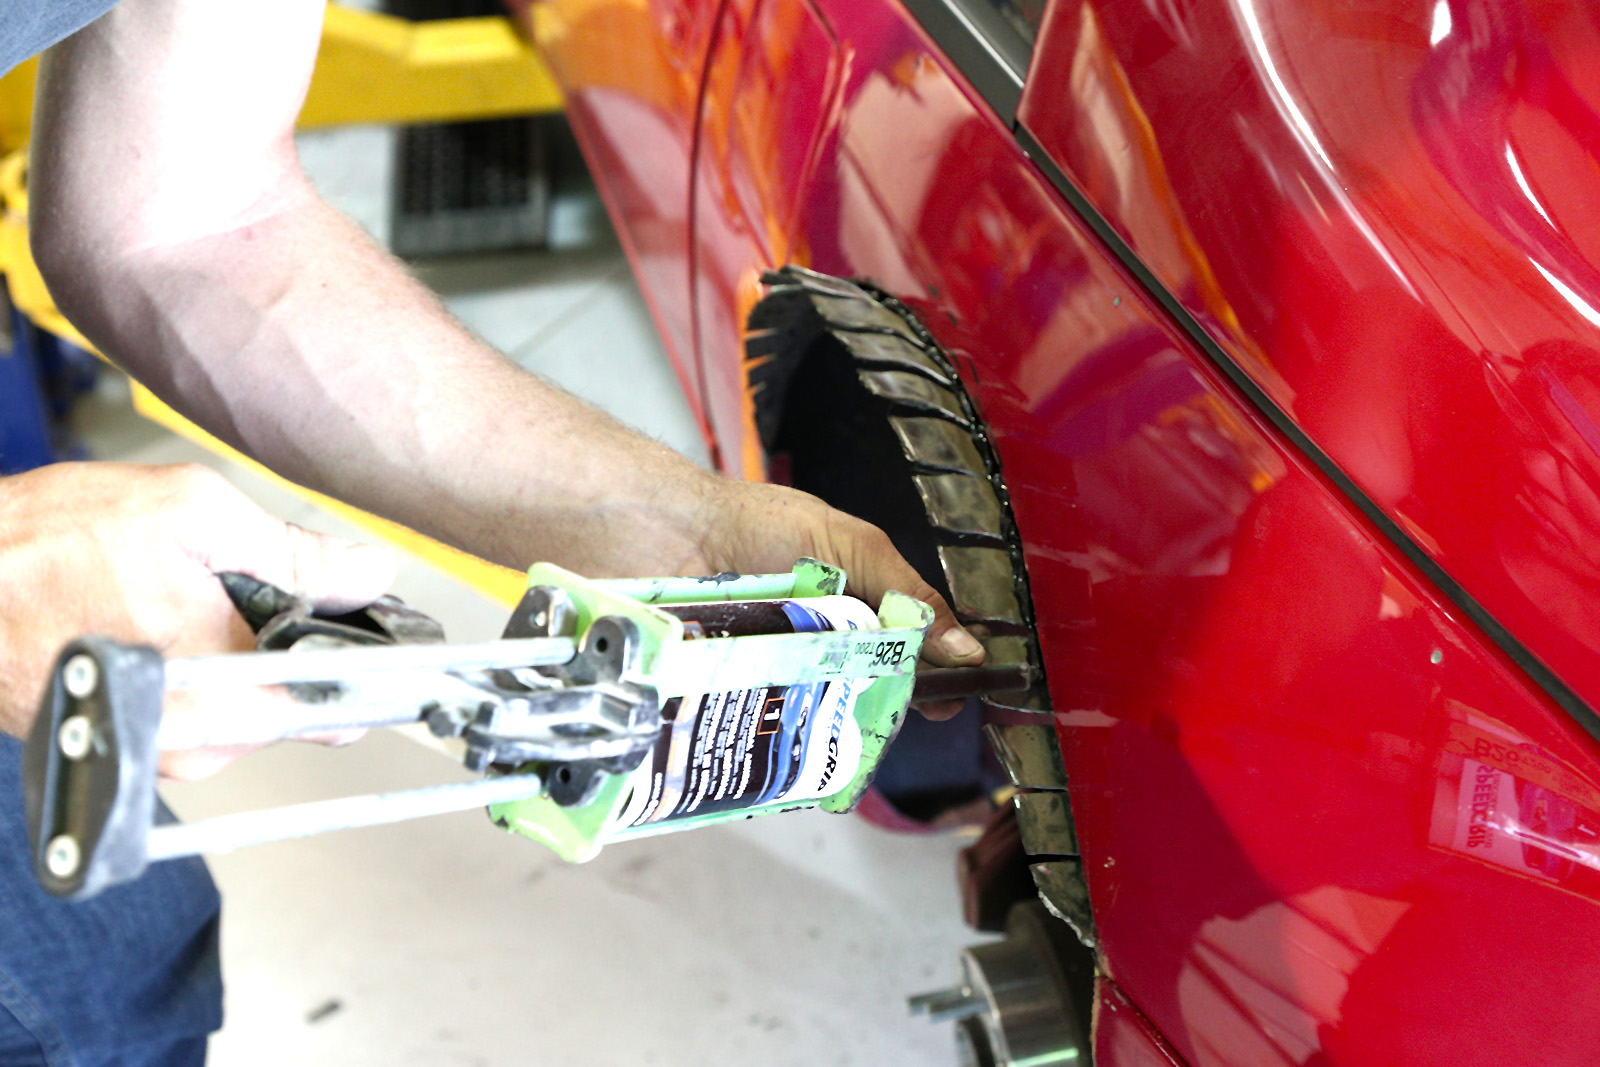
Yum.
After it dries, the excess tabs get cut down.
Look, I helped!

Back to the grind…
Once they’re cut down, any rough edges and blobs of (now hardened) epoxy get smoothed down a bit.

Cleaning up those sharp edges.

More sanding.
Of course, doing this will expose any left-over open and uncoated areas. So it gets one final layer of goop to make sure everything is nice and sealed.
Doesn’t look too mangled, right? Right?
Aside from desperately needing cleanup and probably a little massaging of the paint, the car itself is basically done at this point. So, as the day started to come to an end, we threw all the panels back on, torqued the spacers and wheels, and brought the car down to rest on its own weight.

Coilovers definitely need adjustment.
And it needs more tire now!

Sitting down.

Sitting down.
Considering these spacers were a guess, I got pretty close!
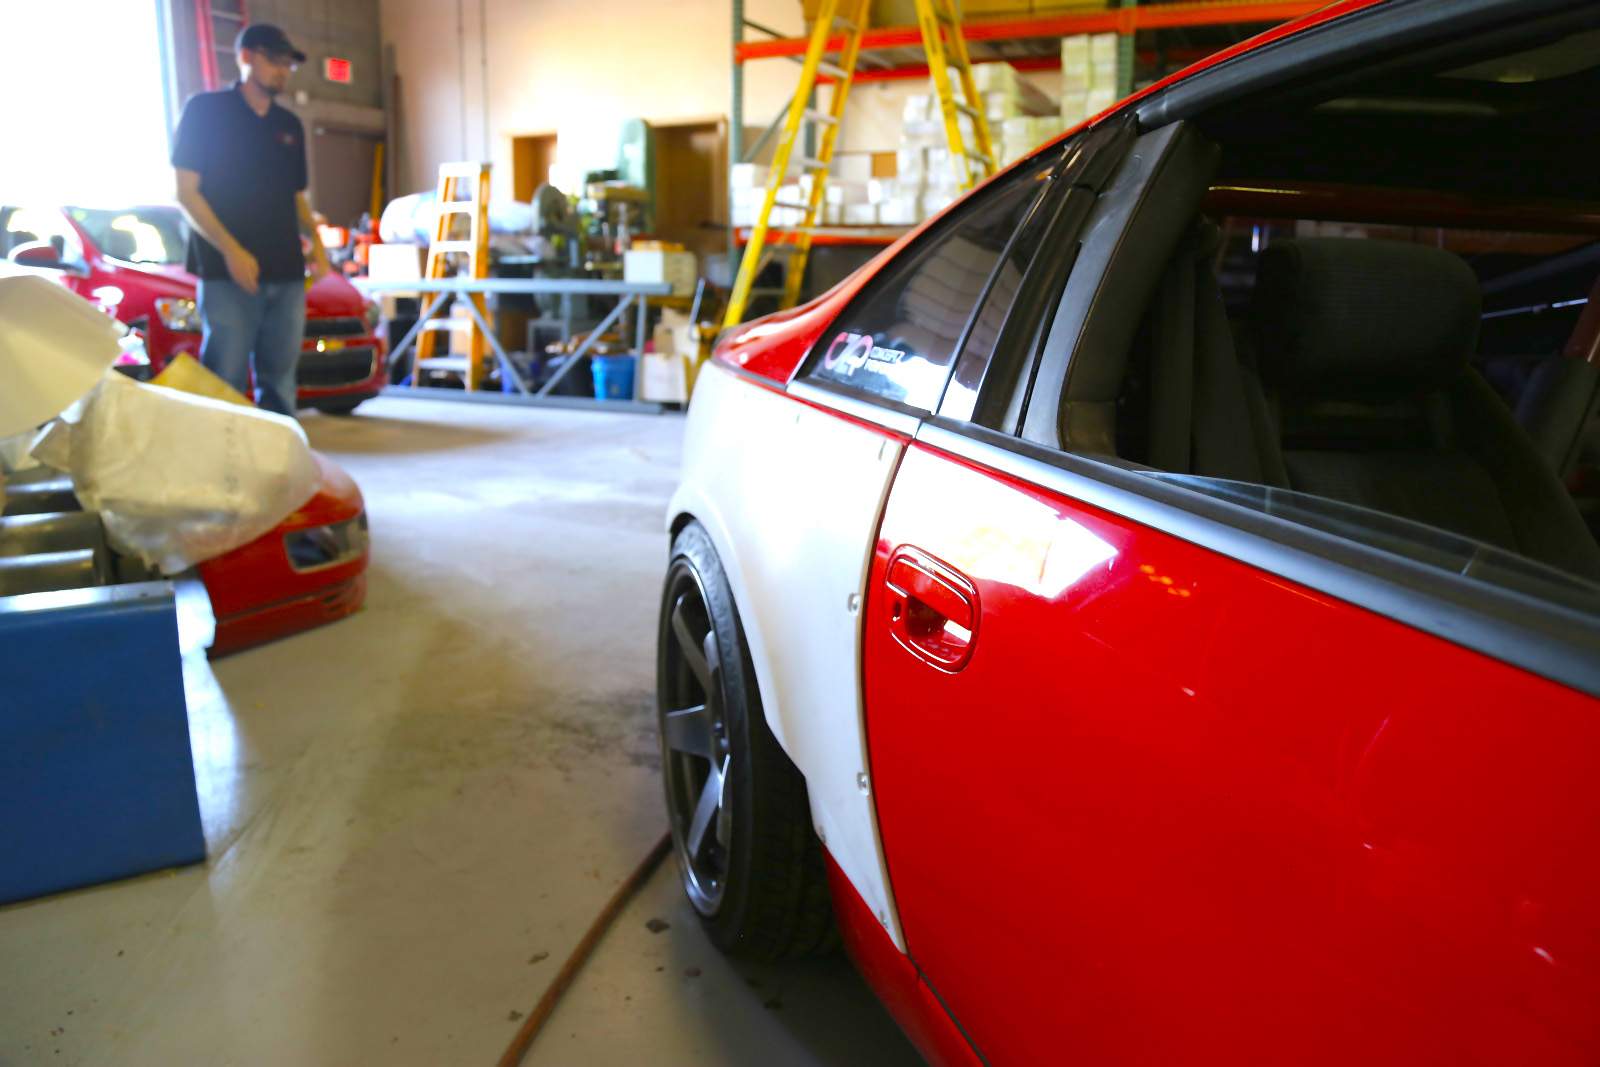
And I’m especially happy with the rear fitment. Also hey Chad!
After that, we raised the car back up, and removed the overfenders once more, for Taylor to take back with him to UpTuned, so they could be painted to match the car. Since UpTuned painted the car just a few months ago, I wasn’t worried about paint match issues or anything. After a couple of weeks, they brought the overfenders back so we could get them on the car and take pics.
Painted & mounted!
Painted & mounted!
Looking nice and wide
Front poke
Rear quarter view
Rear quarter view
Overall, I’m pleasantly surprised with how the kit came out. I’ve taken some notes on small changes we’d like the manufacturer to make before the initial production run, but we’re happy with it and it’s certainly ready to go. On this car, I’ll be playing with the ride height and will most likely be changing the wheel/tire setup in the near future to something better suited for the widebody.
So, after all this time and work, we’re finally ready to put the kit into production! Pricing will be $1899 for all four corners, but for the initial production run, we will be taking pre-orders at an introductory rate of $1599. If you’re interested, you can check it out at the link below:
ZERO Widebody Kit – Concept Z Performance
Up next: Side skirts and… maybe 2+2?
2+2 PLEASE
Someone give me a 2+2 to cut up!!! 🙂
I have a 1991 z32 n/a 300zx 2+2 that I’m doing that is like to install a wide kit on
I volunteer as tribute
Will there be any chance of buying the rears on their own?
Sure! Email me at nick@myczp.com and I can get that set up for you.
This looks amazing Nick. great documentation too! Always wonder how a widebody kit was actually installed.
Thanks Justin!
Looks Awesome! I have an opportunity to buy a 1990 300zx Twin Turbo with 50,000 miles for $9,000 I test drove the car and you would think this car was 5 years old, not 27 years. Should I buy it at that Price?
$9k for a 50k mile Twin Turbo is a great price if it’s in good condition and has been well maintained!
Looks good Nick! Great write up as always.
Thank you!
. Hi Nick.
UK owner of z32 2+2. For last 6 years or so. And in each one have interest in doing the wide body. I’ve one kit in mind from a UK supplier /company.
My thoughts are that I like your version here a lot. Take what Nissan did with the Z33 ( 350z) in its own rear appearance and they introduced more wider arches there. I’ve often looked at all the Z32’s each time I see different photos and thought the style to the front arches very good but the big puzzle in my mind was just why whoever had the work of designing the car did not pass on to nissan for have it with the more wider rear fenders to begin with.
But I’m guessing that no matter what the future owners of the car /s just like you and me plus thousands of others would have wished for more wider rear end in any case regardless of what Nissan had on its original planning when the design was drawn up.
Just my thoughts. Thanks. Phil. UK
what is the rear trunk lip on that car?
That’s a CF Mission Lip spoiler!
thanks!
Yes. 2+2s please! They will see the biggest improvement in looks imho because the rear panel is why they get the limo comments. By breaking up that panel with a kit like this, I think 2+2 looks will greatly improve.
Can I just but the rear??
Yup, did you see my last comment? Just email me at nick@myczp.com and I can set that up for you.
Waiting on 2+2 still 😉
I like to see a 2+2 version I got one and will be cool view
What front bumper is that? Also, what are your wheel dimensions along with the wheel spacer size?
This is with a Nissan JDM front fascia. Current specs are 18×9.5 -18 255/35r18. It will most likely be wearing 18×11 +8 305/30r18 in the rear and 18×9.5 -15 255/35r18 in the front soon!
Does CZP offer that front fascia for a 1993 300zx TT?
Sure, that front is here:
https://conceptzperformance.com/nissan-jdm-62022-vp125-nismo-1999-fairlady-z-jspec-oem-front-bumper-fascia-cover-nissan-300zx-90-96-z32_p_1996.php
z33 virsion plan?
Check out the Stardast kit!
https://conceptzperformance.com/stardast-japan-nissan-350z-full-widebody-overfender-kit-03-08-z33-sd-wbkit_p_26936.php
If I want to put a different front bumper, will the wide body match on the car?
It was designed to follow the corner of the fascia/fender mounting point down to the accent stripe. As long as your bumper still locates the accent stripe in the same location as the US or JDM OEM front bumpers, it should fit just fine!
How much would it be if I bought the kit and had you guys install it? Not paint just install?
We had UpTuned help with the actual install, hit up Damien at uptunedllc@gmail.com!
Hey nick letsom, love the kit, where is this place located? If i buy the kit how much would you guys charge me?
We’re in Phoenix, AZ. And you can check it out on our site here:
https://conceptzperformance.com/czp-zero-widebody-overfender-kit-z32_p_26506.php
Nick I will give you my 94 2+2 to test fit and design on if needed red just like your other test car.
Awesome look and clean installation!! congrats. Is there something similar for a 350z?, thank you!
Looks awesome Nick!!! I would be scared to do this lol. It came out great and I appreciate the documentation. One of these days I will atleasts have the rear fenders!!
Lots of good work there! Can’t say I like the front but the back looks good to me. The sharp cut back lines on the lower half of the fenders seem out of place with the Z’s smooth curves.
Should have leave it alone. The car looks like Frankenstein. All the nice lines of the car are gone.
Great write up Nick!
Is there anything like this for a 2016 Infiniti Q50?
We’re going to focus on the Q60 first, but the Q50 is on the list!
Hi nick. I was wondering what the current set up is that you’re running for the rims and tires now. I saw this blog a few days ago, and I love the look of the kit. If i get one, I was considering running a set of Work Emotion XD9’s on mine.
Sure, on the pics in this listing I kept my old 18×9.5 +20 wheels with 255/35r18s and it has 38mm spacers all around. If you saw the new setup in the pics on the product listing here:
https://conceptzperformance.com/czp-zero-widebody-overfender-kit-z32_p_26506.php
..those are Aodhan DS02s, 19×9.5 +15 front, and 19×11 +15 rear, with 255/30r19 front and 285/30r19 in the rear. It also has the same +38mm spacers up front (making it a hair more aggressive than before) and is now on +20mm spacers in the rear.
Also on the product listing, the purple car is wearing Cosmis XT-206Rs, which were actually my first choice, but wouldn’t clear my Akebonos. Those are 18×9.5 front and 18×11 +8mm rear, but I’m not sure of what tire size and I don’t know what spacer he has on the front.
well documented Nick,
You just inspired me to work on my JDM…
Do you think Zero would consider doing a kit like that for 03-05 G35coupe/350Z
I think there’s another platform or two ahead of the G35/350Z for the next Zero kit, but there is a Stardast kit for the 350Z that looks really good:
https://conceptzperformance.com/stardast-full-widebody-overfender-kit-nissan-350z-03-08-z33-sd-wbkit_p_26936.php
I have just recently become acquainted with this style of body panel, dare I say it, Rocket Bunny. The v.2 kits for the Nissan S13 have really nailed it on style. That said, I have always had a soft spot in my heart for the 300ZX and I applaud your efforts.
http://i.imgur.com/v53nUQv.jpg
http://i.imgur.com/jxGSyIp.jpg
http://i.imgur.com/1z08gz9.jpg
this might be a stupid question but why are you still using spacers behind the rims and not just use wider rims. I want to do an ls conversion and will need all the rubber i can get for track days.
You can do either way. In the initial post, I threw spacers on since I already had those wheels. I later switched to wider wheels, but I still run spacers to get the fitment I want.
your car looks fantastic.. if there were no spacers do you think the car could handle 12 In wide rears with 315 0r 325s 18 or 19s really want rubber for the torque and around 500 whp. Also do you know if a suspension up grade will effect tire and wheel fitment as this will be a driver and track day car. (autocross and road course) Thank you for your time.
Thanks! I was actually originally planning on running 12s with something over 300 in width, I just couldn’t narrow down a wheel, and the only one I actually liked isn’t available in the US. Suspension upgrades will certainly affect fitment, but just in that you can fine-tune the fitment through the camber/caster settings.
Yes! This is so awesome. 2+2 soon please! 😀
I really like the idea of using a high strength epoxy instead of welding the inner liner of the rear wheel well. What type of adhesive/epoxy did you use? If it was a specific product please let us know!
Sehr schöner Kit Passt der kit auch auf ein 2+2 Modell z32 und wie siet es aus komme aus der schweiz gibt es ein matrial gutachten damit ich keine probleme bekomme beim eintragen iin der schweiz braucht man nämlich ein matrialgutachtenist ein solches vorhanden wegen splitterschutz und fussgänger etc.
Gibt es für die schweiz papiere für gutachten ?
What brand of epoxy and goop did you use to seal up the tabs?