Heater Core
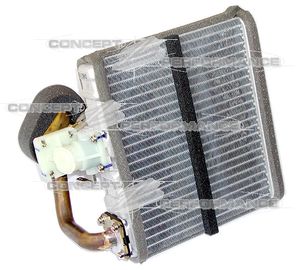
The Heater Core is kind of a mini-radiator which is installed behind the dashboard of the Z32 to provide heat for the passengers.
The heater core receives its coolant through the heater hoses. Hot coolant flows from the passenger-side head to the heater, and returns through the pipe connecting to the thermostat housing.
Contents
Operation
The heater core is the primary device used to warm the cabin when necessary. While hot coolant flows through it, the climate control's blower motor blows air across its fins, and out through the vents, transferring heat from the coolant to the ambient air in the cabin.
The heater core uses a motorized valve which opens/closes flow through it.
Replacement
Heater Cores, like radiators, eventually fail and require replacement. Failure usually manifests itself in the form of leakage, dripping on your foot while driving and fogging the windows while the car is off. While the conventional method of replacement involves removing the dashboard to access the air mix box, it is possible to remove and replace the heater core as per the instructions below.
Original writeup by Pearl_TTZ of 3ZC.
Tools Required
- 8mm, 10mm, 12mm, 14mm sockets/wrenches.
- Philips and Flathead screwdrivers of various lengths.
- Dremel Metal Cutter
- Needle Nose Pliers
- Absorbent towels
Parts Required
- Approximately 4-6" of 5/8 rubber heater core hose.
- 4 Hose Clamps for said hoses.
- New heater core.
Gaining Access
- Remove the driver's seat (2 x 14mm bolts, 2 x 14mm nuts). You will have to disconnect the seat belt sensor connector as well as the power seat connector (if applicable).
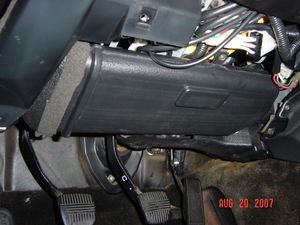
- Remove the panel above the driver's knees (4 x 10mm bolts)
- Remove the dash finisher (piece with the vent seal between the dash and the door) by grabbing it from the front (closest to driver) and prying away from the dash (towards the outside of the car).
- Remove the vent ducts above the driver's knees.
Removing Climate Control Brain
- Disconnect the four harness connectors at the top of the climate control brain.
- Remove the bolts (3 x 8mm, red circles) securing the brain to the air mix box.
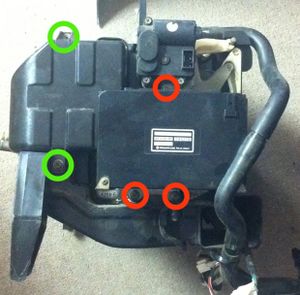
- Remove the 2 x 10mm bolts (green circles) securing the black plastic cover to the heater core.
Disconnecting Heater Core
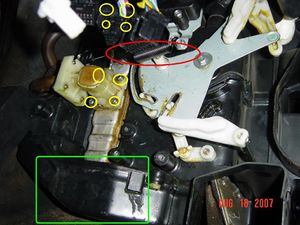
- Remove the spring (red circle above).
- Place a thick towel below the heater core (green square area).
- Unscrew the 8 philips head screws (yellow circles) securing the heater core pipes to the heater core.
- Separate the heater core pipes from the heater core. Coolant will be pouring out, so be prepared to catch it all.
- Remove the 10mm bolt for the heater core "hold down" tab.
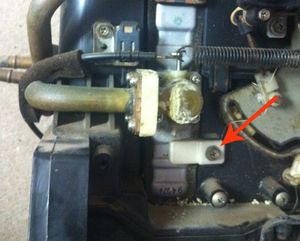
Cutting the Heater Core Pipes
- Remove the heater core valve cable (yellow circle).
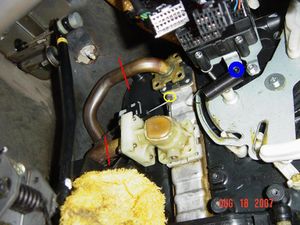
- Cut the two heater core pipes (red lines) with your dremel, and remove the piping assemblies.
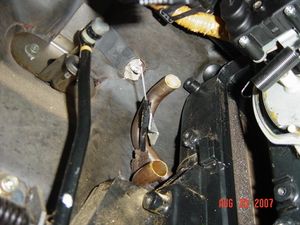
- Slide the heater core out to remove it.
- Clean up the edges of the cuts with sandpaper. Try to make them as smooth and straight as possible.
Replacing the Heater Core
- Using the pipes you removed as a reference, remove the pipes from the new heater core and cut them in the same spot. Give youself about 1cm of "wiggle room" to prevent metal-to-metal rubbing.
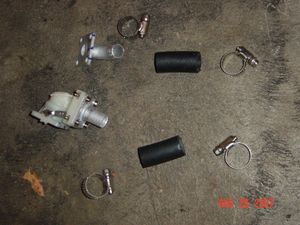
- Slide the new heater core into place.
- Loosely connect the new heater core pipes to the old heater core pipes (in the car).
- Screw the new heater core pipes to the new heater core.
- Snug down the hose clamps.
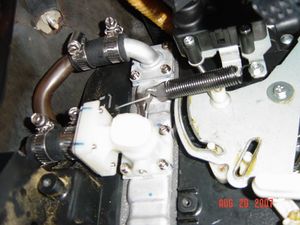
Reassembly
- Replace the valve cable.
- Reconnect the spring.
- Reconnect the climate control brain harness connectors.
- Reinstall the 3 x 8mm (or philips head) bolts securing the climate control brain to the air mix box.
- Reinstall the vents above the driver's knees.
- Reinstall all of the interior trim pieces in the reverse order of removal.
- It's a good idea to run the car at operating temperature with the heater on full blast to make sure there are no leaks first. Don't forget to add coolant as necessary.
