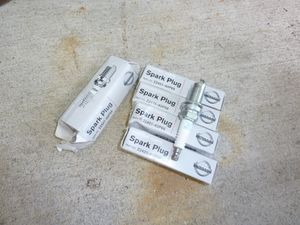
Spark Plug
A Spark Plug is a device that fits into the cylinder head of an engine. The tip of the spark plug features and electrode, across which high-voltage electricity jumps to create a spark, which ignites the air/fuel mixture in the combustion chamber.
On the Z32
The original plugs available for the Z32 were manufactured by NGK. Their model numbers were:
| |
Non-Turbo |
Turbo |
| Standard |
PFR6B-11 |
PFR6B-11C |
| Hot Type |
PFR5B-11 |
PFR5B-11C |
| Cold Type |
PFR7B-11 |
PFR7B-11C |
These plugs come pre-gapped to 0.44"
However, all but the PFR7B-11 have been discontinued. The rest of the NA plugs are now of the PFR6G series, and the turbo plugs are all PFR6B-11B. For most applications, the plugs that should be used are:
- NA: PFR6G-11
- TT: PFR6B-11B
Gapping
NA plugs can be left at factory gapping; TT plugs should be gapped to 0.035", as the shorter gap ensures the spark will successfully "make the jump" under higher pressures.
A note about TT Plugs: The PFR6B-11B/C was developed specifically for the TT. The plug extends past the threads by about 1cm to place the electrode in the center of the combustion chamber. No other plug on the market for the Z32 features this.
The Iridium IX plug is also available for Z32s, and works excellently in the NA. Some recommend its use in the TT, but others use only use the PFR6B-11B/C for the above reason.
Replacing Spark Plugs in the Z32
- Remove the balance tube (5x12mm). It may be necessary to loosen the IACV hose bracket on the driver's side of the engine as well.
- Disconnect each coilpack connector. Be careful not to lose the little rubber seals in the connectors--they like to jump out.
- Remove the 12mm bolts securing the coilpack brackets to the plenum (2 per coilpack, 12 total). Remove the coilpacks.
- Using a long extension and a 16mm spark plug socket, loosen and remove each spark plug.
- Gap your new plugs as necessary (see above).
- Using the same extension and socket, gently thread in the new plugs. Do it by hand at first and be careful not to cross-thread any.
- Torque to 14-22 ft-lbs.
- Reinstall coilpacks.
- Reinstall coilpack bracket bolts. These do not need to be very tight, just snug.
- Inspect balance tube O-rings. If they're flat (squared), they should be replaced to prevent a vacuum leak. If they're nice and round, they can be reused.
- Install balance tube. Torque nuts/bolts to 12-15 ft-lbs. Don't forget the IACV hose bracket!

