ECU Diagnostics
ECU Diagnostics are a great way to begin troubleshooting practically any fault you may be having with your car. It does not require any special equipment (though some can make it easier) and can be done quickly and easily.
There are three basic methods for ECU testing.
Original writeup by TTZD.
Contents
Potentiometer
On the ECU itself there is a potentiometer (fancy-talk for a tiny dial) that can be used to put the ECU into diagnostics mode.
- Pull back the carpet on the passenger side by the passenger's feet.
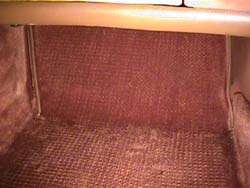
- Remove the 4 10mm bolts holding the wooden floorboard down.
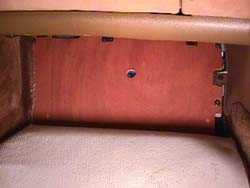
- Remove the wooden floorboard.
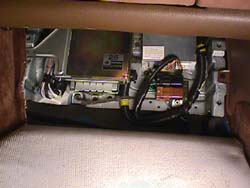
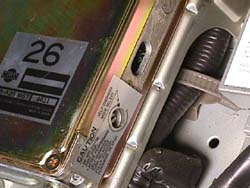
- Locate the potentiometer and LED "window" on the right-side of the ECU.
- Turn the car's ignition ON.
- Using a small flat-head screwdriver, rotate the potentiometer fully clockwise (the label indicates where to stop--don't force it past the stop)
- Hold it there for three seconds.
- Turn the potentiometer fully counter-clockwise. The ECU is now in diagnostics mode (MODE II. MODE I is ordinary running).
- The red LED on the ECU and the Check Engine Light on the dash will begin blinking codes simultaneously; you can read either one.
- Codes are two digits. The first set of blinks (slow) are the first digit, and the second set of blinks (fast) are the second digit. If there are multiple codes, they are displayed one after another. The image below illustrates how to interpret these blinks as numerical codes.

- To clear codes, repeat steps 6 through 8. This will also return to MODE I. To get out of diagnostics mode without clearing codes, simply turn the car off.


.jpg)

Photographs above are from TTZD; animated GIF is by Stadsport
Consult Connector Pins

Rather than removing the floorboard, it is possible to use a paperclip to jump two pins on the consult connector (located by the hood release pull) to enter diagnostics mode. For practical purposes, shorting these connectors is the same as turning the potentiometer on the ECU. Codes can be read from the Check Engine Light.
This image shows which pins to short. Insert a jumper, hold for three seconds, then remove it.

Using a Computer
The preferred method of reading codes is simply using a computer. Software such as Nissan DataScan, conzult, or ECUTalk can read codes and display their meaning without shorting or removing anything.Refer to the software's installation guide for setting it up, then just use the Self-Diagnostics function to read the codes.

Self-Diagnostics Code List

Source: 1993 Nissan 300ZX FSM
Please note: A common misconception is that the above codes indicate a failed sensor or part. Code 11, for example, doesn't actually necessarily say that the crank angle sensor is bad. In fact, they don't fail very often. The code is for the crank angle sensor CIRCUIT--it's saying the connection to the CAS is open or completely out of range (ie...open). A most common fix for these codes is simply inspecting/cleaning the connector for the associated component. The ECU practically never throws a code for a component simply giving a bad reading--doing so would require knowledge of what the reading should be, and such knowledge would make the presence of the sensor unnecessary.
O2 Sensor Testing
Starting the car while in MODE II (Diagnostics mode) will enter an Oxygen Sensor test mode. This test should be performed with the car fully warmed up.
- Once in MODE II (Diagnostics mode), start the car. The Check Engine Light will be reading from the Driver's Side O2 sensor.
- Run the engine at 2000 RPM for 2 minutes. Remember, car should be warm.
- Watch the Check Engine Light.
- The O2 sensor's job is to tell the ECU when the Air/Fuel mixture is lean and when it's rich. Like balancing a broom by the handle, it has to bounce back and forth between Lean and Rich very quickly to keep the engine running at the optimal air/fuel mixture.
- When the CEL is ON, it's indicating a Rich condition. When it's OFF, it's indicating a Lean Condition.
- The light should be blinking on and off at least 5 times every 10 seconds. This indicates that the O2 sensor is reacting quickly to the changes in the air/fuel mixture and that the ECU is adjusting to compensate for these readings.
- To switch to the passenger side O2 sensor, turn the potentiometer on the ECU clockwise for 3 seconds, then back, all with the engine still running. It is now reading the passenger-side O2 sensor.
- Repeat steps 2 and 3.