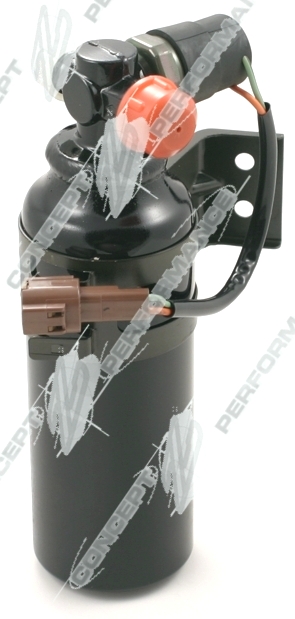
Receiver-Drier
The Receiver/Drier is a device that dries refrigerant and acts as a storage reservoir for refrigerant.

Function
The receiver/drier removes moisture from refrigerant as well as filtering any contaminants or particulates from it. It also acts as an accumulator or reservoir to store excess coolant.
The Z32 receiver/drier also houses a pressure switch.
Versions
There are two versions of the receiver/drier which are virtually identical.
- 1990-1993 (R12 systems)
- 1994+ (R134A) systems
They are interchangeable (aside from the fact that you should never install a used one), and the R134A version can be considered an upgrade for R12 systems as its pressure switch is two-way. That is, the R12 receiver/drier's pressure switch disables the compressor if the refrigerant level is too low. The R134A receiver/drier's pressure switch disables the compressor if the refrigerant level is too low or too high.
Replacement
Replacement is quite simple and should be done any time the system is exposed to the elements.
Tools Needed
- 10mm socket & ratchet.
- Medium-sized adjustable wrench.
Parts Needed
- New receiver/drier (duh).
- Don't remove the protective caps until you're ready to install it.
- New O-rings for the receiver/drier line fittings.
Procedure
- Discharge the A/C system if it hasn't been already. Be sure to properly evacuate the system and don't just vent it to the atmosphere.
- Remove the nose panel (2x 10mm bolts, 4x 10mm bolts on airbag-equipped cars).
- Loosen the union fittings on the receiver/drier A/C tubes.
- Disconnect the electrical harness to the receiver/drier pressure switch and ambient temp sensor (if applicable). Remove the harness clips from the receiver/drier bracket.
- Remove the 2x 10mm bolts securing the receiver/drier to the car.
- Remove the receiver/drier.
Installation of the new unit is the reverse of the removal. Be sure to follow the guidelines for connecting the union fittings in the A/C Recharge article, and remember to replace the o-rings with new parts.